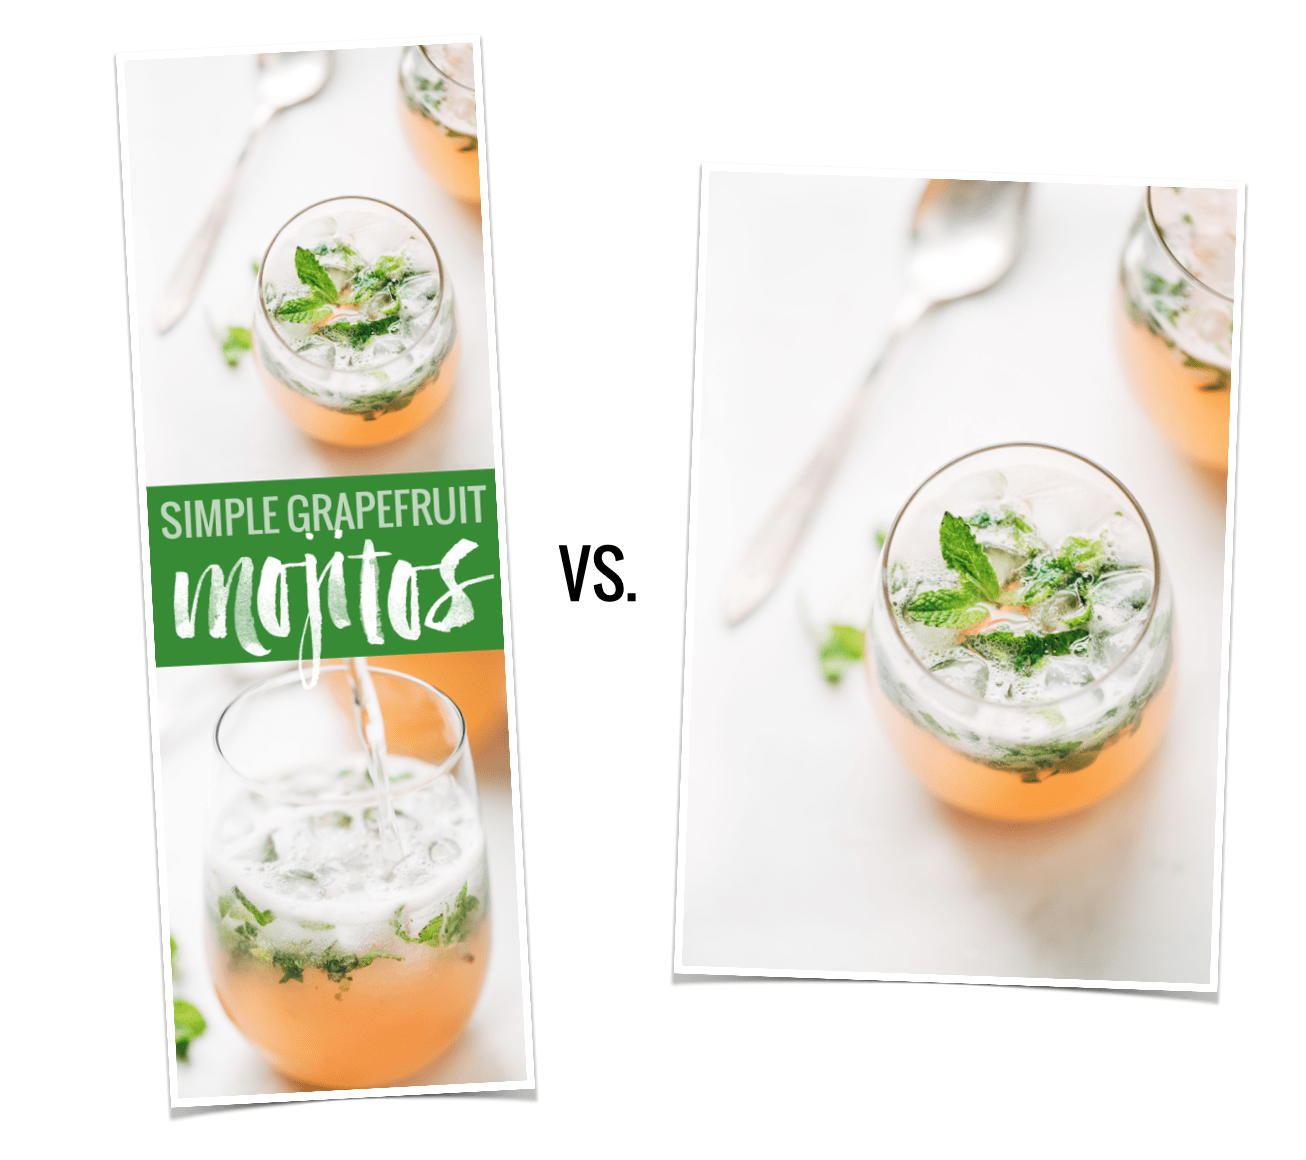
Since doing the April 2015 income report with our Pinterest “study” where we found that, on average, long Pinterest images got 70% more repins that short Pinterest images, we’ve gotten so many requests for a tutorial on creating these long Pinterest-style images and how to hide them in a post. These requests combined with my desire to teach and feeling really cool that I know SOMETHING about code led me to record a few video tutorials. 📹
So here we go!
Why Hide a Pinterest Image?
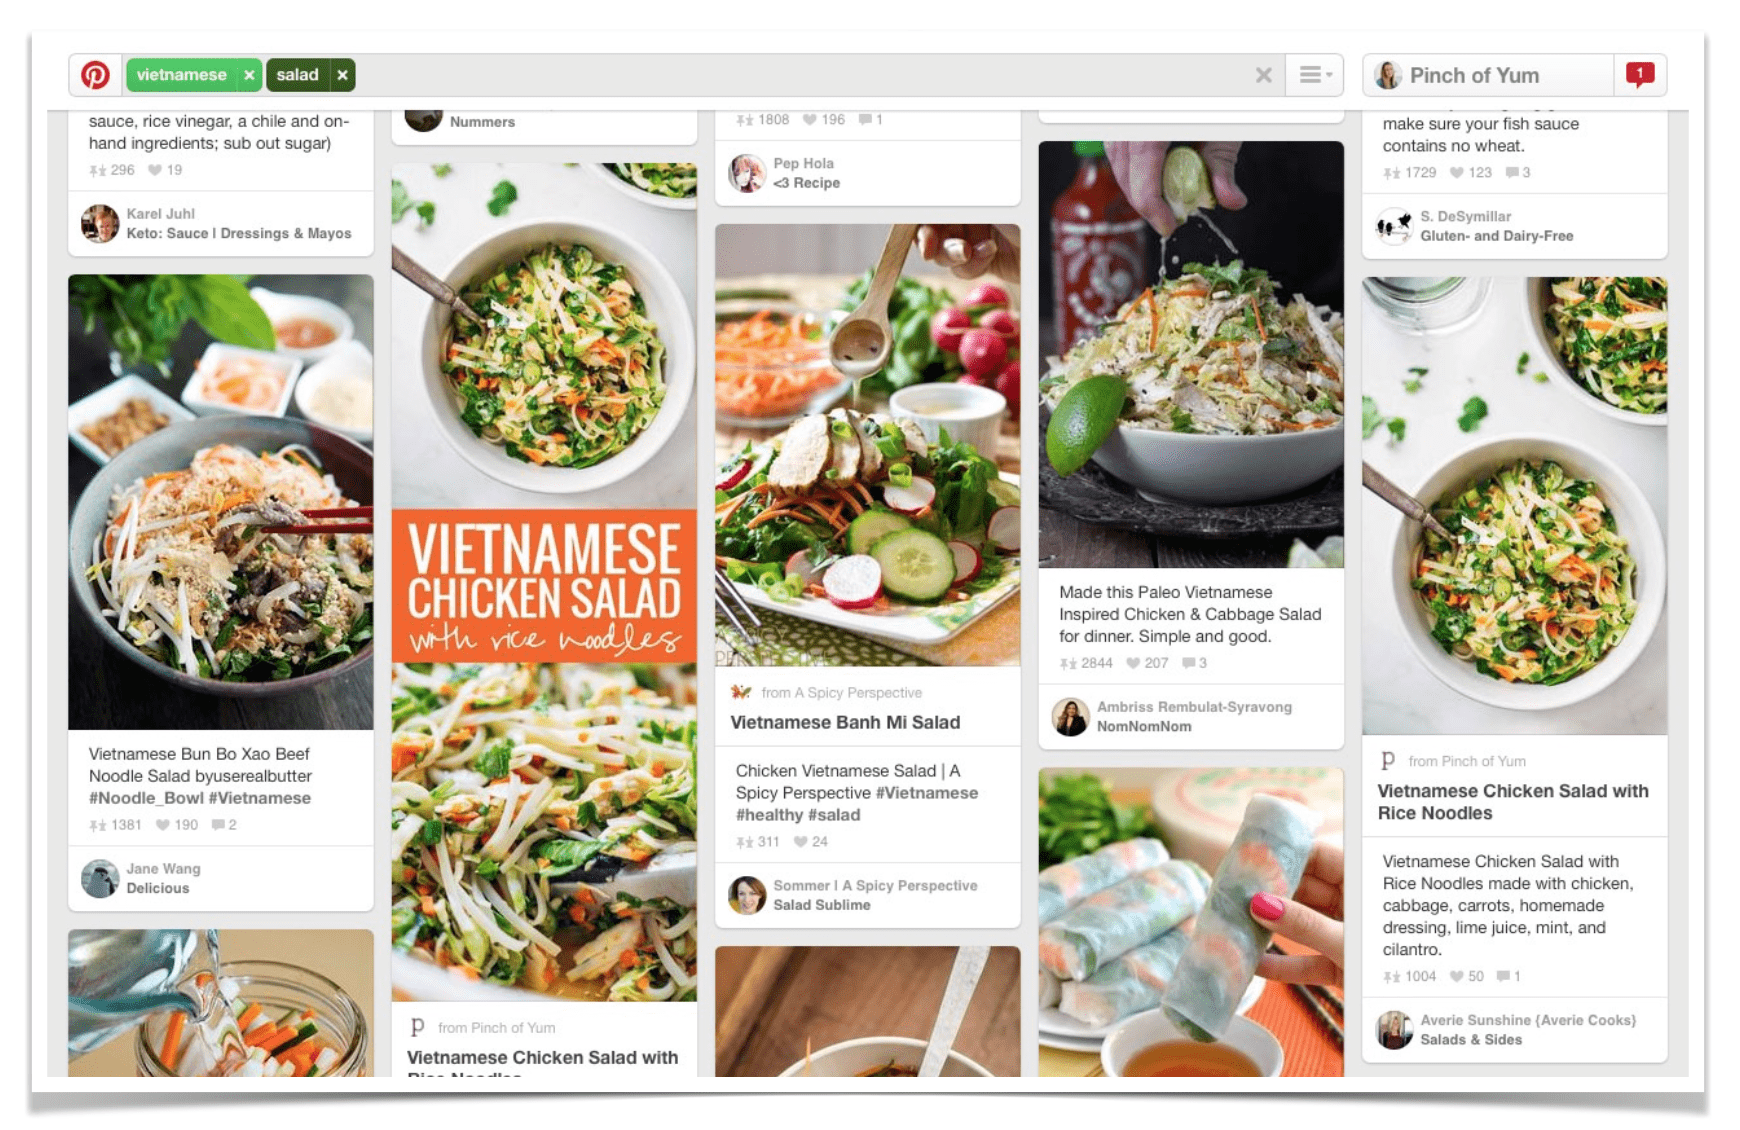
Okay, so just a quick recap – why do these long Pinterest images matter? Even if we don’t personally like them (hi!) or know that they might not always be effective or relevant based on how Pinterest could make display changes that are out of our control — still, in my opinion, it’s important to know how to create and use these types of images because right now we see them being highly effective.
- They stand out in the feed.
- They stand out in search results. Look at the image above – where do your eyes go first? there are two Pinch of Yum images in that window, but the one with the orange box of text stands out a lot more than the original “short image.”
- They give your existing content a new “face.” They allow you to share and show off the same awesome content in more than one way.
- They can help you create a branded look and feel.
- Right now, according to our experiment looking at about 500 images and accounts with a total combined following of almost nine million users, long text-based images are getting 70% more repins than traditional images.
So yes, I think for right now, they do matter.
Let’s jump into the good stuff now, shall we?
👻👻👻👻👻👻👻
How To Make a Custom Pinterest Image
Video here! 👇
How to make a Long Pinterest Image in Photoshop (8 MINS):
And general overview screenshots here 👇 in case you don’t want to hear my voice talking about Photoshop. It’s cool. I can deal.
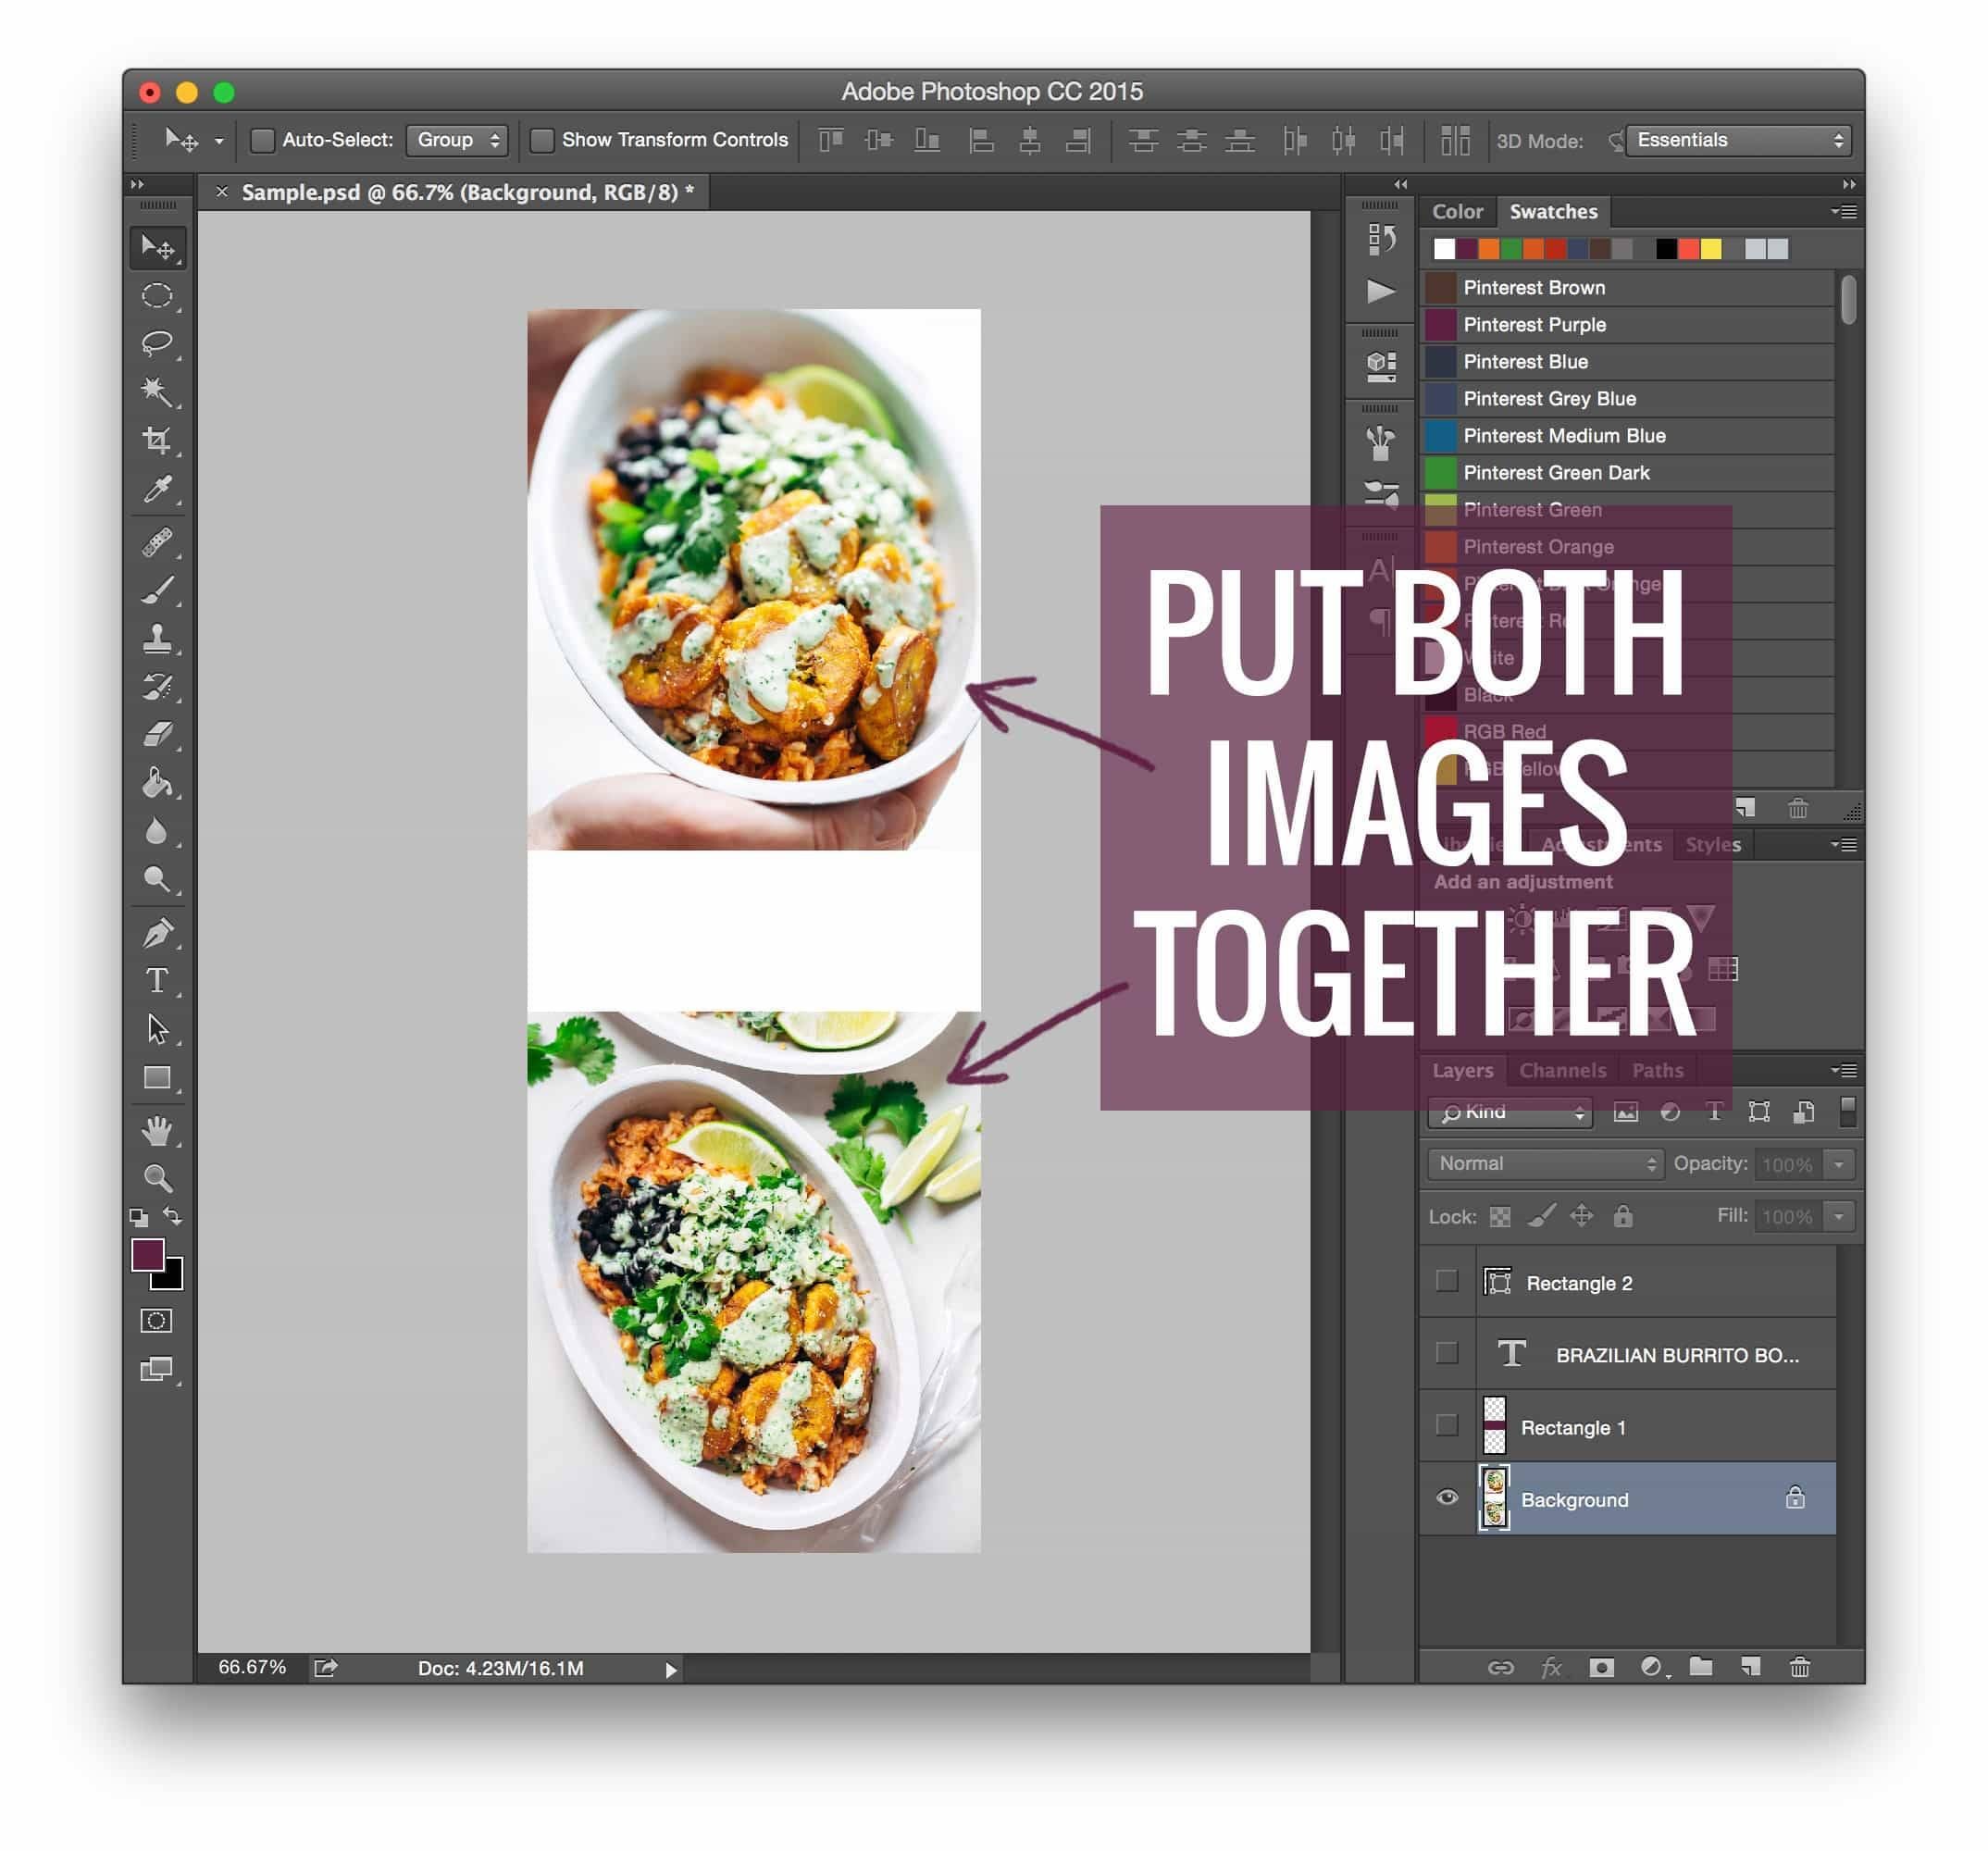
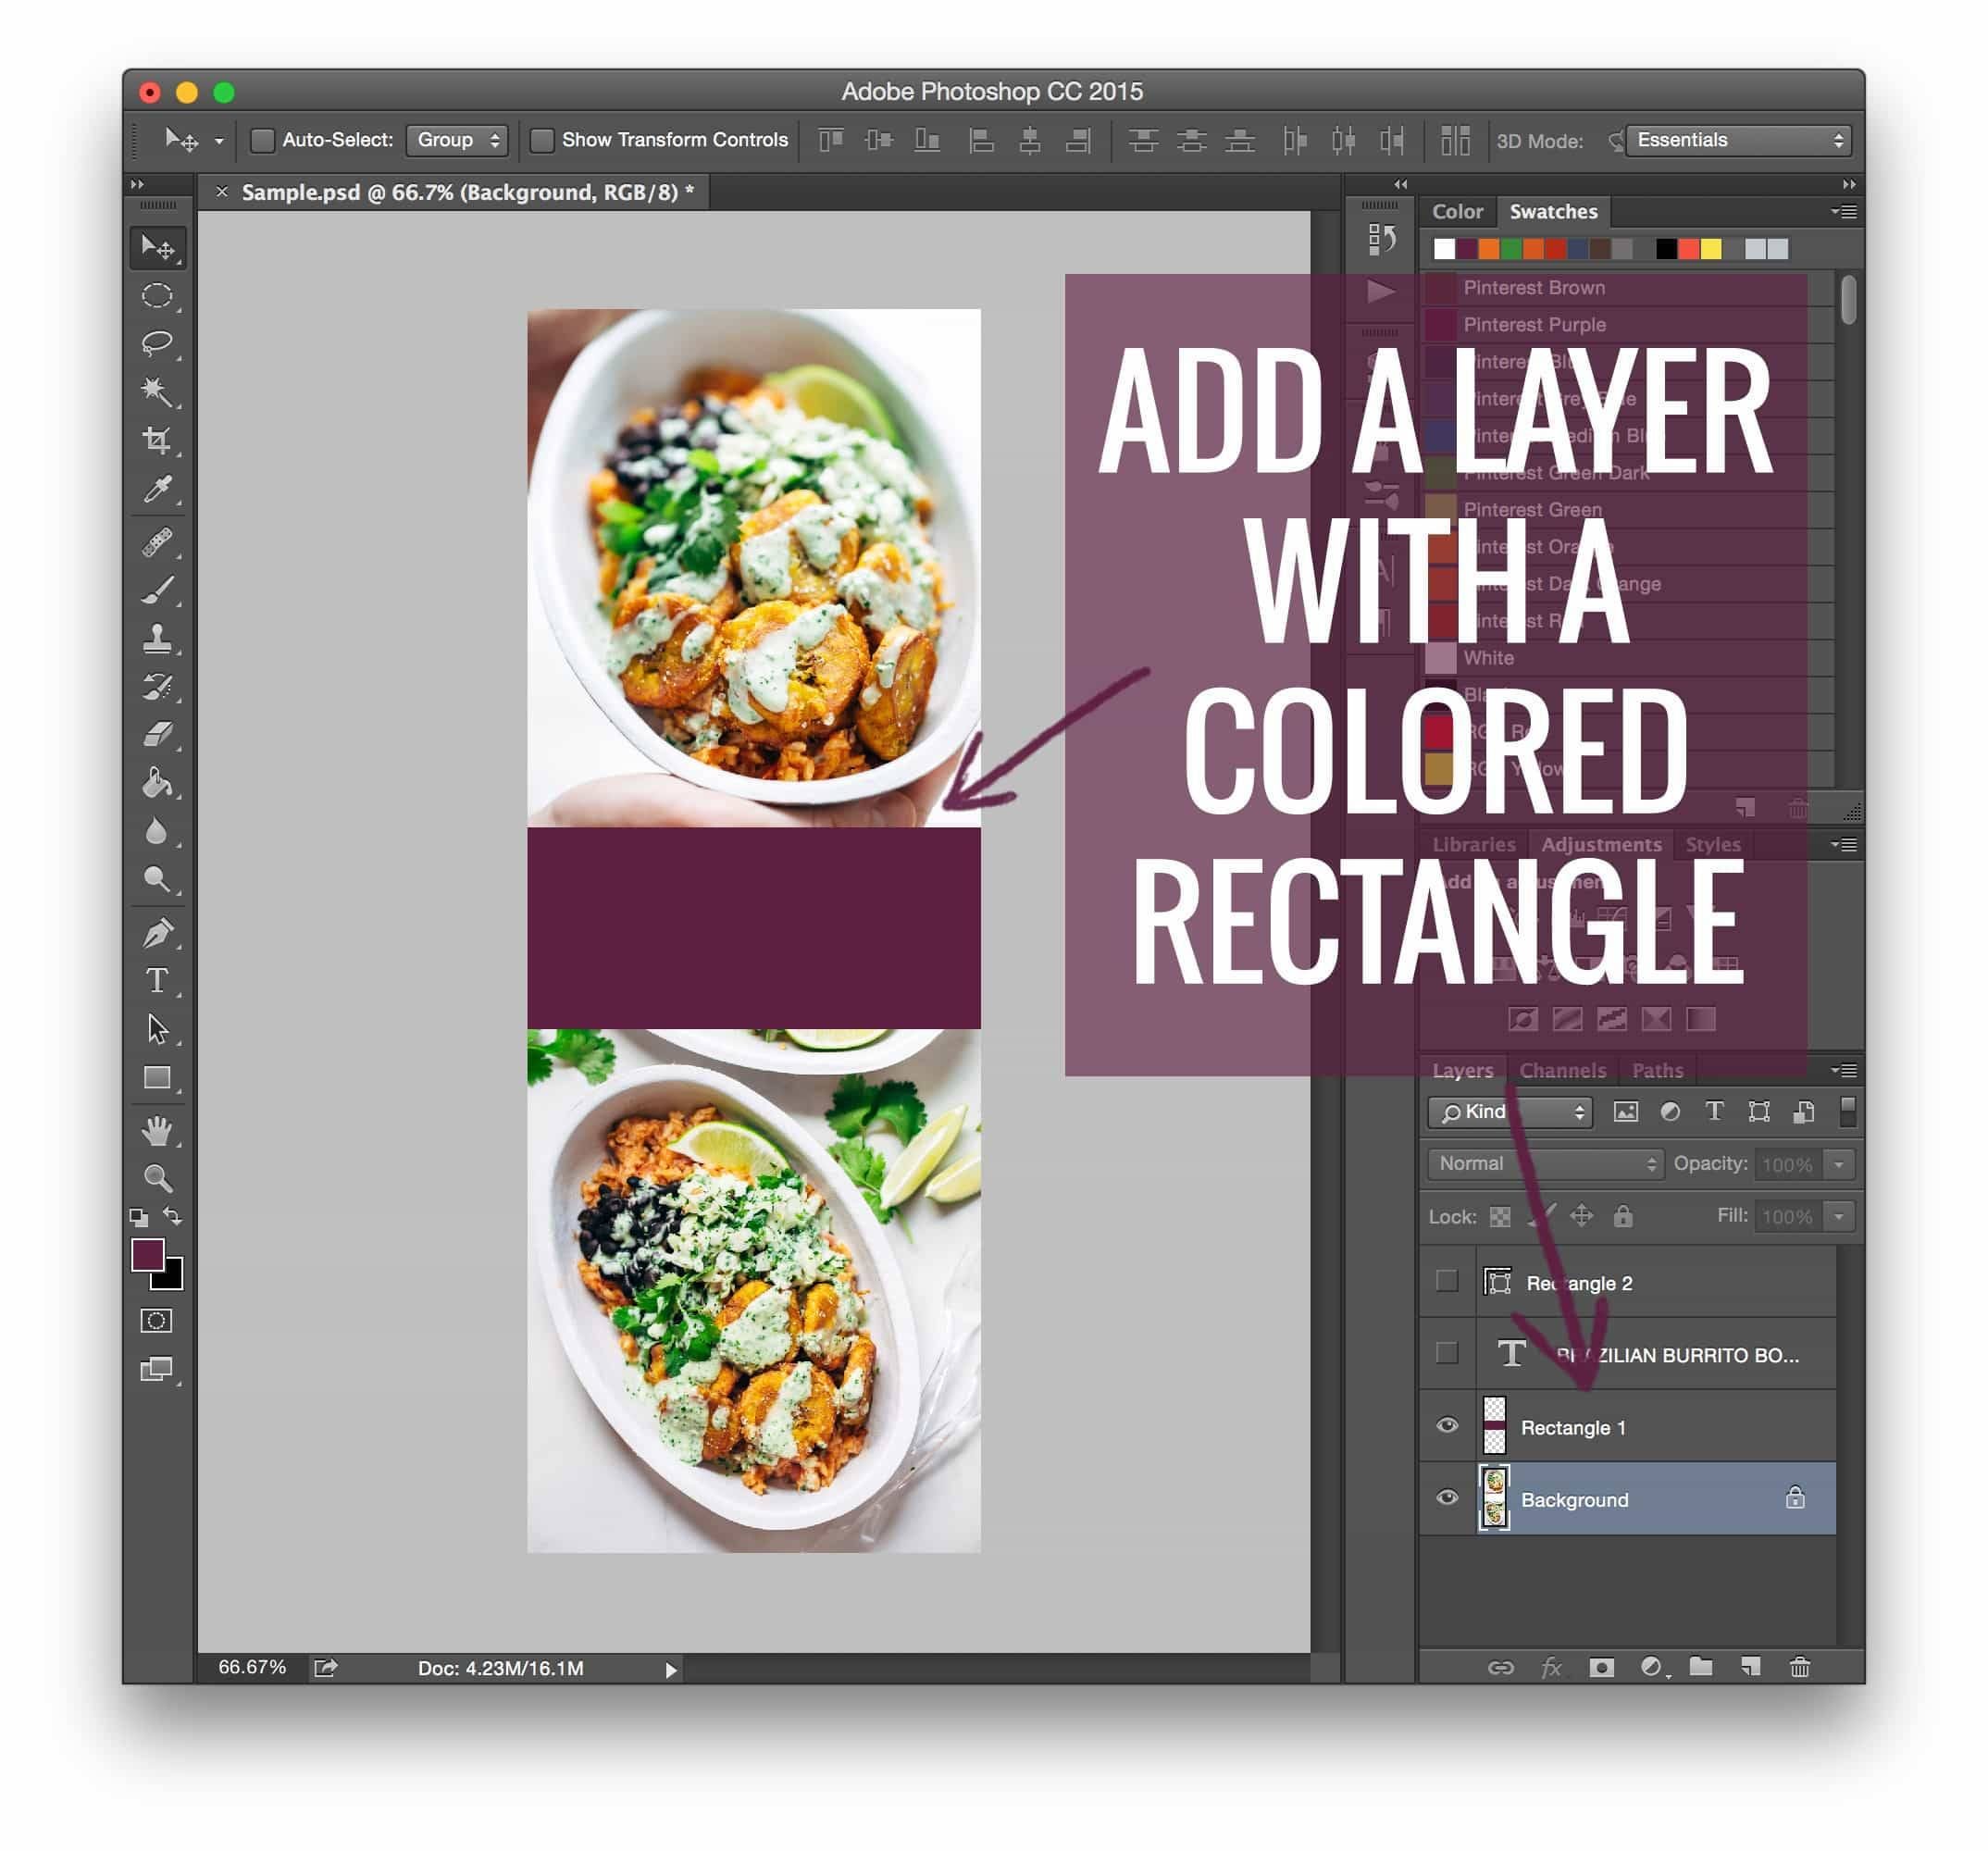
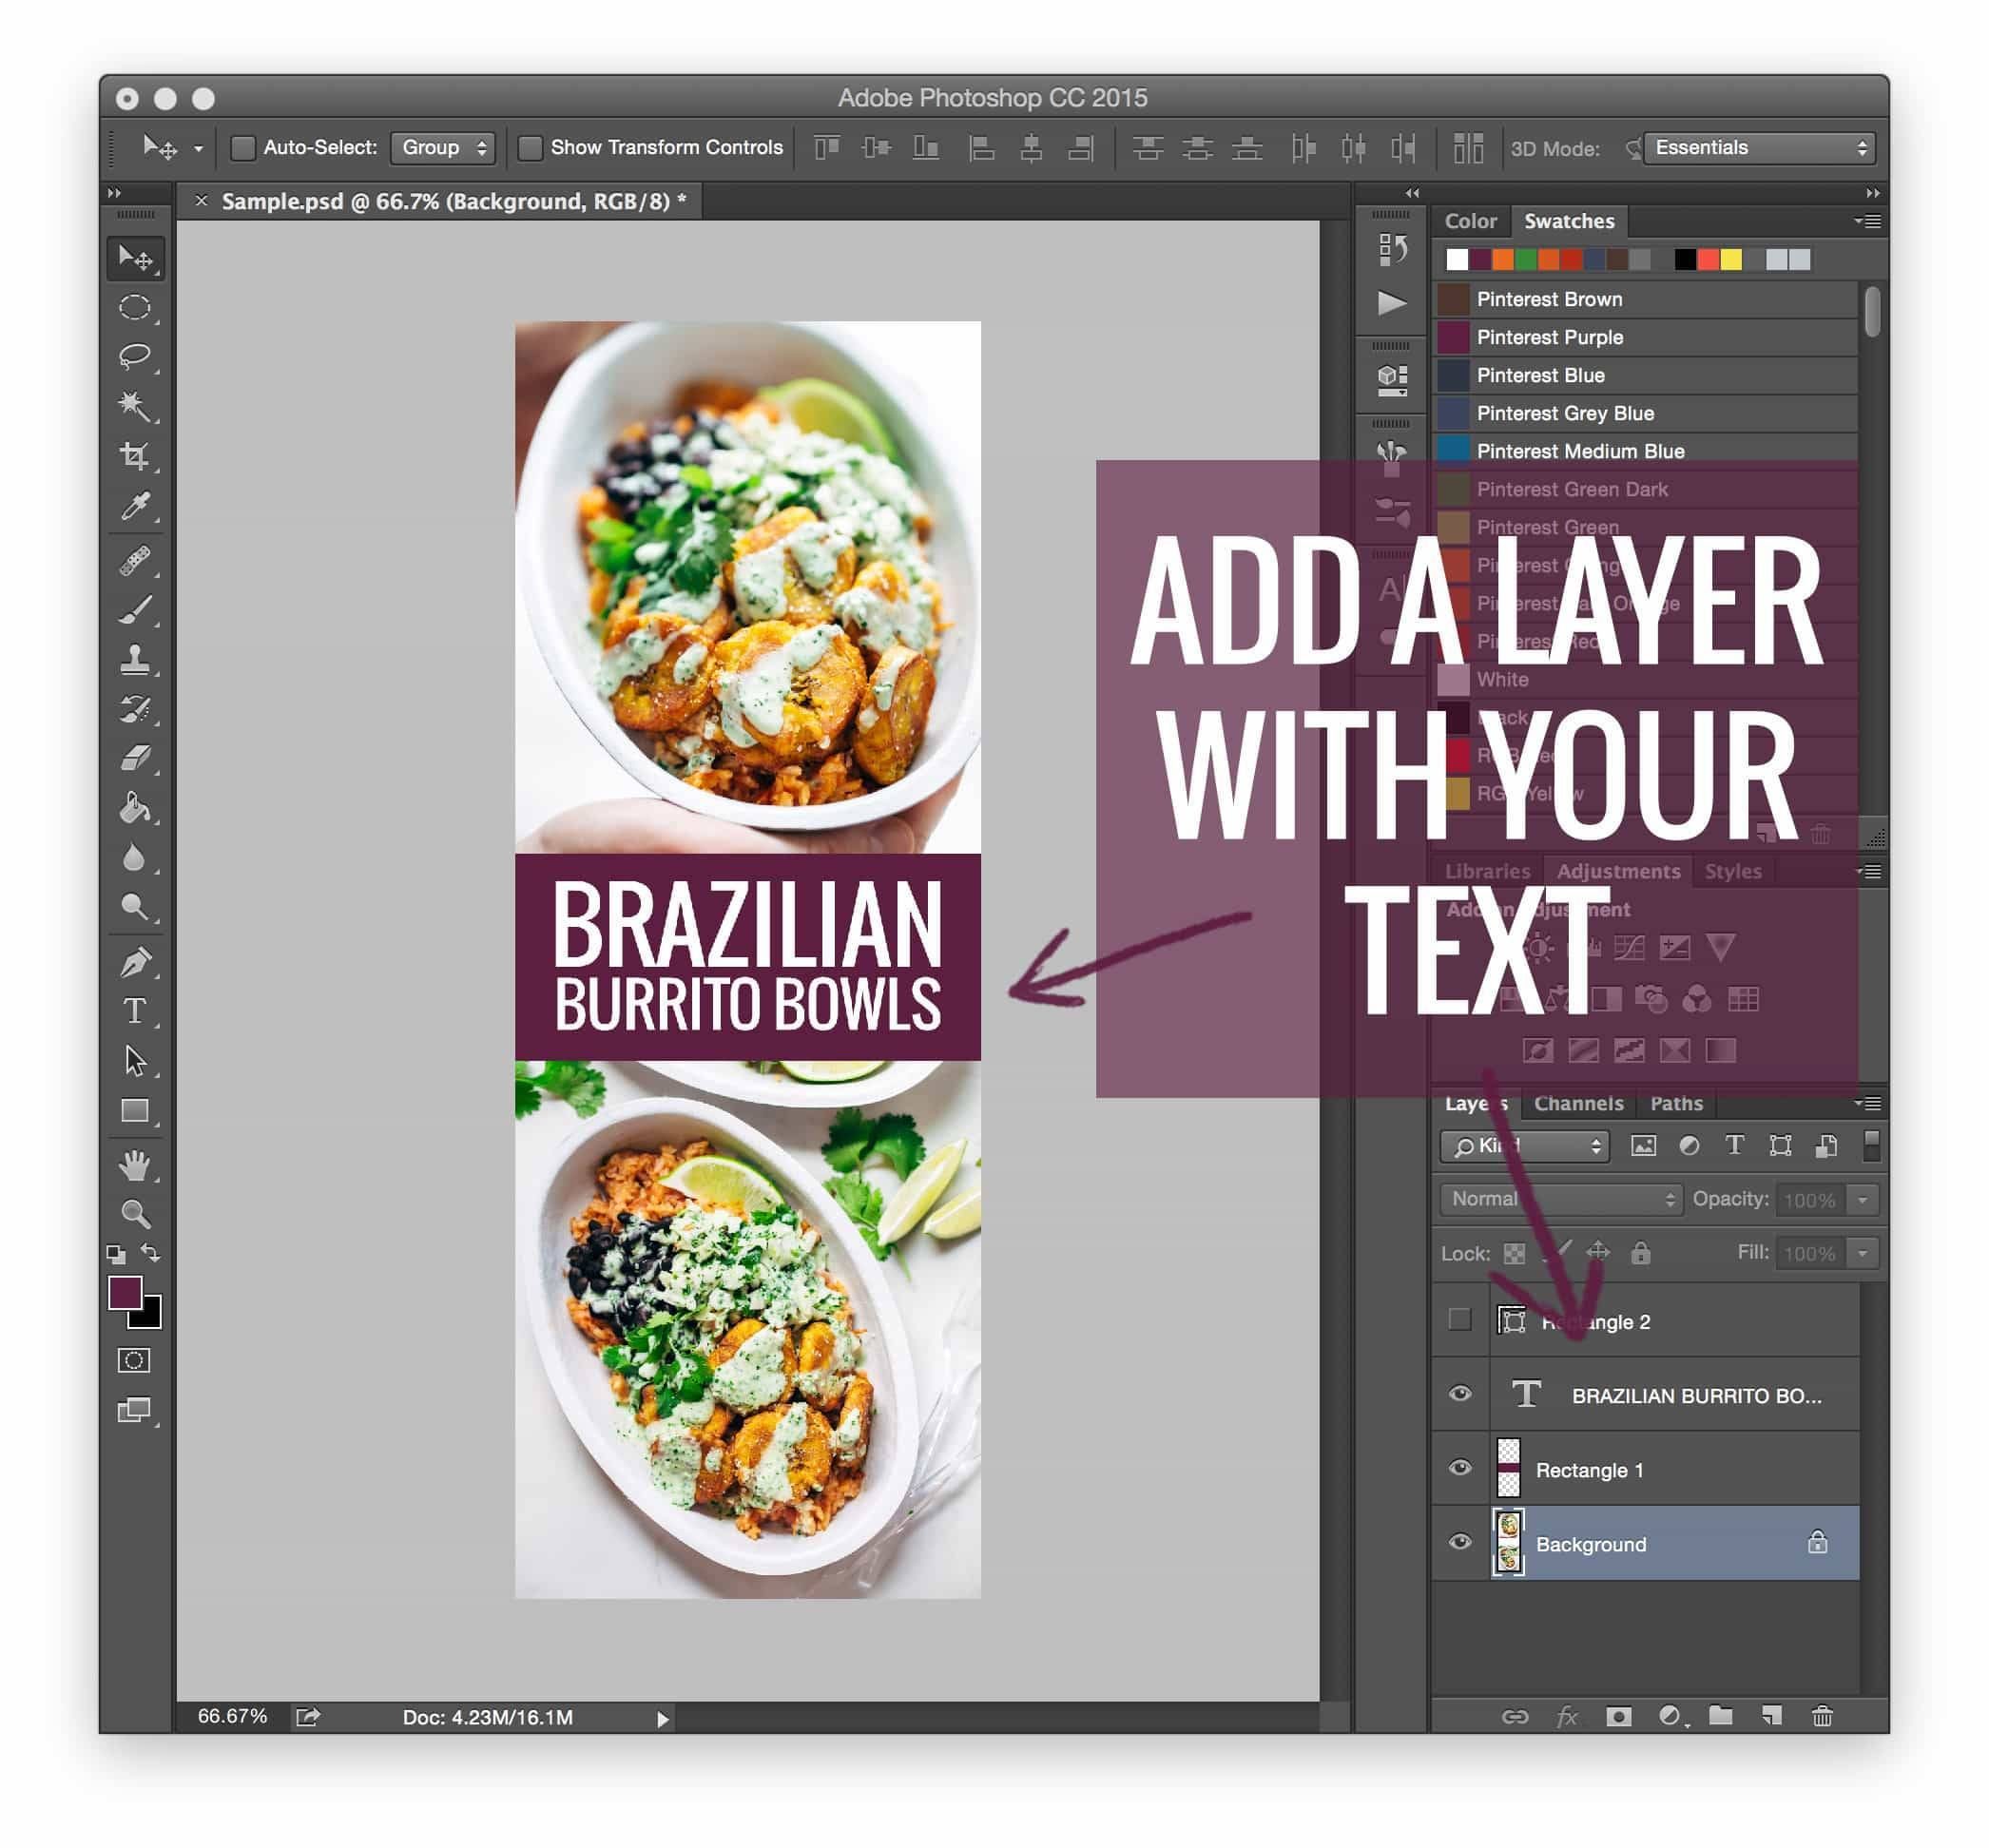
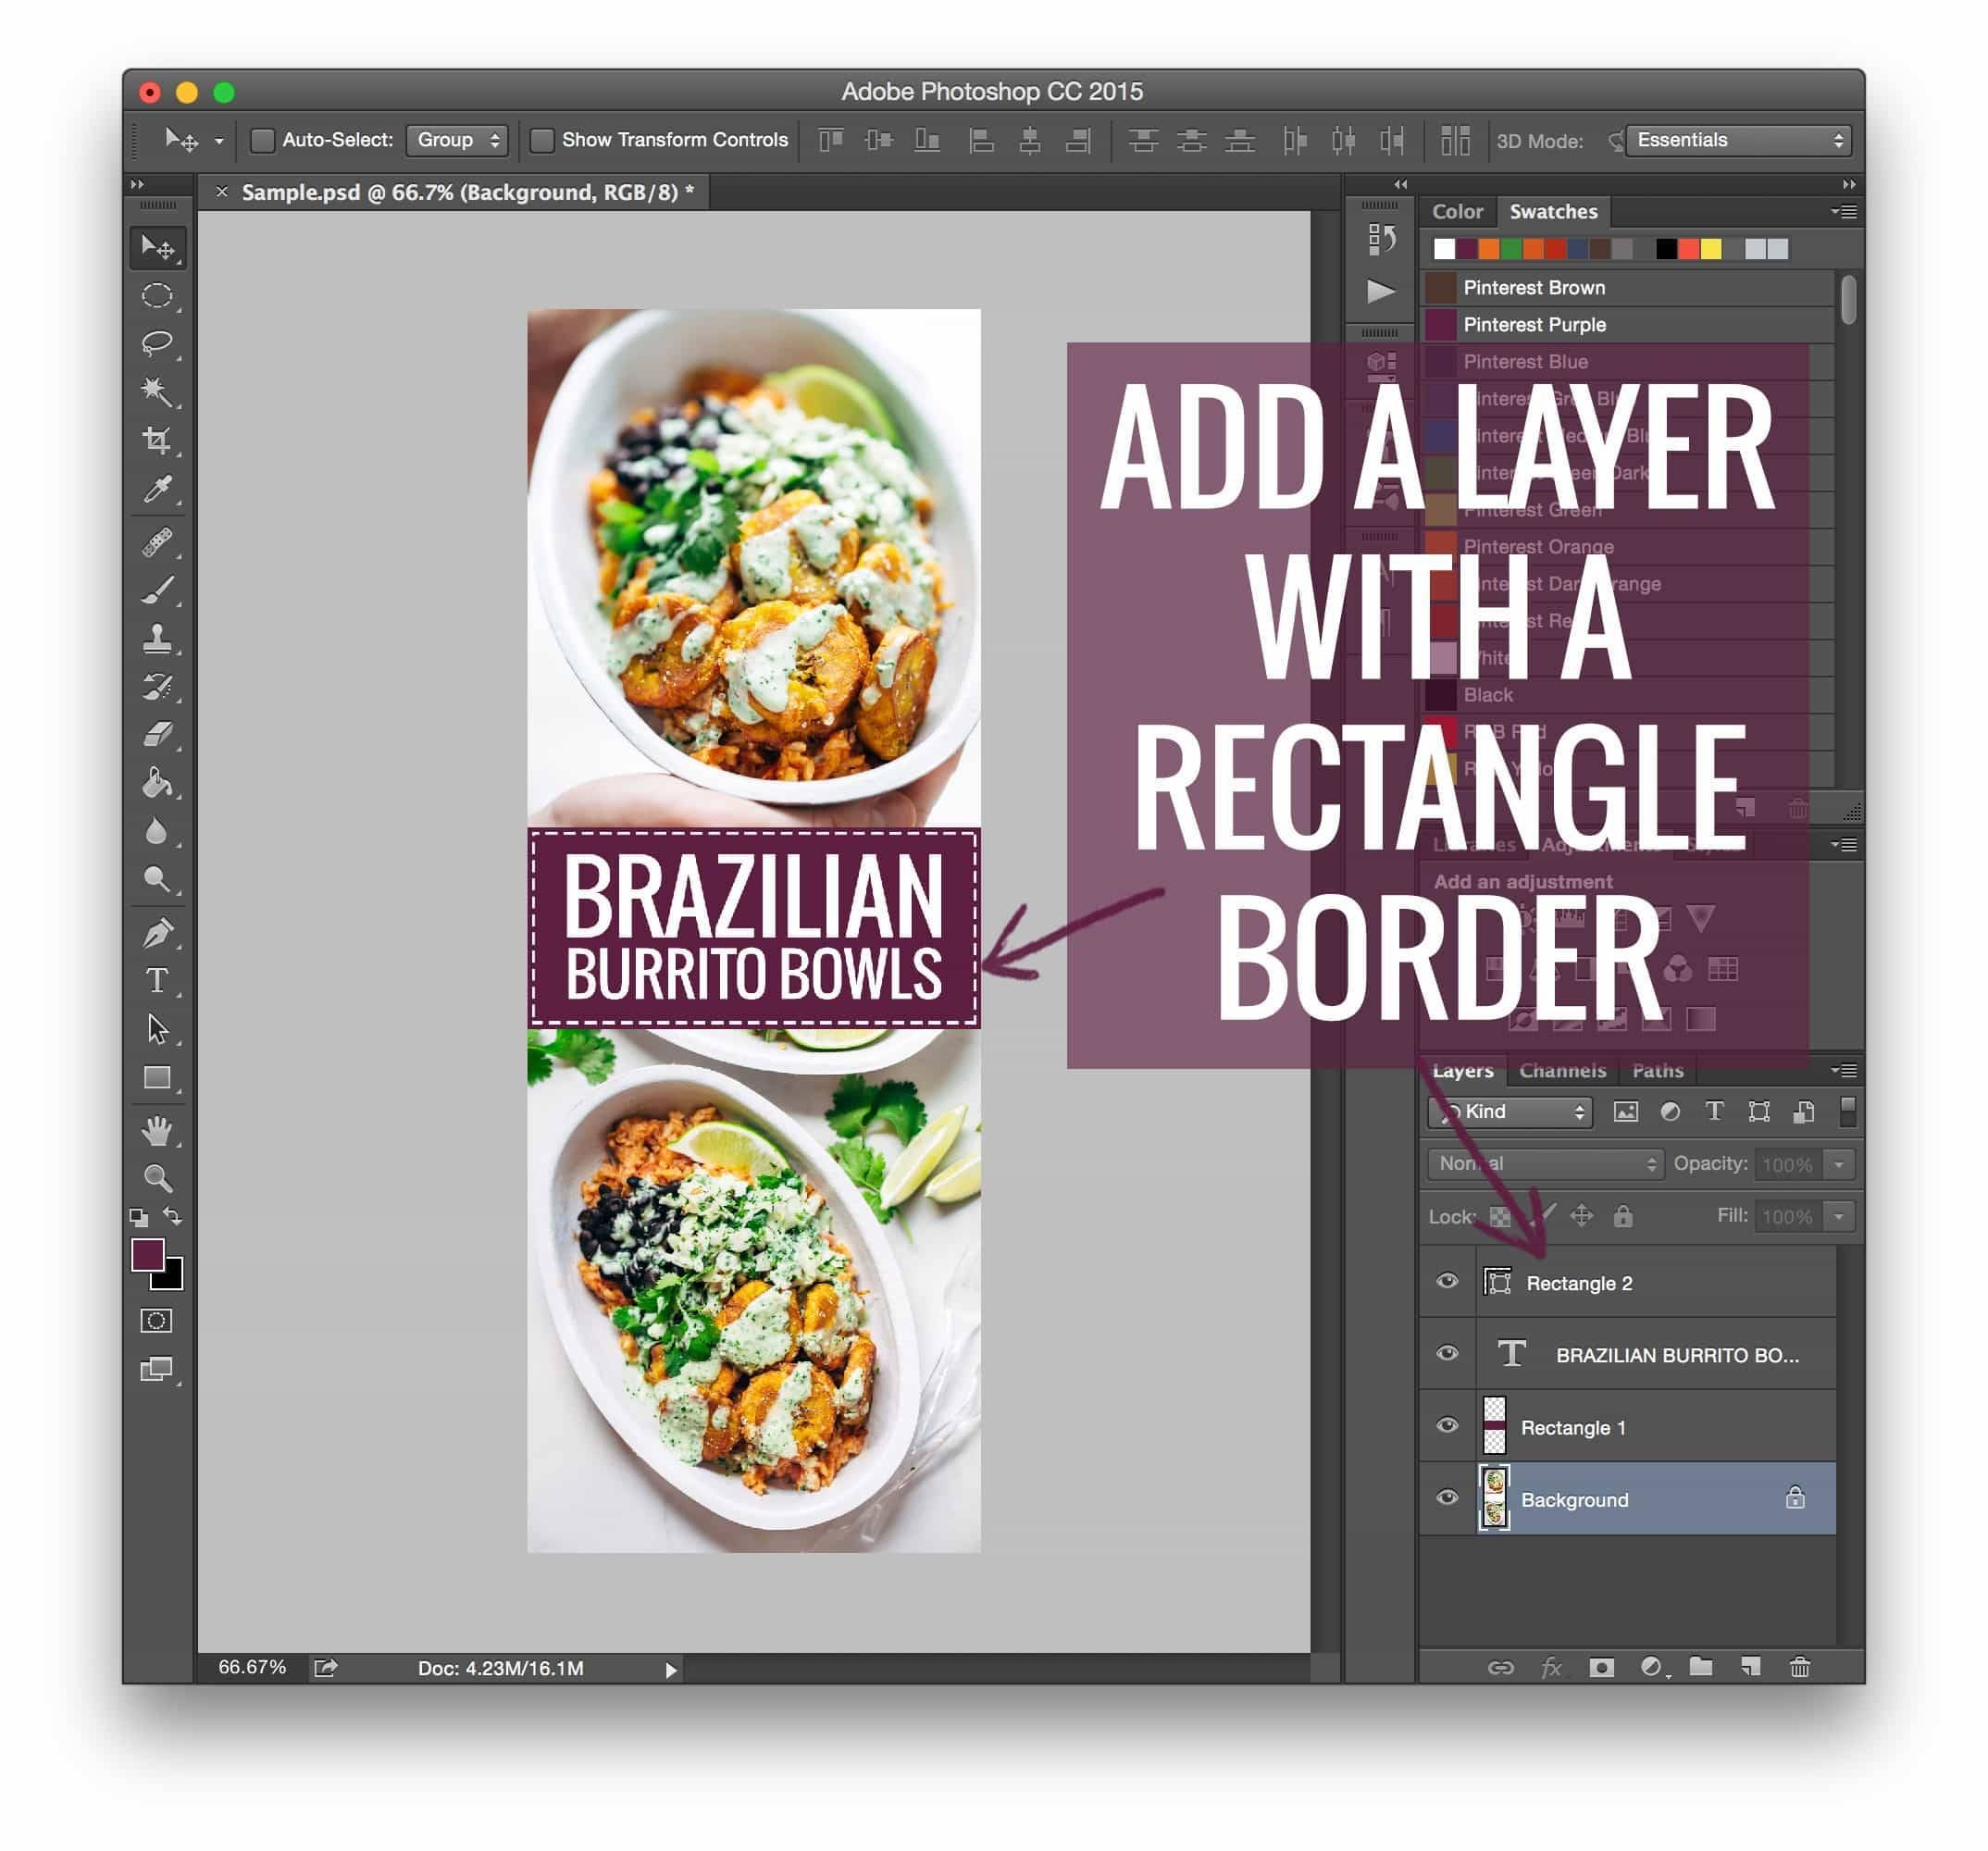
This tutorial is not the end-all-be-all of Photoshop’s capabilities – it’s just showing you how we create our Pinch of Yum long image style, which, obviously, includes the colored rectangle, text, and dotted line frame.
Photoshop is incredibly versatile, much more so than a site like Canva or PicMonkey (which are also good places to start! but not nearly as flexible), so I’d encourage you to use this “style” as a starting point if you need something to get you going, and then keep playing until you find something that feels perfectly tailored to your brand!
How To Hide a Pinterest Image On a Blog Post
UPDATE: At Pinch of Yum, we no longer use the method below to hide our long pins on posts. We now use Tasty Pins from our WP Tasty team. We found that because we were doing it so often, we wanted an automated and reliable way to hide the images instead of having to deal with the code below. Learn more here!
Now for the coding magic!
Video here! 👇
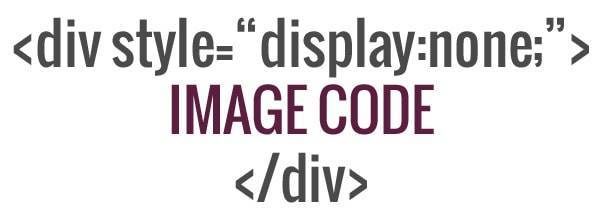
I will just add that there are several ways to do this – all of it, from creating the images to hiding them – and if you would like to share something that you know of that works really well right down there in the comments, I’d be super pumped.
Because we are smarter than I! A rising tide lifts all ships! 💪
I am SUCH an elementary school teacher right now.
If you’re interested in learning more about some of the ways that you can monetize a food blog, we encourage you to download this free ebook, “ 16 Ways to Monetize Your Food Blog,” from our sister site, Food Blogger Pro!
Answers To Questions
Question: Why would you want to hide a Pinterest image?
Answer: Sometimes bloggers want to have the long images as an option for pinning, but they don’t like the way the long, text-heavy images look in a post.
I feel this way for sure – it doesn’t really fit my style of blog content to all of a sudden throw an image in the post that is a collage with text. It’s too long, too big, and awkward looking. When all my other images are text-free single photos, it just doesn’t make sense with the “flow” of my posts to throw a long one in there.
But that is definitely dependent on the individual blogger. Some people may find that fits their style, and as a result, they can just display all the images as normal.
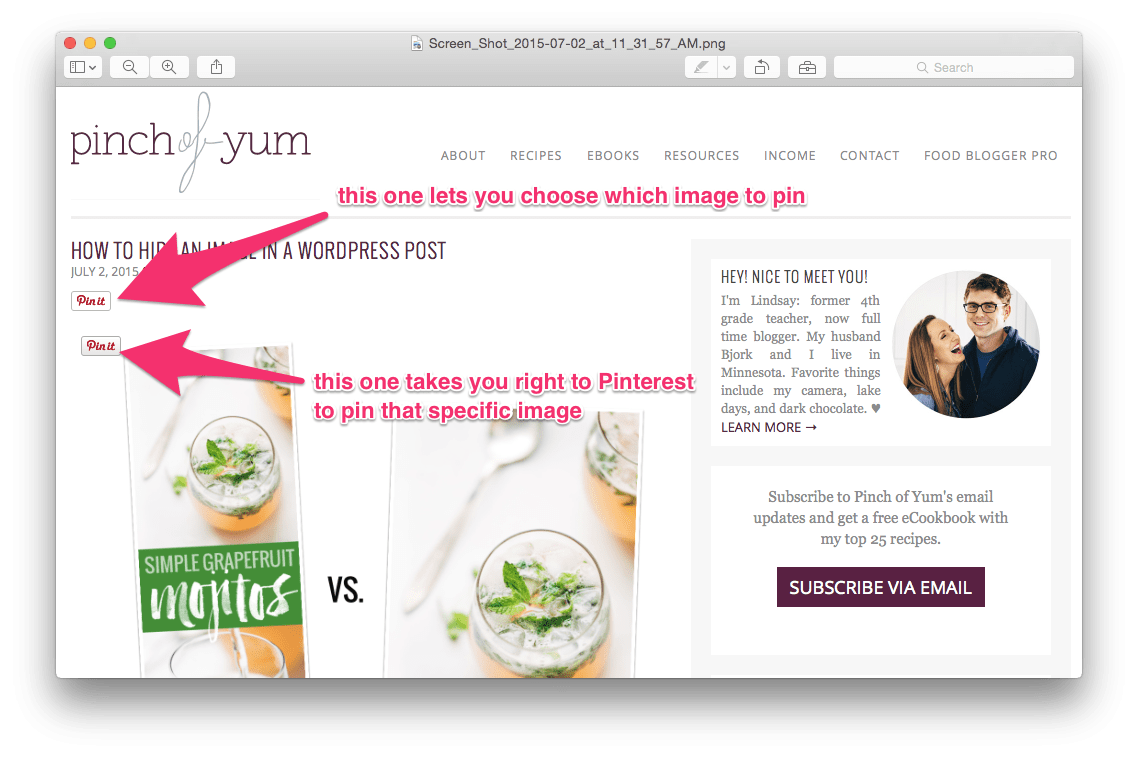
Question: How do you get the pin it button option where people can choose the image?
Answer: There are two different buttons – one goes over the images and one goes at the top of the post. The one at the top of the post gives you the option to choose whichever image you want to pin before jumping over to Pinterest.
Our button is custom, but you can get the same functionality where users can choose their image with this WordPress plugin (Pin It Button Pro).



Thanks a lot, I was desperately searching for this information! I’m going to implement it now.
Quality articles or reviews is the crucial to be a focus for the users to visit the site, that’s what this website is
providing.
Sort the list however you like By default the listing will list the newest content first, but you can order by title, menu order, relevance, content type, metadata, and more.
I’m new to blogging and found this very helpful. Thank you for sharing!
Hi Lindsay,
I just watched this and loved it. I wondered do I need both Lightroom and Photoshop to make these layered Pinterest pics? And which Photoshop would you recommend, there are a few to choose from.
Thank you,
Mary
Thank you so much for this awesome tutorial. I’ve been wondering how to go about doing this. TY!
Hi Lindsay, may thanks for this tutorial. Very useful indeed. One question. I have managed to get a pinterest save button (in the UK it seems to be save rather than pinit) for each photograph. However, I do not have a button that allows all photographs to be saved at once.
Can you advise how to do this?
Thanks,
Steve.
My brother recommended I may like this website. He was once totally right.
This post truly made my day. You cann’t imagine just how
a lot time I had spent for this info! Thanks!
I know this is ancient, but I just found it. It is SO helpful and shockingly easy. Thank you!
This is very helpful!
(25 a 100 mm de profundidad). Personal muy competente.
I am entering this code but it is not working. I used it for my initial blog post and it was fine, but now is not working for my second one and the first one isn’t either. You need the first line with the :none at the beginning of the pic link and the /div at the end , correct?
Wonderful article! I think you should add Tonomatograph in this list. It’s a new and good platform.It’s
also easy to use and you find here a lot of customizable graphics for Pinterest.
https://www.tonomatograph.com
nice post friend
I’ve been getting this to work on my posts that just have text and images. However, I embed youtube videos on some of my posts, and I can’t get those ones to let me pin. I can add the image, and get it to not display. But when I go to pin the URL, it only gives me the option to pin the video. Do you know if there is a way around this? Thanks!
Nice tips! Each and every step clearly explore no any confusion to follow it.. Thanks!!
Thanks so much for the tutorial! You made it so easy 🙂
Hi Lindsay! Love your blog! This was fantastic information. I use Squarespace for our company’s blog. Do you know how and where your coding would translate on squarespace? Thanks
Thanks so much for this article! It was so easy for even a newbie blogger like me to do it. But I have a question…..now I have my long pins hidden in my post there is no way for me to pin them. My pin it button only hovers over the images that are shown and if I click it only allows me to post that picture. I don’t know how to add a pin it button where I can pin the hidden pins. How are you doing that? Thanks!
I’d suggest getting the Pinterest plugin on Google Chrome. That will find those hidden pins!
Ah, thank you! So easy! (And yes, I am writing this comment 2,5 years later. Well, it did help me today! 😉 )
That was great, Lindsay! Thanks for taking the time to make that for us. Love your work!
Thank you SO SO much. This is a life saver! I have been trying to figure out how to create long pins without having them show up on my posts, because long images are great for Pinterest, but really not many other places. Appreciate all your help and great advice!
As a begging blogger who isn’t familiar with the language or anything else for that matter, I can’t thank you enough for your fantastic video on hiding pins! You paced it beautifully, you highlighted the parts that you were working on, you did it all perfect! You made it all wonderfully clear. Thank you so much!
Thanks so much for this tutorial. I’ve tried several others, and I think their syntax was wrong. I really appreciate it!
Had to drop you a comment and say thanks for the simple and straightforward tutorial! I was able to apply this immediately and it also works with tools like Tailwind!
Thanks again!
http://www.dafrastar.com