
Everyone has a soft spot in their hearts for banana bread.
Including myself. Nevermind the fact that I’d already baked cookies and muffins in the same weekend. We all know that banana bread doesn’t count as a sugary baked dessert because, obviously, it’s bread. I know I’m not the only one with this type of logic.
When making the decision about whether or not to attempt this culinary feat, I did what most normal people would do. I listed the pros and cons.
PROS of Chocolate Checkered Banana Bread:
- tastes great
- looks cool
- goes perfectly with peanut butter
- goes perfectly with Nutella
- goes perfectly with butter
CONS of Chocolate Checkered Banana Bread:
- disappears quickly
I think the choice is obvious.
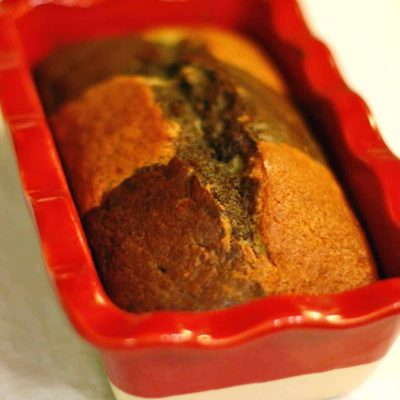
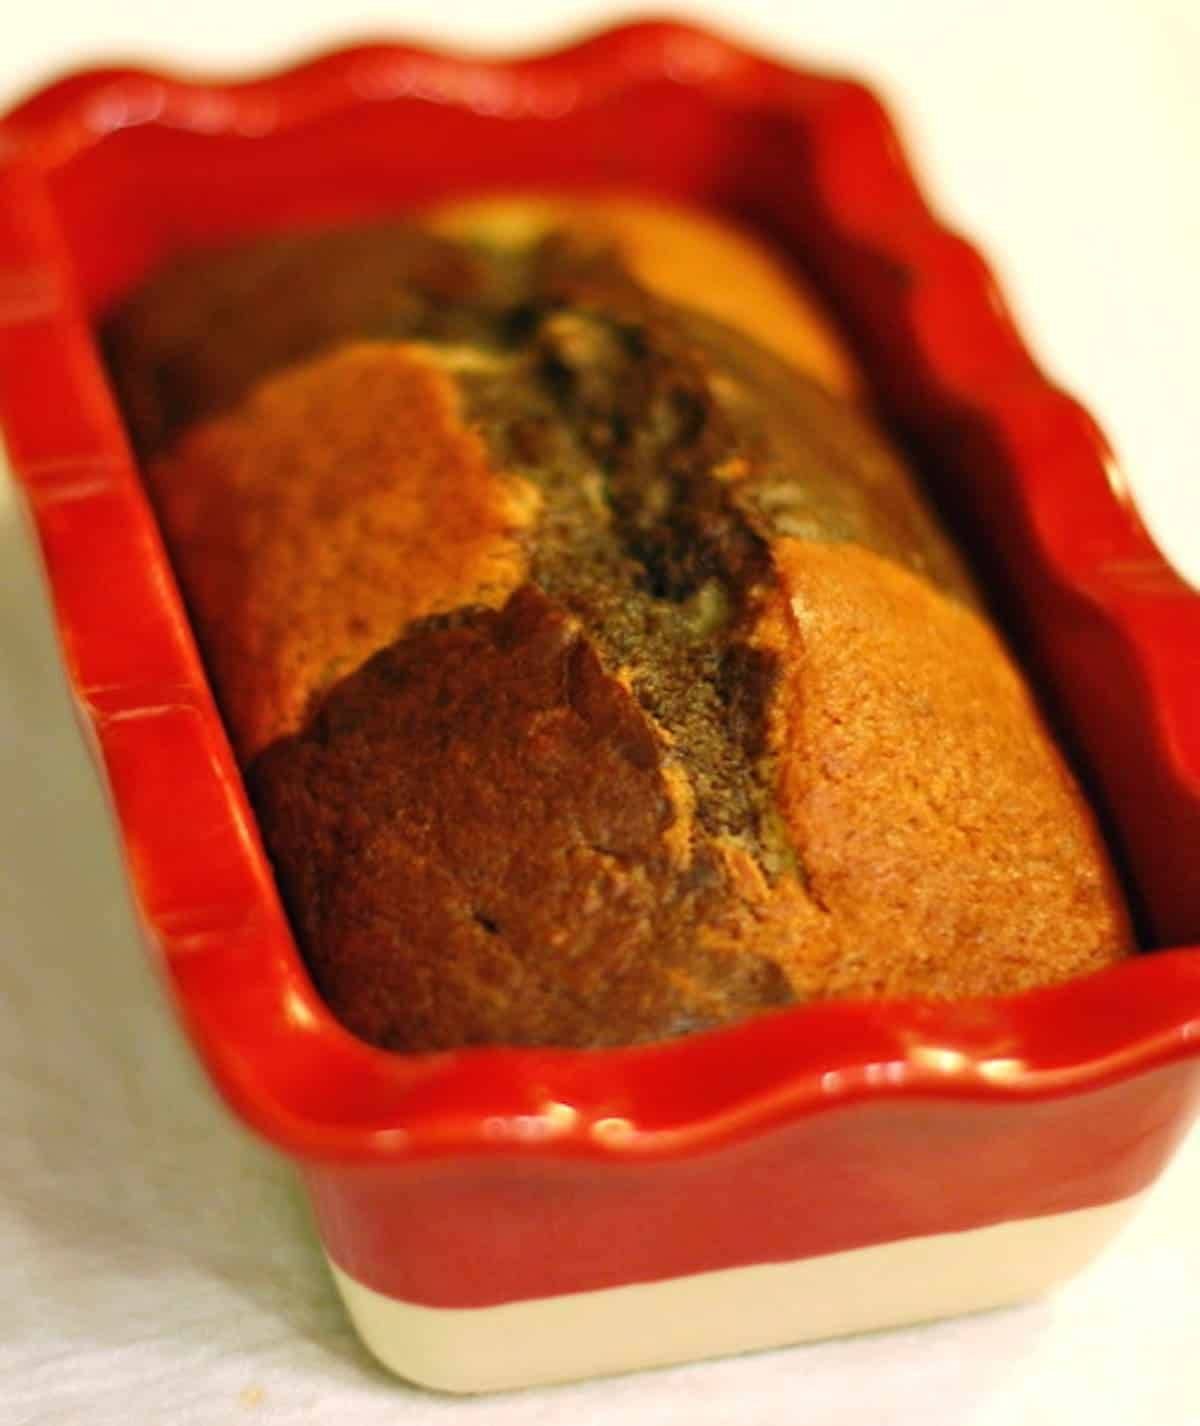
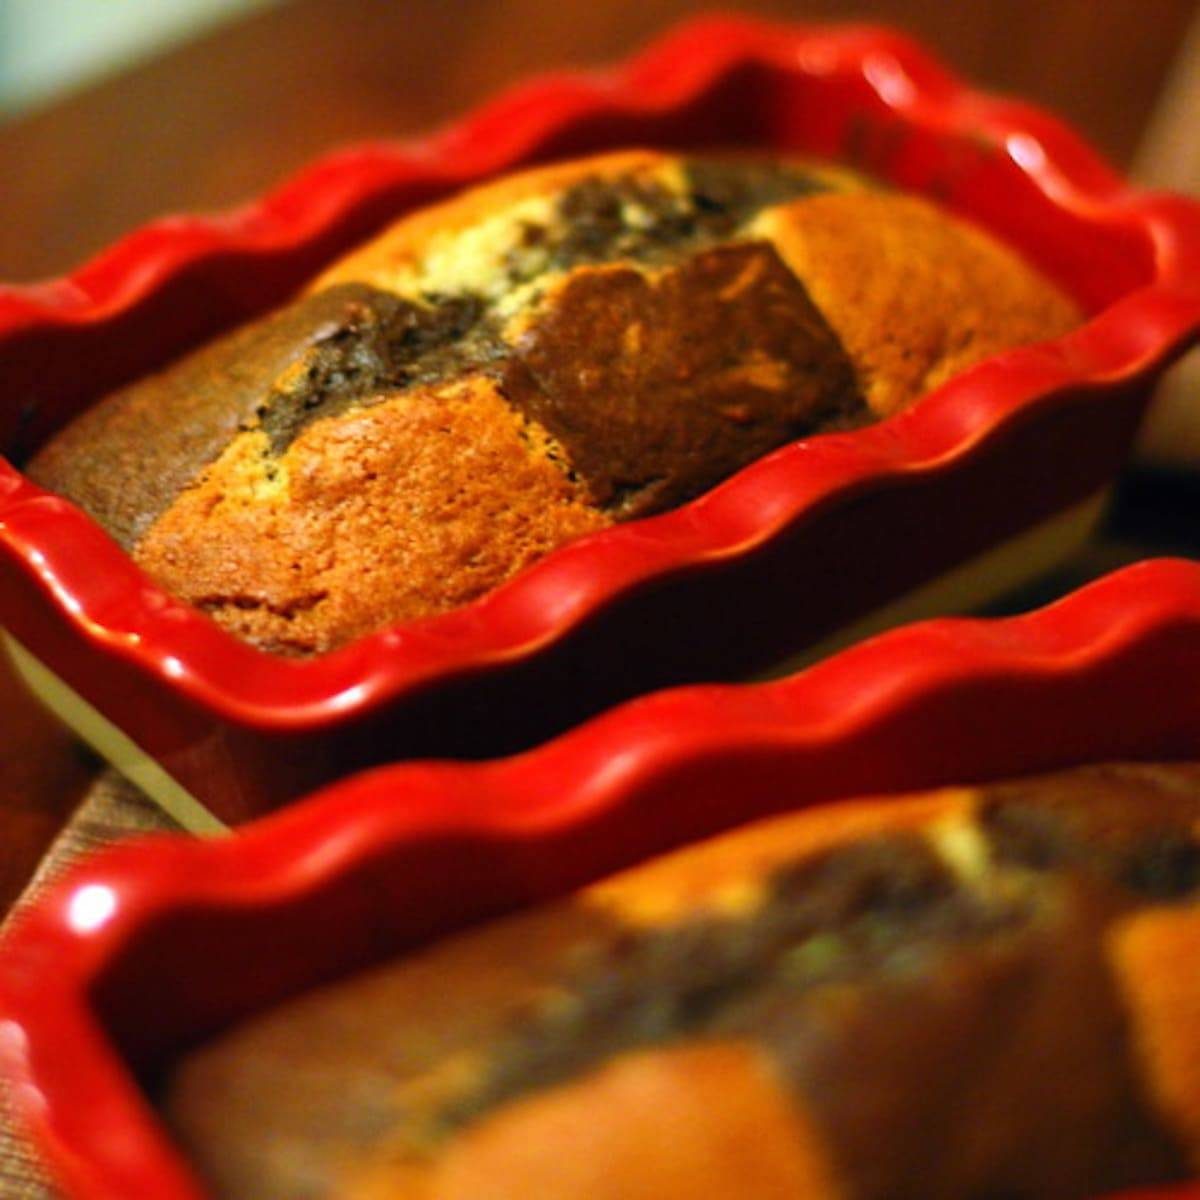
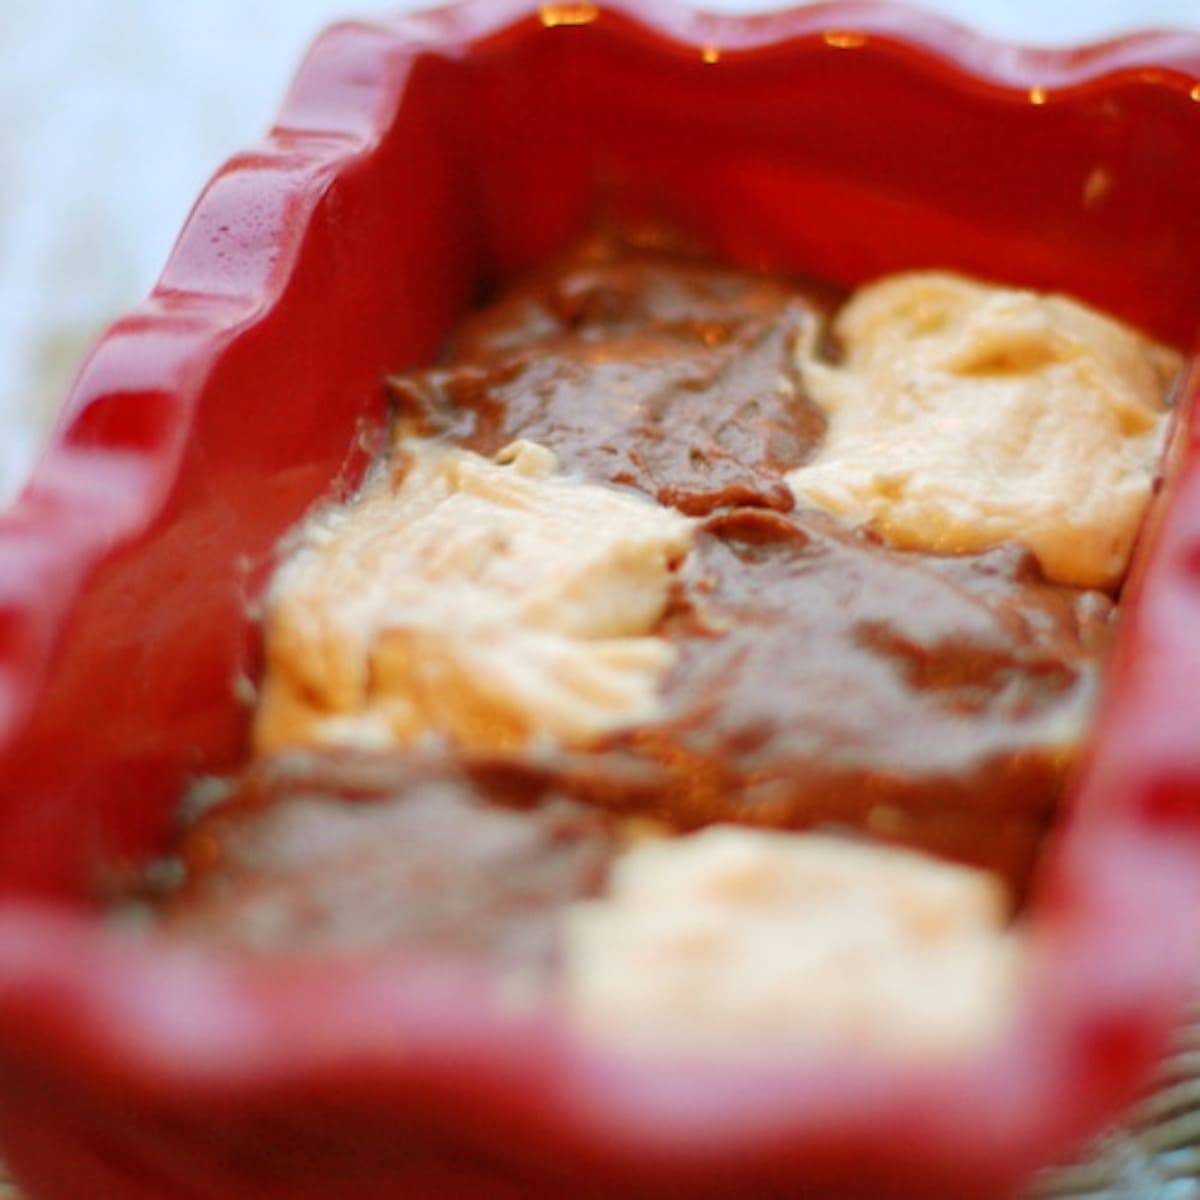
Chocolate Checkered Banana Bread
- Total Time: 55 minutes
- Yield: makes 3 mini loafs 1x
Description
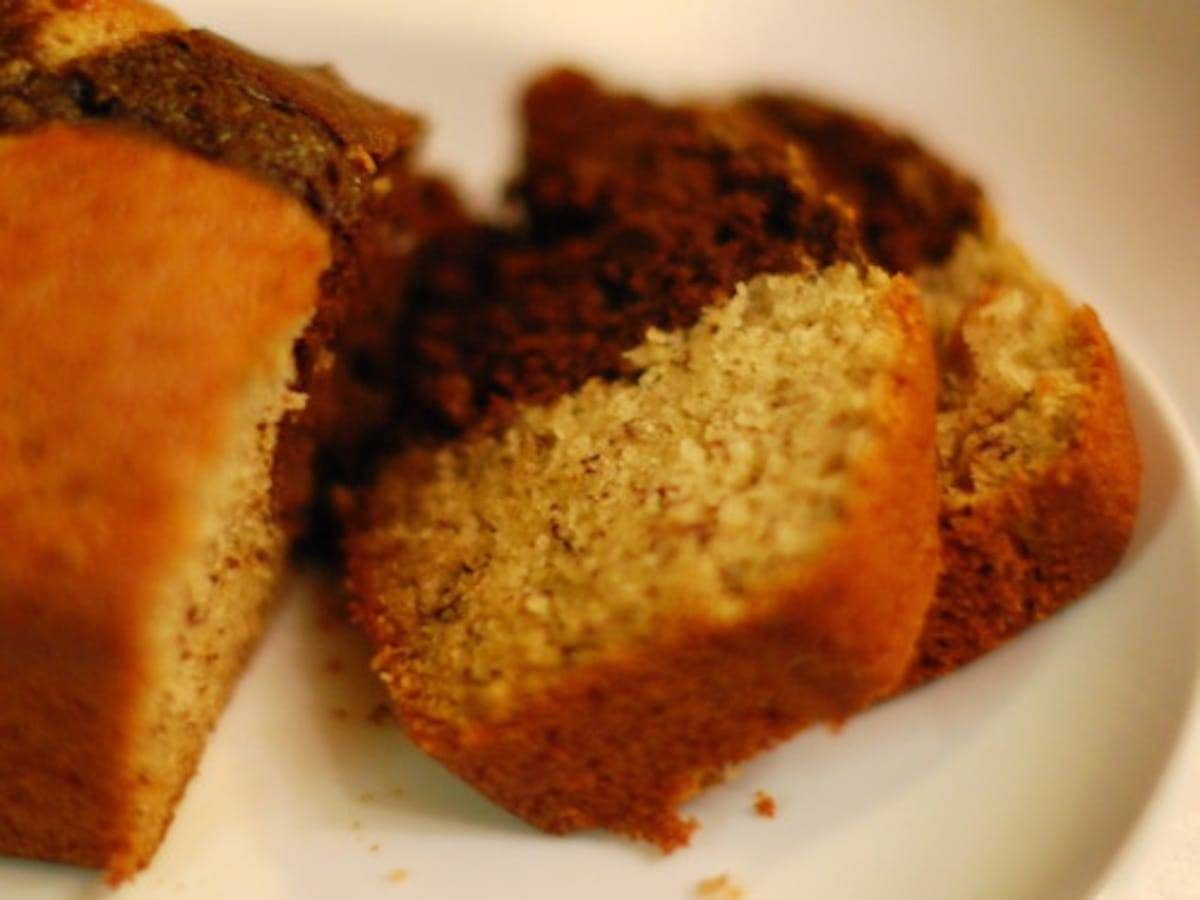
This fun chocolate checkered banana bread mixes regular and chocolate banana bread batter to make a unique checkered look.
Ingredients
- 3 large overripe bananas, mashed
- 1/4 cup buttermilk
- 2 teaspoons vanilla extract
- 2 cups flour
- 1 teaspoon baking soda
- 3/4 teaspoon baking powder
- 1 teaspoon cinnamon
- 1/4 cup unsweetened cocoa powder
- 3–5 tablespoons boiling water
- 9 tablespoons butter
- 1 cup sugar
- 2 large eggs
Instructions
- Preheat oven to 350 degrees. Lightly grease a loaf pan (or mini loaf pans, like me)! In a small bowl, combine the mashed bananas, buttermilk, and vanilla. Set aside.
- Sift together the flour, baking soda, baking powder, and cinnamon into a medium bowl. Whisk together. Set aside.
- Beat the butter and sugar on medium high until the mixture is light and fluffy. Add the eggs one at a time, beating well after each egg. Turn the mixer on low and combine the ingredient mixtures in thirds (a third of the banana mixture with a third of the flour, and so on).
- In a small bowl, stir together the cocoa powder and 3 tablespoons boiling water. Add more water until the desired texture is reached. Transfer half of the batter to another mixing bowl and mix in the cocoa paste.
- Drop alternating spoonfuls of the light and dark batters into the pan. Swirl the batters to make a more “marbelized” look (I kept mine like a checkerboard). Bake for 20 minutes, checking every 5 minutes afterwards, looking for a puffy and springy top. Mini loaf pans should bake for about 20 minutes, and full loaf pans should bake for 40-50 minutes.
- Prep Time: 10 mins
- Cook Time: 45 mins
- Category: Dessert
- Cuisine: American
Keywords: marble loaf, chocolate banana bread, chocolate checkered banana bread
So there you have it.
Do you have a favorite variety of banana bread? It’s only a matter of days before I attempt my next banana bread spinoff…

What is the cooking time?
Yes, what’s the cooking time? I’m about to put 1 full loaf & 3 mini loafs in the oven…
I would start at 20 minutes and just check periodically after that. When they are golden and puffy and springy to the touch, then they’re done. 🙂 And I will go back and add that to the recipe now!
I love your chocolate chip cookie recipe.
Thanks for teaching me
Greetings!!