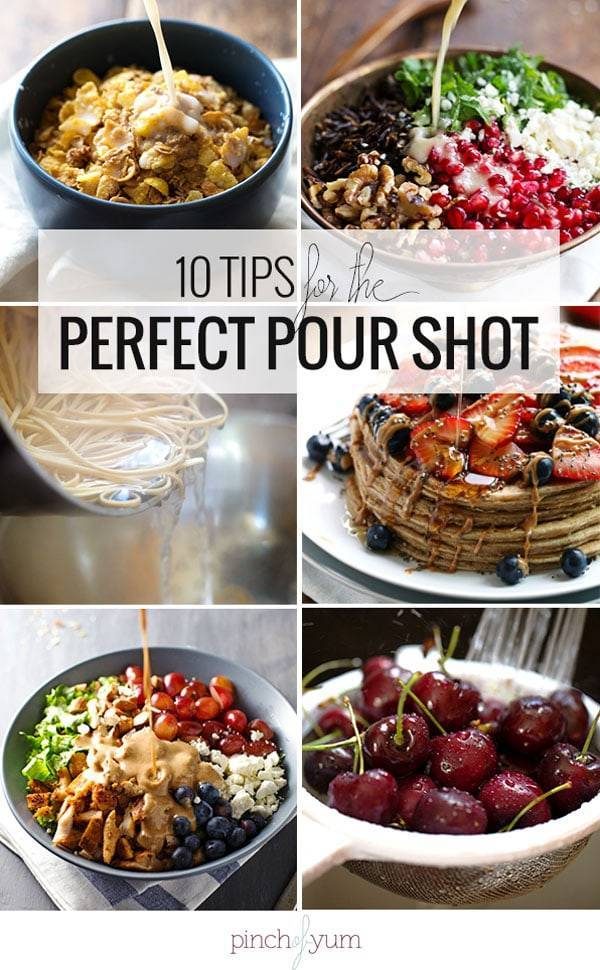
 Dressing! Sauce! Toppings galore!Drizzling and swirling and pouring things over my food is probably among the top 5 things I enjoy about food blogging. Because my life goal is to make errathing so purty.
Okay though, back up the train. It’s time to tell the truth about these deliciously in-your-face pour shots. And I’m talking about the messy, badly aimed, missed the bowl and dumped sauce all over the table truth. Yes – you suspected and I can confirm. For every one amazing, in-focus, clean pour shot you see here on Pinch of Yum, you can just imagine (but don’t) the 800 NOT amazing pour shots it took to get there. My poor table.
Related to food photography but unrelated to pour shots, this week I did my first Google Hangout on Air with Katie from Kitchen Stewardship and it was all about FOOD PHOTOG! Even though in today’s post I’m talking specifically about pour shots per a few requests that I’ve gotten via email and comments (you guys! such a great idea!), I wanted to also including the video from the hangout so we can virtually talk about all elements of food photography at the same time. And I know some of you wanted to see the hangout but couldn’t make it at the time we were live, so voila. The miracle of technology.
I was a little nervous in the beginning if you can’t tell from my straight up confident lie stating that I wrote Tasty Food Photography last year. Um, try 2011. #nerves
Okay, so I’m not an expert at this pouring shot thing as you’ll see from some of my scrappy little tips today. My approach is very, um, how can I say this? homemade? and I’m always trying to keep things as easy as possible. So professional photographers, go away now. Kidding/serious. But the good news is I have done many-a-pour-shot in my day and I have some hopefully helpful ideas about how you can make the dreamy pour photo less of a blobby splat and more of a reality.
Let’s do dis thang.
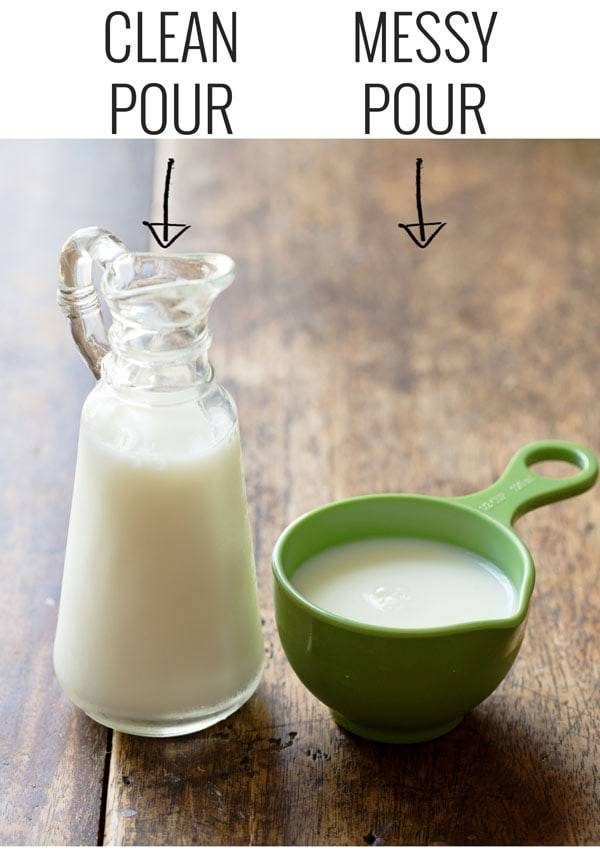
Imagine that you’re going to hold one of these in your hand and pour out of it. Which one is going to give you a more crisp, clean stream? Good job, kids, it’s the tall glass one. The measuring cup might look tempting since it has that little lip/spout/thing on there (I was immediately drawn to it like a complete fool, thinking it would be awesome because CUTE! the lip!). But the reality is two-fold – the lip/spout/thing is not big enough to give you a defined stream, and the handle is set off to the right side so you can really only hold it with your right hand, unless you want to test fate by pouring it backwards over the not-spouted edge. You will see how THAT turned out a little later in this post.
Bottom line: use a container with a long, skinny pour spout for a clean stream, and look for a handle on the back so you can use either hand to pour.
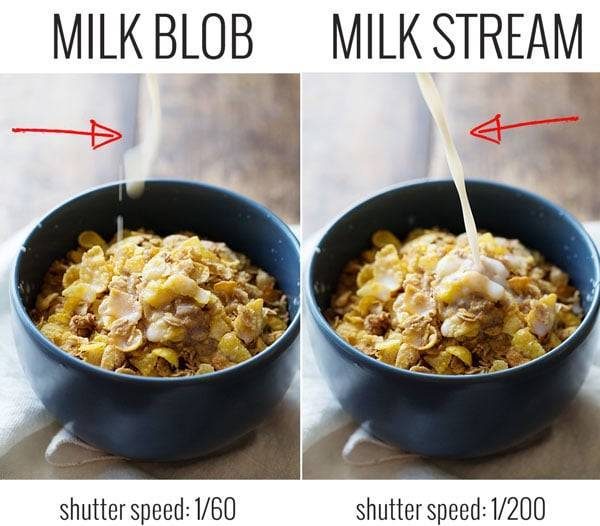
When shooting still, non-moving, regular food on a plate, I always suggest that people set their shutter speed low + slow. Usually I have mine around 60 – that means that the shutter will take 1/60th of a second to open and close. But in the case of milk being poured on cereal, 1/60 is not fast enough to catch the movement of the pour. Check out the floating blob of milk hovering just above the cereal. That might have also had something to do with a faulty pour, but you get the idea: mystery stuff lingering in the air is not a goal in food photography.
But if the shutter goes FASTER, you can catch more action! *Openclose*, just like that, and you’ve caught the droplets or the stream midair without the blurry blobness. For the one pictured here, I used a shutter speed of 1/200 of a second.
Bottom line: shutter speed should be FASTER (higher #) to catch more sharp, quick action.
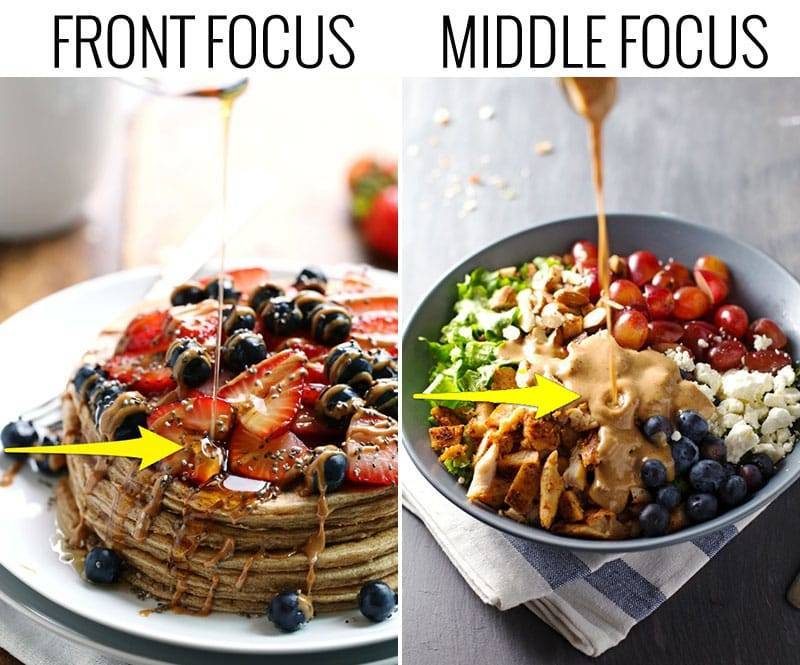
Sometimes I want the pour to land in the foreground of the photo, and sometimes I want it in the center. It’s really important that you are able to talk to your camera and let it know what you’re trying to do, so I just press the little “Q” button on the back of my screen and select the icon that looks like this.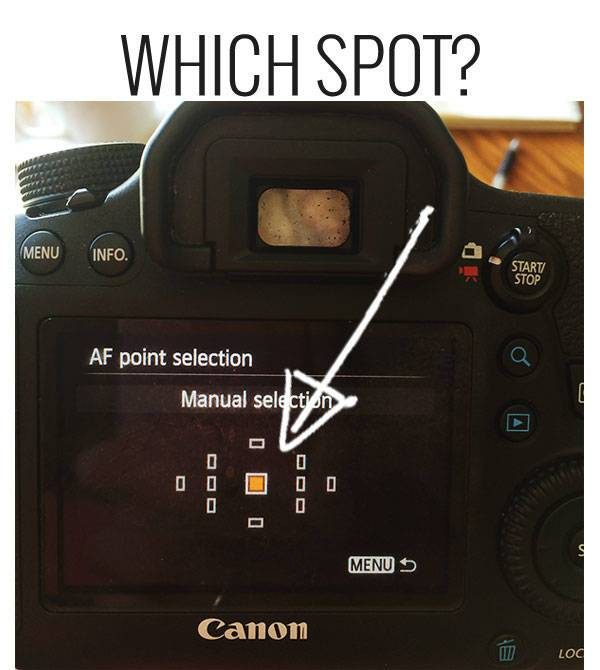
I arrow over until I land on the focal point that I want the camera to focus on. Manually selecting your focal point is just a good way to boss your camera around and make it behave like you want. In this example, the camera would default to focusing on the center of the photo. Perf!
Bottom line: find this function on your camera and use it to tell your camera where you want it to focus.

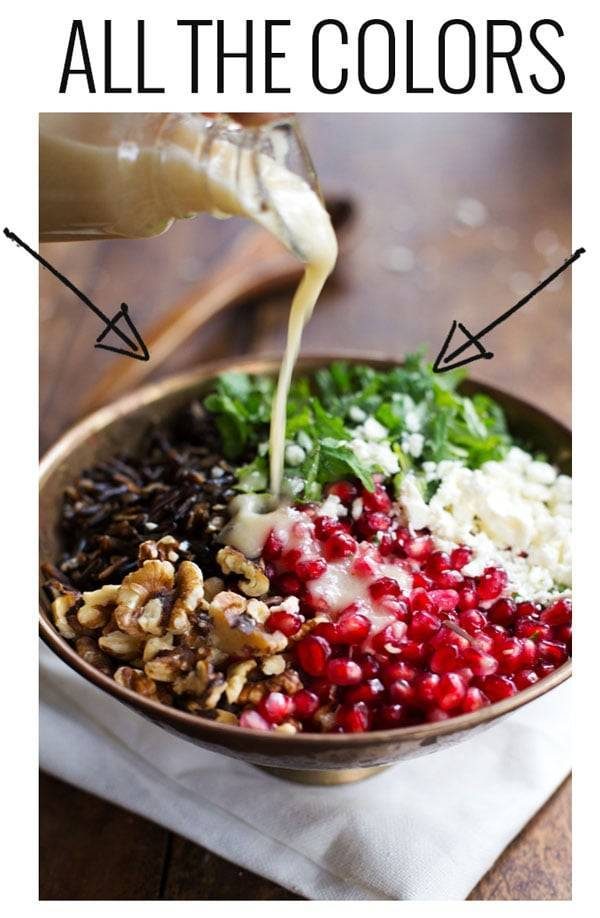
This one’s easy: the camera will just have an easier time focusing if the area that you’re shooting (and where the sauce is landing) has lots of contrast. The last thing you want is to start the pour and have the lens squirm back and forth trying to figure out where to focus. Wahhh!
Bottom line: give the food/landing spot some contrast with color and texture and your life will be much easier.
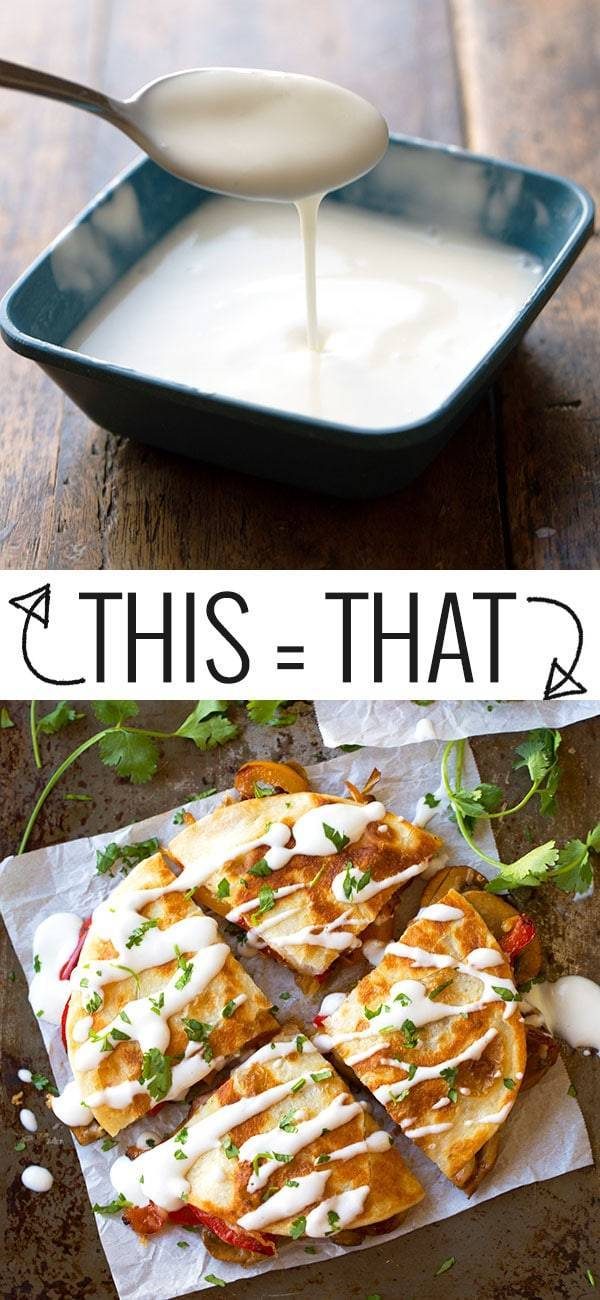
When I use certain toppings or sauces as , I often add water to them to make them pour more smoothly. A great example is dressings – sometimes they are a little more gloppy than I want them to be. Nothing says EEWW like a thick glop of dressing on the front and center of your salad. So I just whir up a little extra water in there until it runs off my spoon nice and smooth. Even if the recipe doesn’t need it, the photo DOES. So don’t be afraid to manipulate your food to get the effect you want.
Bottom line: adding water to sauces almost always helps them pour more smoothly.

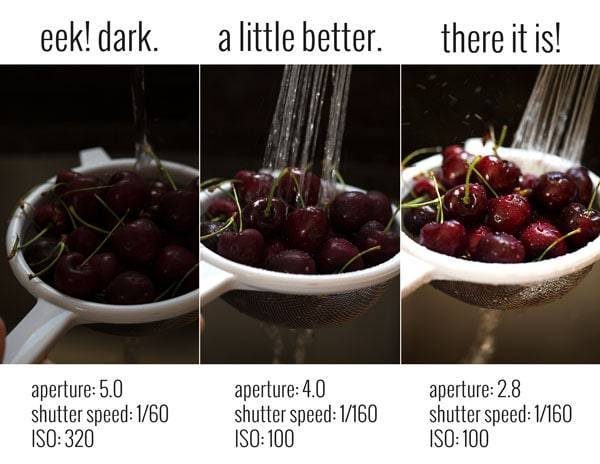
So, but if you’re going to adjust the shutter speed, then what? Doesn’t it get too dark and too light and oh my gosh what are all these manual control wheels for?!
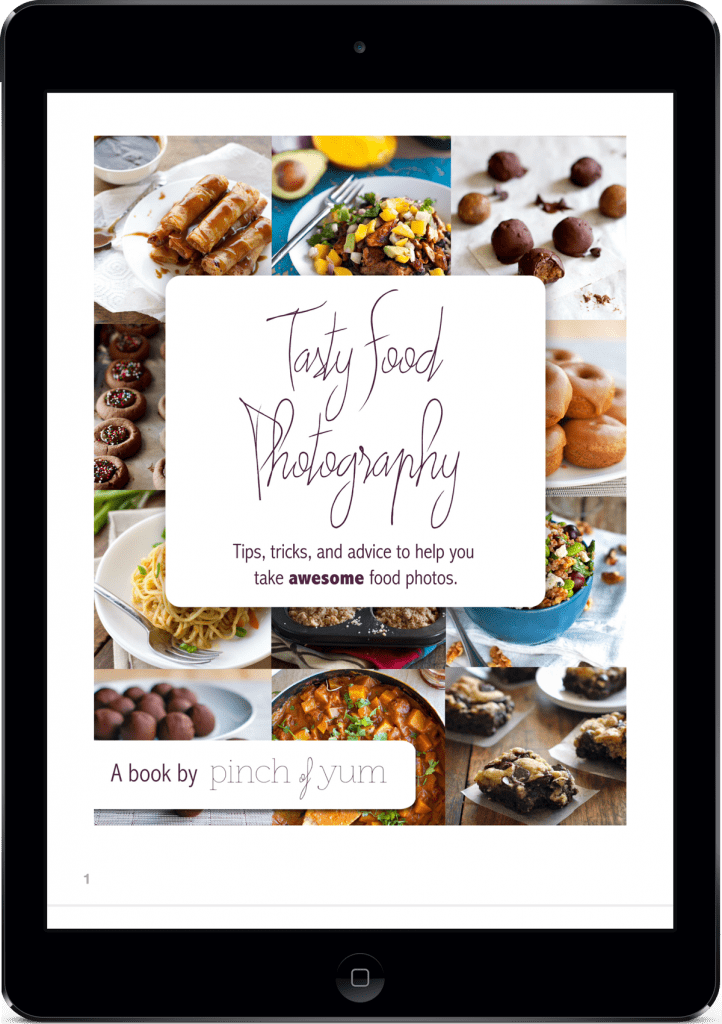
If you are changing the shutter speed to be faster, you’ll need to compensate with more light. You can do that by adjusting the aperture or the ISO. I’m not going to say a ton of mumbo jumbo about that here, because IMO it takes more than just quickly reading through one post to really learn how to do this manual controls thing well. But it’s important, like SUPER important! so that’s why I’m mentioning it. If you want a little more detailed (but easy to understand) help with this process, check out my ebook Tasty Food Photography.
Bottom line: shoot, check, adjust. shoot, check, adjust. shoot, check adjust. and repeat.
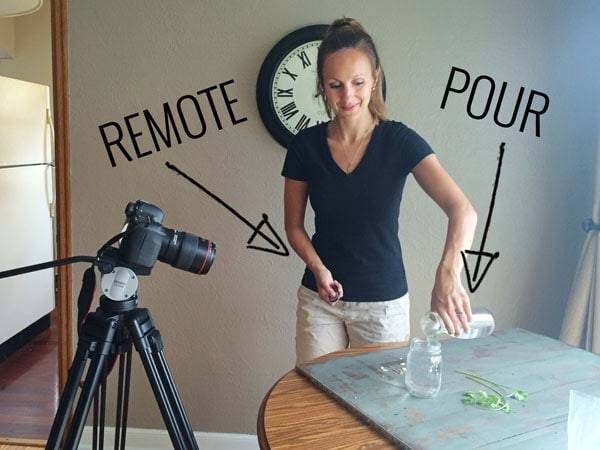
This is a really beautiful water, almond, and cilantro set up. Just stunning. I call that one Recipe Photo Shoot Leftovers Being Repurposed for a Food Photography Example Photo.
In reality, this is just me showing you how I would set up my tripod if I ever actually used my tripod. I would hold the remote while standing opposite the light (don’t block it!) and pouring the water right into the glass. Prior to this, if you’re using a tripod, you’ll want to check your setting, set your focal point, and do a few test shots without the actual pour. This same concept can work by replacing the tripod with a human spouse or friend or roommate.
Bottom line: using a tripod makes the pour shot, like, waaaay easy.

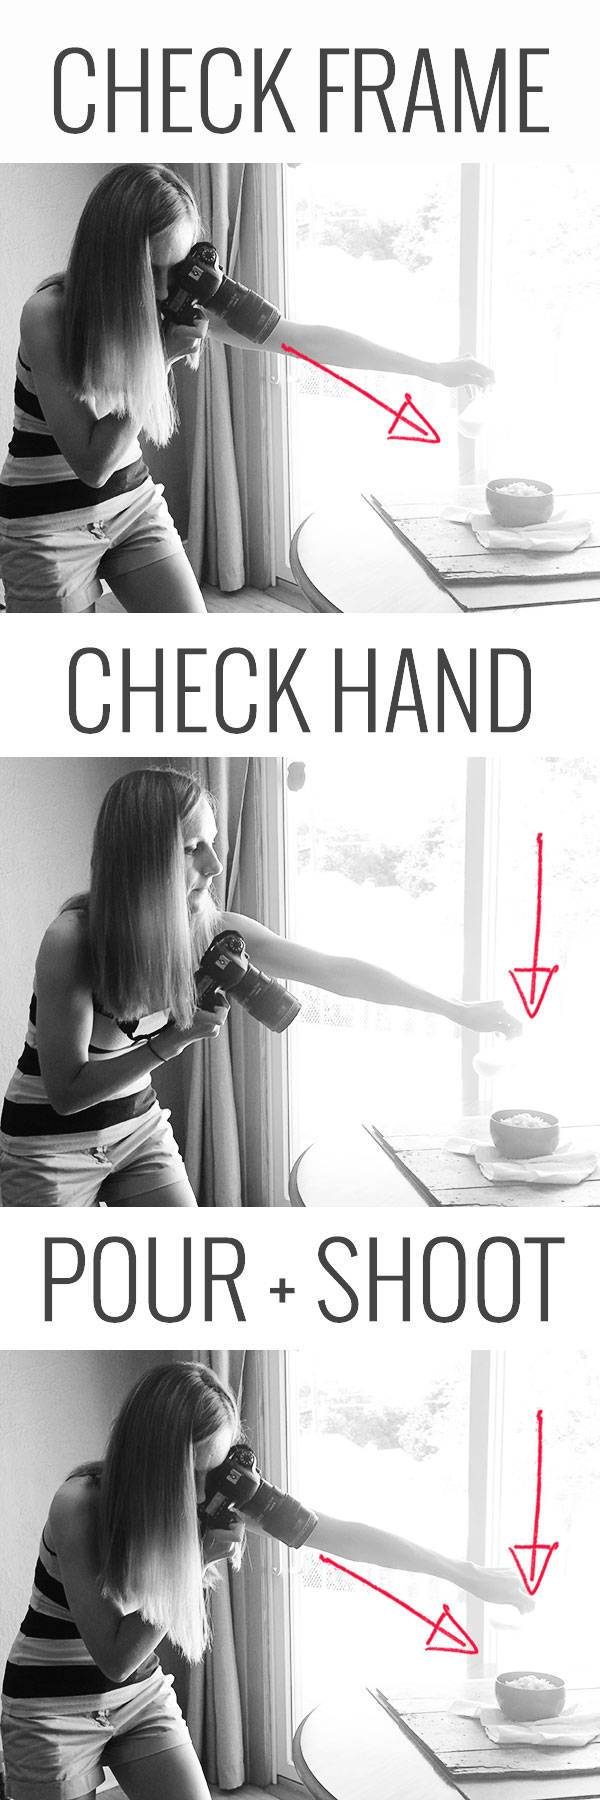
Okay, this is the time when I tell you the true stories. I almost never ever use a tripod. And I almost always do this little quick and simple hand maneuver to get my pour shots. I am seriously laughing right now – it’s so weird and not at all professional. But this is what I do! I’m not going to give a whole-hearted recommendation for this method because it is, without a doubt, more difficult than using a tripod. But if you are like me (impatient and impulsive) and want to get things done now now now instead of setting up a tripod for 10-15 minutes to get one photo (nutso!), this can work instead.
So here’s what I do: I look THROUGH the camera to line up my shot while holding the pouring vessel. Then I look UP at the pouring vessel to make sure it’s actually going to land on the food. <— very very very important. Then I do that again, and again, and again, back and forth at least five times, and finally when I’m sure both my hand and camera are in the right place, I pour and shoot.
Even though I can’t fully recommend this way of doing it, especially for beginners, I did want to mention this little homemade strategy for two reasons:
- I don’t want you to be fooled into thinking that you have to own a tripod to get a good pour shot. No way, man.
- I want to shed light on the bigger idea that there’s always more than one way of achieving an effect when it comes to food photography. Remember these posts about using household items to help your food photography? You don’t always need fancy-professional-tools. This is yet another way of achieving the tripod pour-shot effect, right now, in your very own house with whatever food you’re shooting, using something that you almost for sure have –> your arm.
Bottom line: it can work just fine without a tripod.

Just, just, just don’t ever do what I’m doing in that first picture which is pouring cream out of a measuring cup BACKWARDS (using my left hand and requiring me to pour over the non-spouted side of the measuring cup resulting in the liquid totally sloshing over the side and running off the measuring cup straight onto the table). Also, my hand. Gross. It’s like a mysterious dark creature of the night descending on the coffee and it makes me scurrd.
Bjork took the second picture for me and, as a result, my hand looks way more natural. If you DO want your hand to be in the photo, like so, move your hand up and back and angle it naturally so no one is wondering about creatures in the tops of your pictures and use a tripod or second shooter. If you don’t have either of those things, I would suggest moving your hand completely out of the shot and just capturing the stream. It’s really hard to get a natural-looking hand angle when you are doing the fancy maneuver from #8.
Bottom line: pay attention to your hand placement, whether it’s in or out of the shot.
 Practice practice practice practice practice practice practice practice practice. For every recipe that you do with a sauce or dressing, challenge yourself to just try snapping a quick pour shot. When you drain or rinse things at the sink, practice the pour shot. Practice as much as you can, because remember, for every one good pour photo that you see, there are probably 800 bad ones that you’re not seeing. And you don’t always have to use the photos that you take, but if you’re already cooking and pouring and drizzling, and you already have your camera out, why not practice one real quick?
I love creating that up close and personal food feeling through the photos on my blog, and to me, saucy, realistic, in-your-face pour shots are one of the easiest ways to do that. My fingers are crossed that some of these tips will encourage you to be brave with your pours! If you have some awesome pour shots that you love, feel free to link a post below so we can check it out.
If You Liked This…
then I’m a happy girl!
You can also check out my ebook Tasty Food Photography to get more tips and tricks for improving your food photography.


I can’t believe how perfectly timed this post is for me! I just sat down to catch up on some emails and some lunch, with a chocolate cake I just made sitting downstairs for me to photograph with cream being poured on. Thanks!! Great tips!! Now let’s see how the photo actually turns out….. 🙂
Yes! I would love to see the finished product – feel free to come back and leave a link to your post when it’s done. 🙂
Hi Lindsay, thanks for the reply. 🙂 I’ve been following your Tasty Food Photography ebook, as well as the Food Blogger Pro photography videos over the last couple of months gradually going through updating and re-doing all my blog photography (definitely still work in progress!). My best attempt at the pouring cream photo is the last image at the bottom of the post https://neilshealthymeals.com/low-fat-summer-chocolate-pudding-cake/ I definitely think I needed to make the aperture perhaps 2.2 ( was 3.2) and I think I had a bit of camera shake there. Still, practice, practice and more practice I know that’s what I need to do! 🙂
Thanks for sharing Neil! That cake looks amazing!
Thank you so much for this timely post. I was just wondering how to set up pour shots a few days ago. I have just started the process of re-creating my blog and switching it over from being a craft blog to a food & lifestyle blog. I have been finding that photographing food is so very different from photographing cards and frankly I have been finding the whole thing very intimidating. It’s embarrassing to say but I’ve been procrastinating actually putting up recipes because I still feel so uncomfortable with the whole food photography thing. I joined Food Blogger Pro last month and bought your Tasty Food Photography book and have slowly been making my way through both. So I wanted to say THANK YOU for all that you offer and share. You and Bjork are a real help and inspiration!
So awesome to hear that Andrea! One of my favorite things about Food Blogger Pro is the forum on food photography – people will often post their photos and ask for feedback or ask for an explanation of how to do something, and it’s so great to get all the different voices chiming in about what works best, so be sure to take advantage of that when you feel comfortable! 🙂 Thanks again for the comment!
This is so detailed, Lindsay.. I am amazed by all the details you have shared and all the do’s and don’ts..I think I am a long way from perfecting pour shots, but I think i can start practising when I get a chance..
Thanks!
SUCH a helpful post! Thanks for all the tips!!! It’s clear you put a lot of time and effort into this post and it pays off!
I’m so glad it’s helpful Trisha! I love putting all the time and energy in when I know that people read the information and find it useful. 🙂
I am SO bad at pour shots and this tutorial is going to be SO SO helpful!
Thank you so much for this! I’ve been struggling with these pour shots and now I see several things I was doing wrong. Especially with the focus area! Now I’m excited to give it another try!
I love your tips, Lindsay. Thank you so much for this post. I’ve been roping my OH half in to help me with photos, he pours while I shoot.
Perfect! I love it when Bjork will help me. But he gets tired of it pretty fast – poor guy! Hand model was not his dream job. 🙂
Thank you so much for these great tips! I have always wondered how you get those fantastic pour shots. I’m off to find something to pour…
Love this post!! I’ve struggled quite a bit to get the “pour” shots, or just basically anything that requires action. I have a tripod and I actually use it for every shoot. It’s permanently set up in my studio (ahem, dining room).
I think I’m getting closer to achieving that pour shot, and my method is pretty much exactly like you described in your post. That’s probably because Tasty Food Photography is my bible 🙂
This post has some pour shots that are *almost* what I wanted them to be: https://thewanderlustkitchen.com/mexican-chicken-salad-chipotle-raspberry-dressing/
I think I should have use a slightly increased shutter speed to really get a clean shot. But it smelled really good and I was impatient and wanted to eat all-of-the-things.
I love your pour shots Anetta! Thanks for sharing!
Great tips! I always struggle with that which is why I have very few pouring photos. Now I will try a little more.
You are both absolutely awesome. I love opening my email and finding mail from you. So much information! And just refreshing delivery by both of you.
Thanks Peggy! So glad you’re enjoying the posts!
Lindsay – thank you so much – these are some amazing tips! I have only taken a couple of (bad) pour shots and that too I have had my daughter help me with the pours.
P.S. Bought Tasty Food photography and truly enjoying reading it – you have taught yourself so much – you should be so proud with all your hard work. Enjoyed the first 30 minutes of the video – gotta watch the rest this evening – hoping to join Food Blogger Pro in a couple of months to enjoy more videos and learn more tips. Thank you!
Thank you Shashi! Appreciate that! 🙂
LOVE.
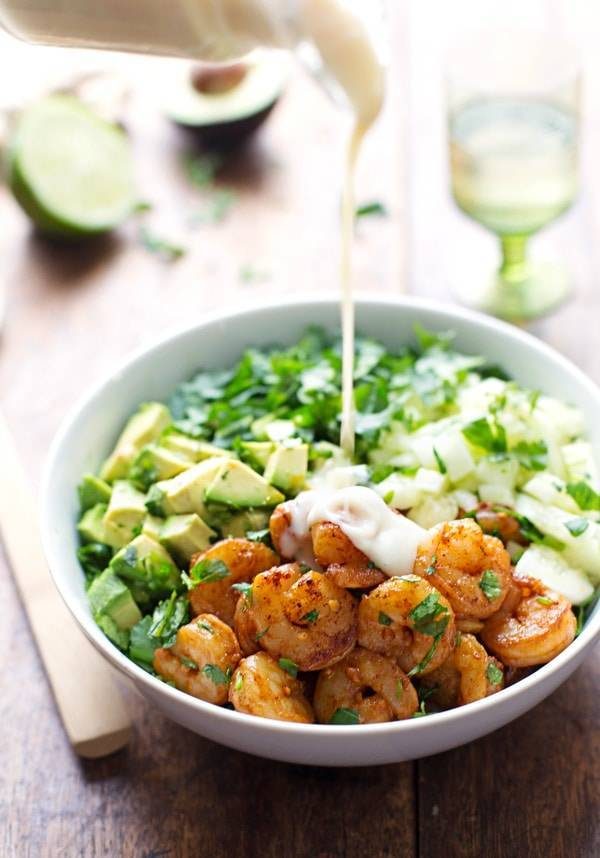
Such good tips. Love your pour shots!! That shrimp dish pictured up there…it makes my mouth water just looking at it.
Love the post, but I would suggest a couple changes in your setup.
1) ALWAYS use a tripod. That allows moving the items on the table, tweaking the arrangement until everything looks good prior to starting the pour. All exposures can then be set up and verified before starting the actual pour.
2) Use MANUAL FOCUS. You talk about how to get the camera to choose the focus. I find it better to use Live View and set focus just where I want it. I typically stick a bamboo shish-kabob shaft at the point I want the focus, then set sharp focus where it hits the food. If I am photographing liquid (coffee, etc), I put the stick in a little clay which lets it sit upright from the base of the cup. I then focus on the interface of the stick and liquid.
3) Get a CamRanger for remote control and viewing. I place my iPad on the table (out of camera view). As I arrange the table, I can then see exactly what the camera sees without having to bob back-and-forth to the camera viewfinder — I can see it live on the iPad. I can then also take a test shot, look at a LARGE view of the photo (on the iPad), change camera settings and try again, all without leaving the target (food) area.
Gotta say, that CamRanger changed my whole approach to shooting. I now use it for dance shots, water drop shots, food shots, and just about anytime I have my camera on a tripod and need to experiment with positioning, lighting, posing, whatever.
Thanks for the feedback and tips Burt!
Watching the video hangout now – your Minnesota accent is so CUTE! Haha, and thanks for the pour shot tips – I’m still working on them and I’m sure this’ll help a lot 🙂
Oh no. The accent!!!
Thank you Lindsey for this post and your blog. Just on time for me. I just created my blog and there is still a lot to learn and improve for me. Your blog is big help for me! Thanks!:)
Thanks Valya! Glad to hear it.
Awesome, thanks for the tips! I’ve been experimenting with pour shots lately using my tripod and contorting myself to pour and hold down the button at the same time…I need a remote!
Yes, the remote is key with the tripod!
I never use a tripod either. I’ve shot two cookbooks and 5 years of blogging without one and every time I try, I feel locked in. And I’m glad to know that your whole thing in #8, yep, that’s what I do. In the beginning, your table has way more syrup on it than the pancakes, and you get more wonky fingers in the frames and weird hand angles, but as you said, practice is key. Loved this post! Pinned 🙂
Thanks Averie! It makes me feel better to hear that another blogger does it the “scrappy” way. 🙂
Thank you so much for this helpful post! It’s great to hear tips on how to make the liquid look like a picture perfect stream of deliciousness. I’ve totally tried to do the pour with one hand shot with the other maneuver too! It’s hard to take the time or have the right space to setup a tripod 😉
What a great post! Love all your tips. I’m just now starting to play around with pour shots so all your tips will be very useful. I am impatient and impulsive as well and can not stand the tripod 🙂
Lindsay, this post is amazing! Thank you so much! I have been learning a lot with you, your blog and your videos. You are so generous to share all that with us and it’s crucial for a newbie like me! 🙂
I’m so glad! Thanks Olivia!
My gosh, Linsay, I really thought that to be able to capture pour shot , I have to do it in slower shutter speed to compensate the time when the liquid is flowing. I am gonna try this tip. 🙂
Yep – try the faster shutter speed so it catches the action!
Thank you SO MUCH! I can’t tell you how happy this makes me! Your tips are always so helpful! You’re the best!
Love hearing that. Thanks Erren! 🙂
Great post, Lindsay! The only semi-successful pour shot I’ve done is here: http://acalculatedwhisk.com/pan-seared-chicken-orange-walnut-salad/ . . . I know which tip I should have been using: thin out the dressing with some water! I can’t wait to try some pour shots with your ideas in my arsenal.
ahh yes, that’s a familiar scene 🙂 happens to me all the time! But the shot is great otherwise – nice job!