This cottage cheese pizza crust is ridiculous. 4 ingredients, 20 minutes, and actually chewy, crispy, and delicious.
My New Favorite Pizza Has a Cottage Cheese Crust

It Has No Business Being This Good.

So, I’ve made it 4x already this week.
I saw a video for a cottage cheese pizza crust from our friends at Fit Foodie Finds last week and I thought, hmm. Interesting. Maybe I should try that.
I am always a little suspicious about recipes based around cottage cheese, but HERE IS THE THING.
It’s ACTUALLY SO GOOD!

It is not one of these gimmicky cottage cheese moves. I mean, honestly, forget that there’s even cottage cheese in the crust. I mean, yay protein, but all I care about is that that crust is still somehow is light and airy and bready, but still gets a bit of a golden brown crisp out the outside? It’s a 20 minute miracle. Every time I am shocked and amazed.
I’ve tried some variations of this and I’ll put my thoughts into the notes of the recipe. But for now, just know: this is worth trying. You can find the Fit Foodie gals recipe here – I made it almost exactly the same as theirs! I just bake it a bit hotter, to get more crispy and browned. I also triple the amounts to make a thicker / bigger crust to feed our whole family of 4.
I had lots of people asking me about the details of my changes on Instagram, so here it is in writing for ya.
I hope you love it!

1
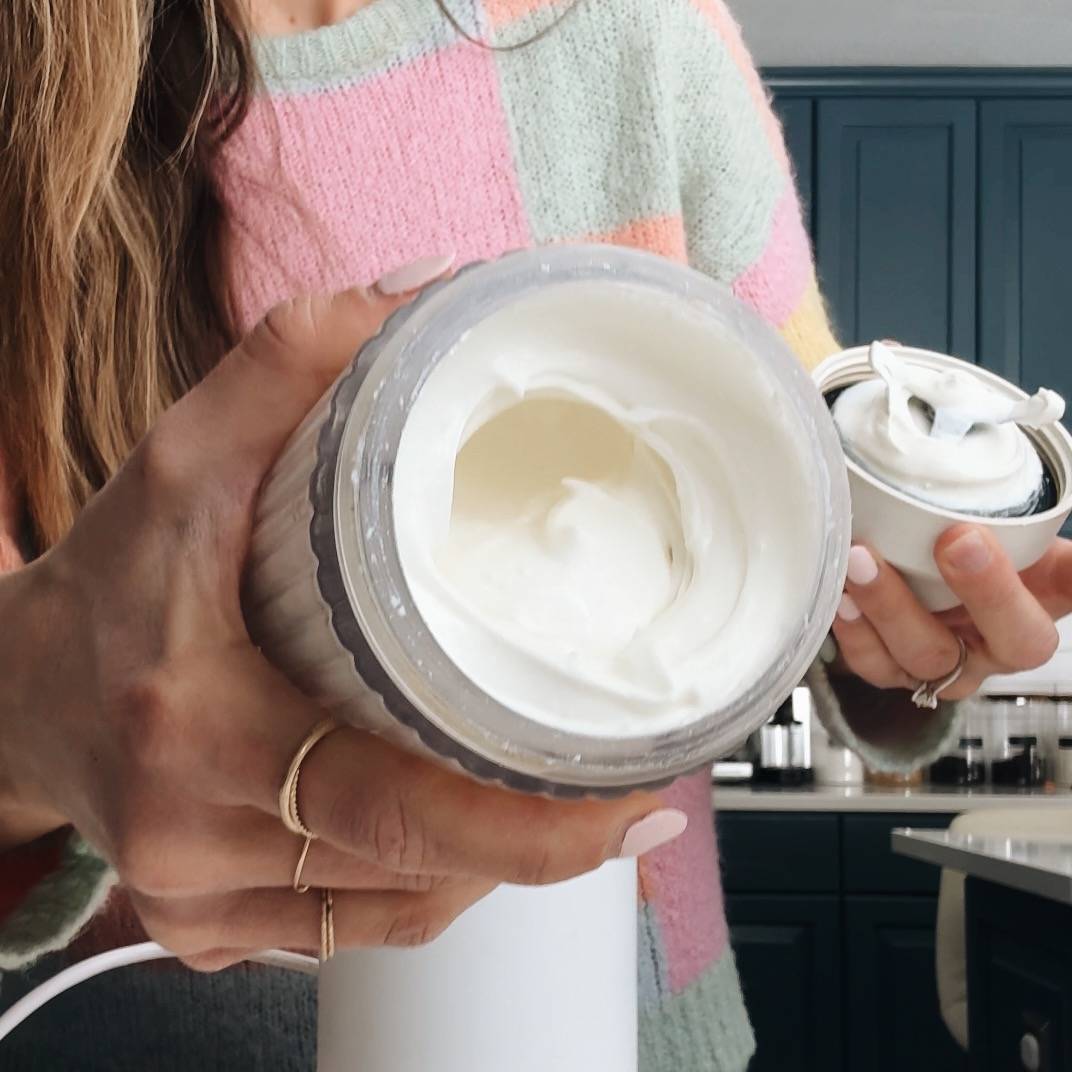
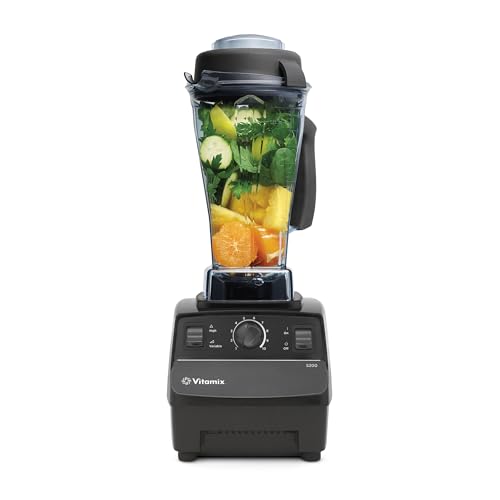
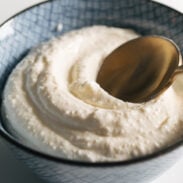
Blend The Cottage Cheese.
I like the cottage cheese to be nice and smooth for the dough. This is not necessary, but I think this gives you the best texture!
2
Form The Dough.
Mix up the dough and dump it on a surface. It will be thick and a little sticky, but be patient and work it into a ball, then spread into a pizza shape.

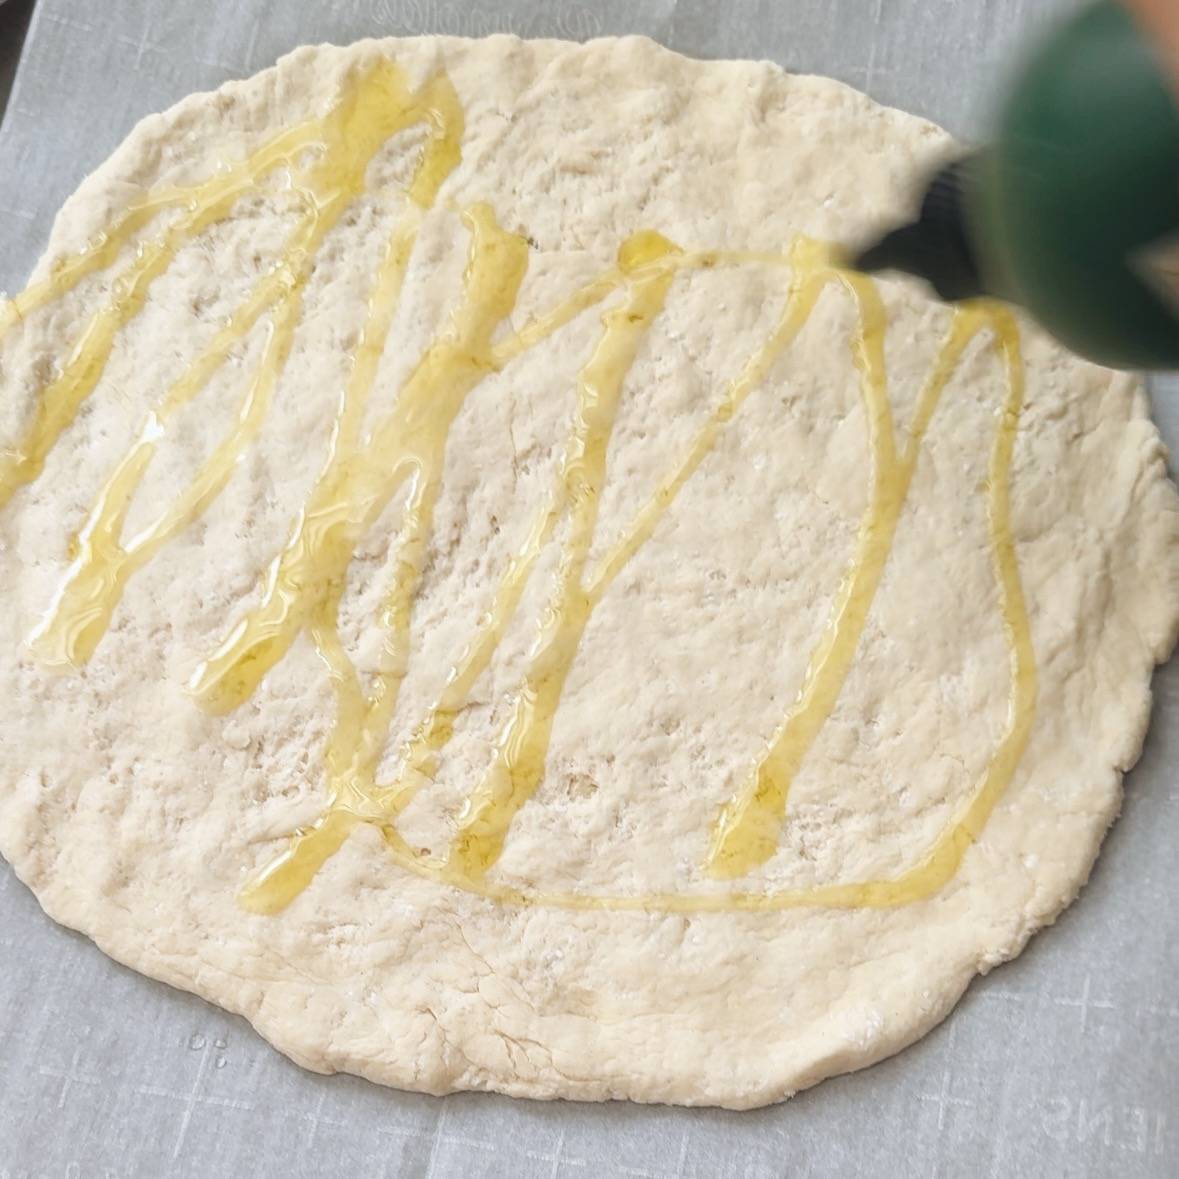
3
Drizzle Olive Oil.
Drizzle the pizza with a little bit of olive oil before baking.
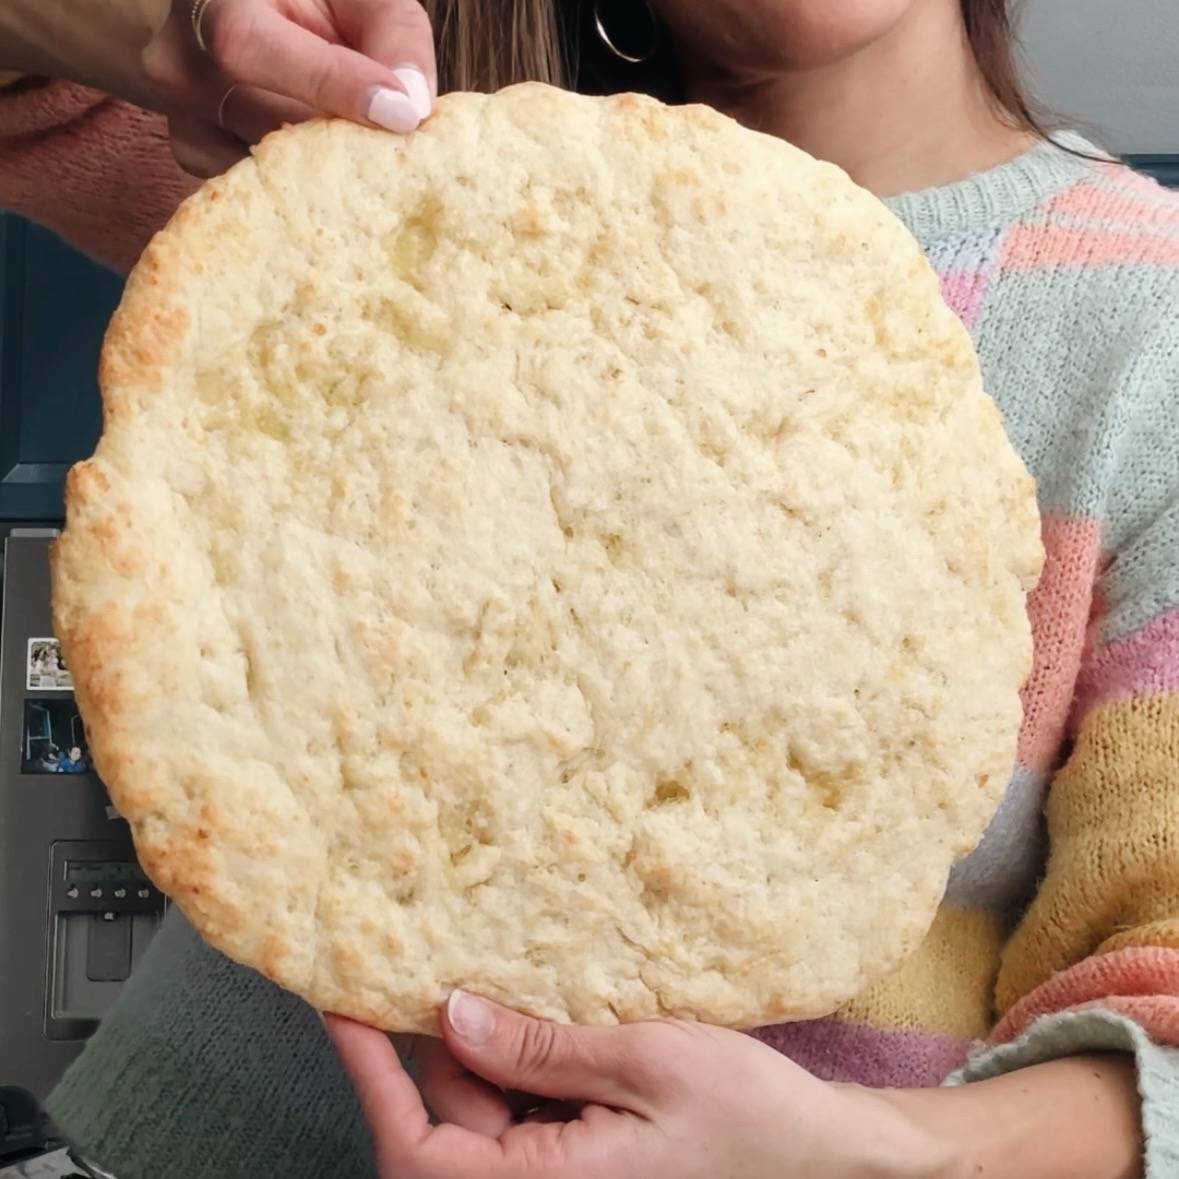
4
Pre-Bake The Crust.
Bake the crust in the oven on its own before adding toppings. This will help it get a little crispy and hold up your toppings!
5
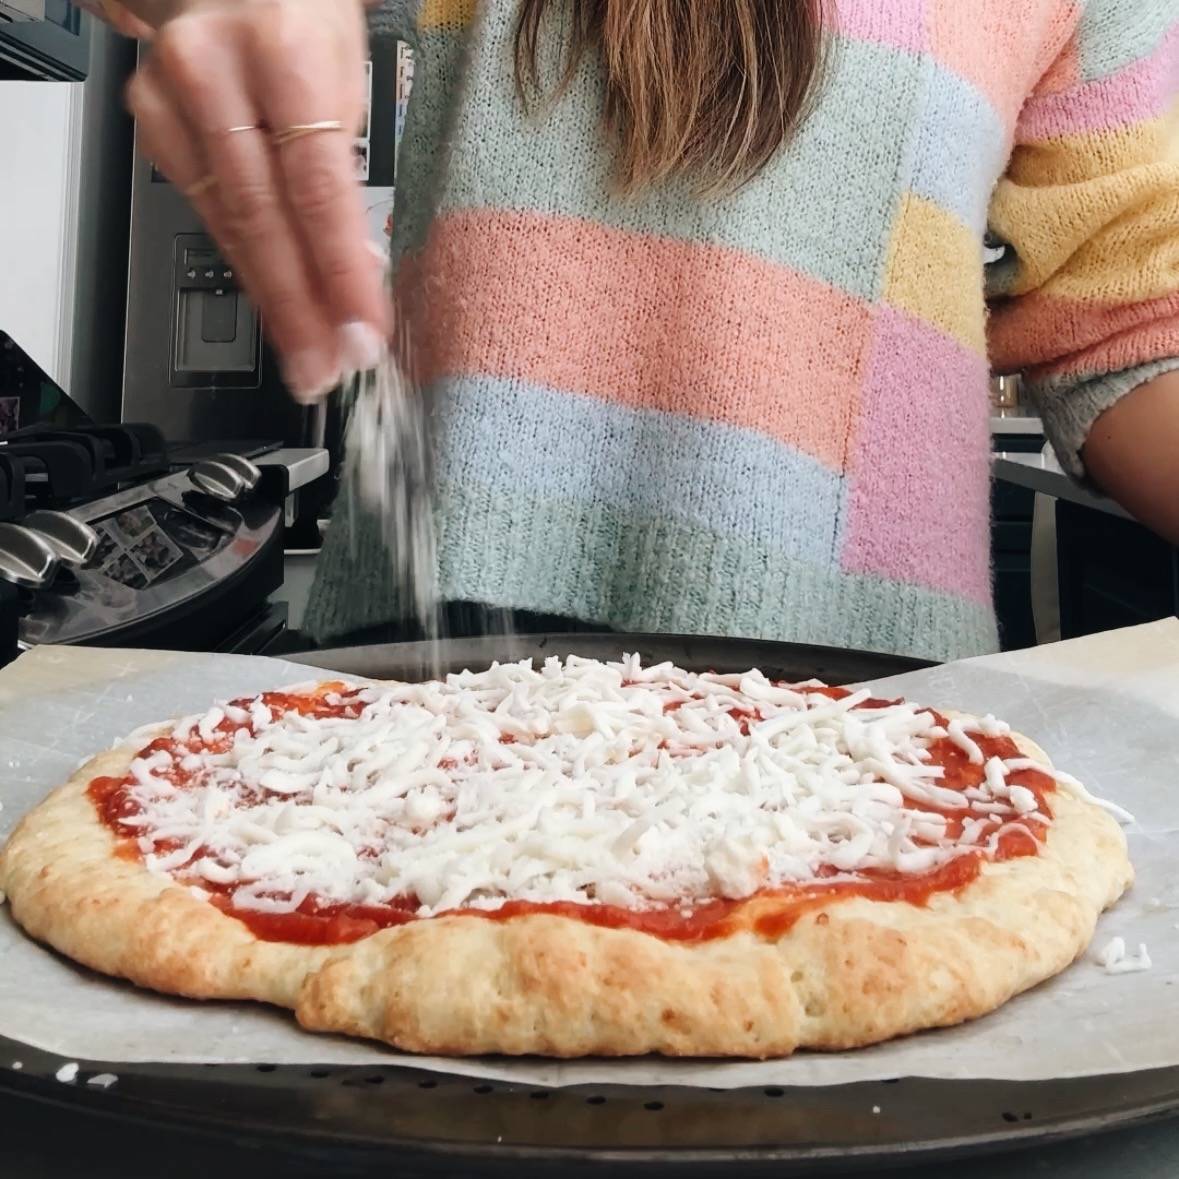
Add Your Toppings.
Add your sauce and your cheese (and any other toppings you’d like) and pop it back in to bake a little more.
6
Bake and Eat!
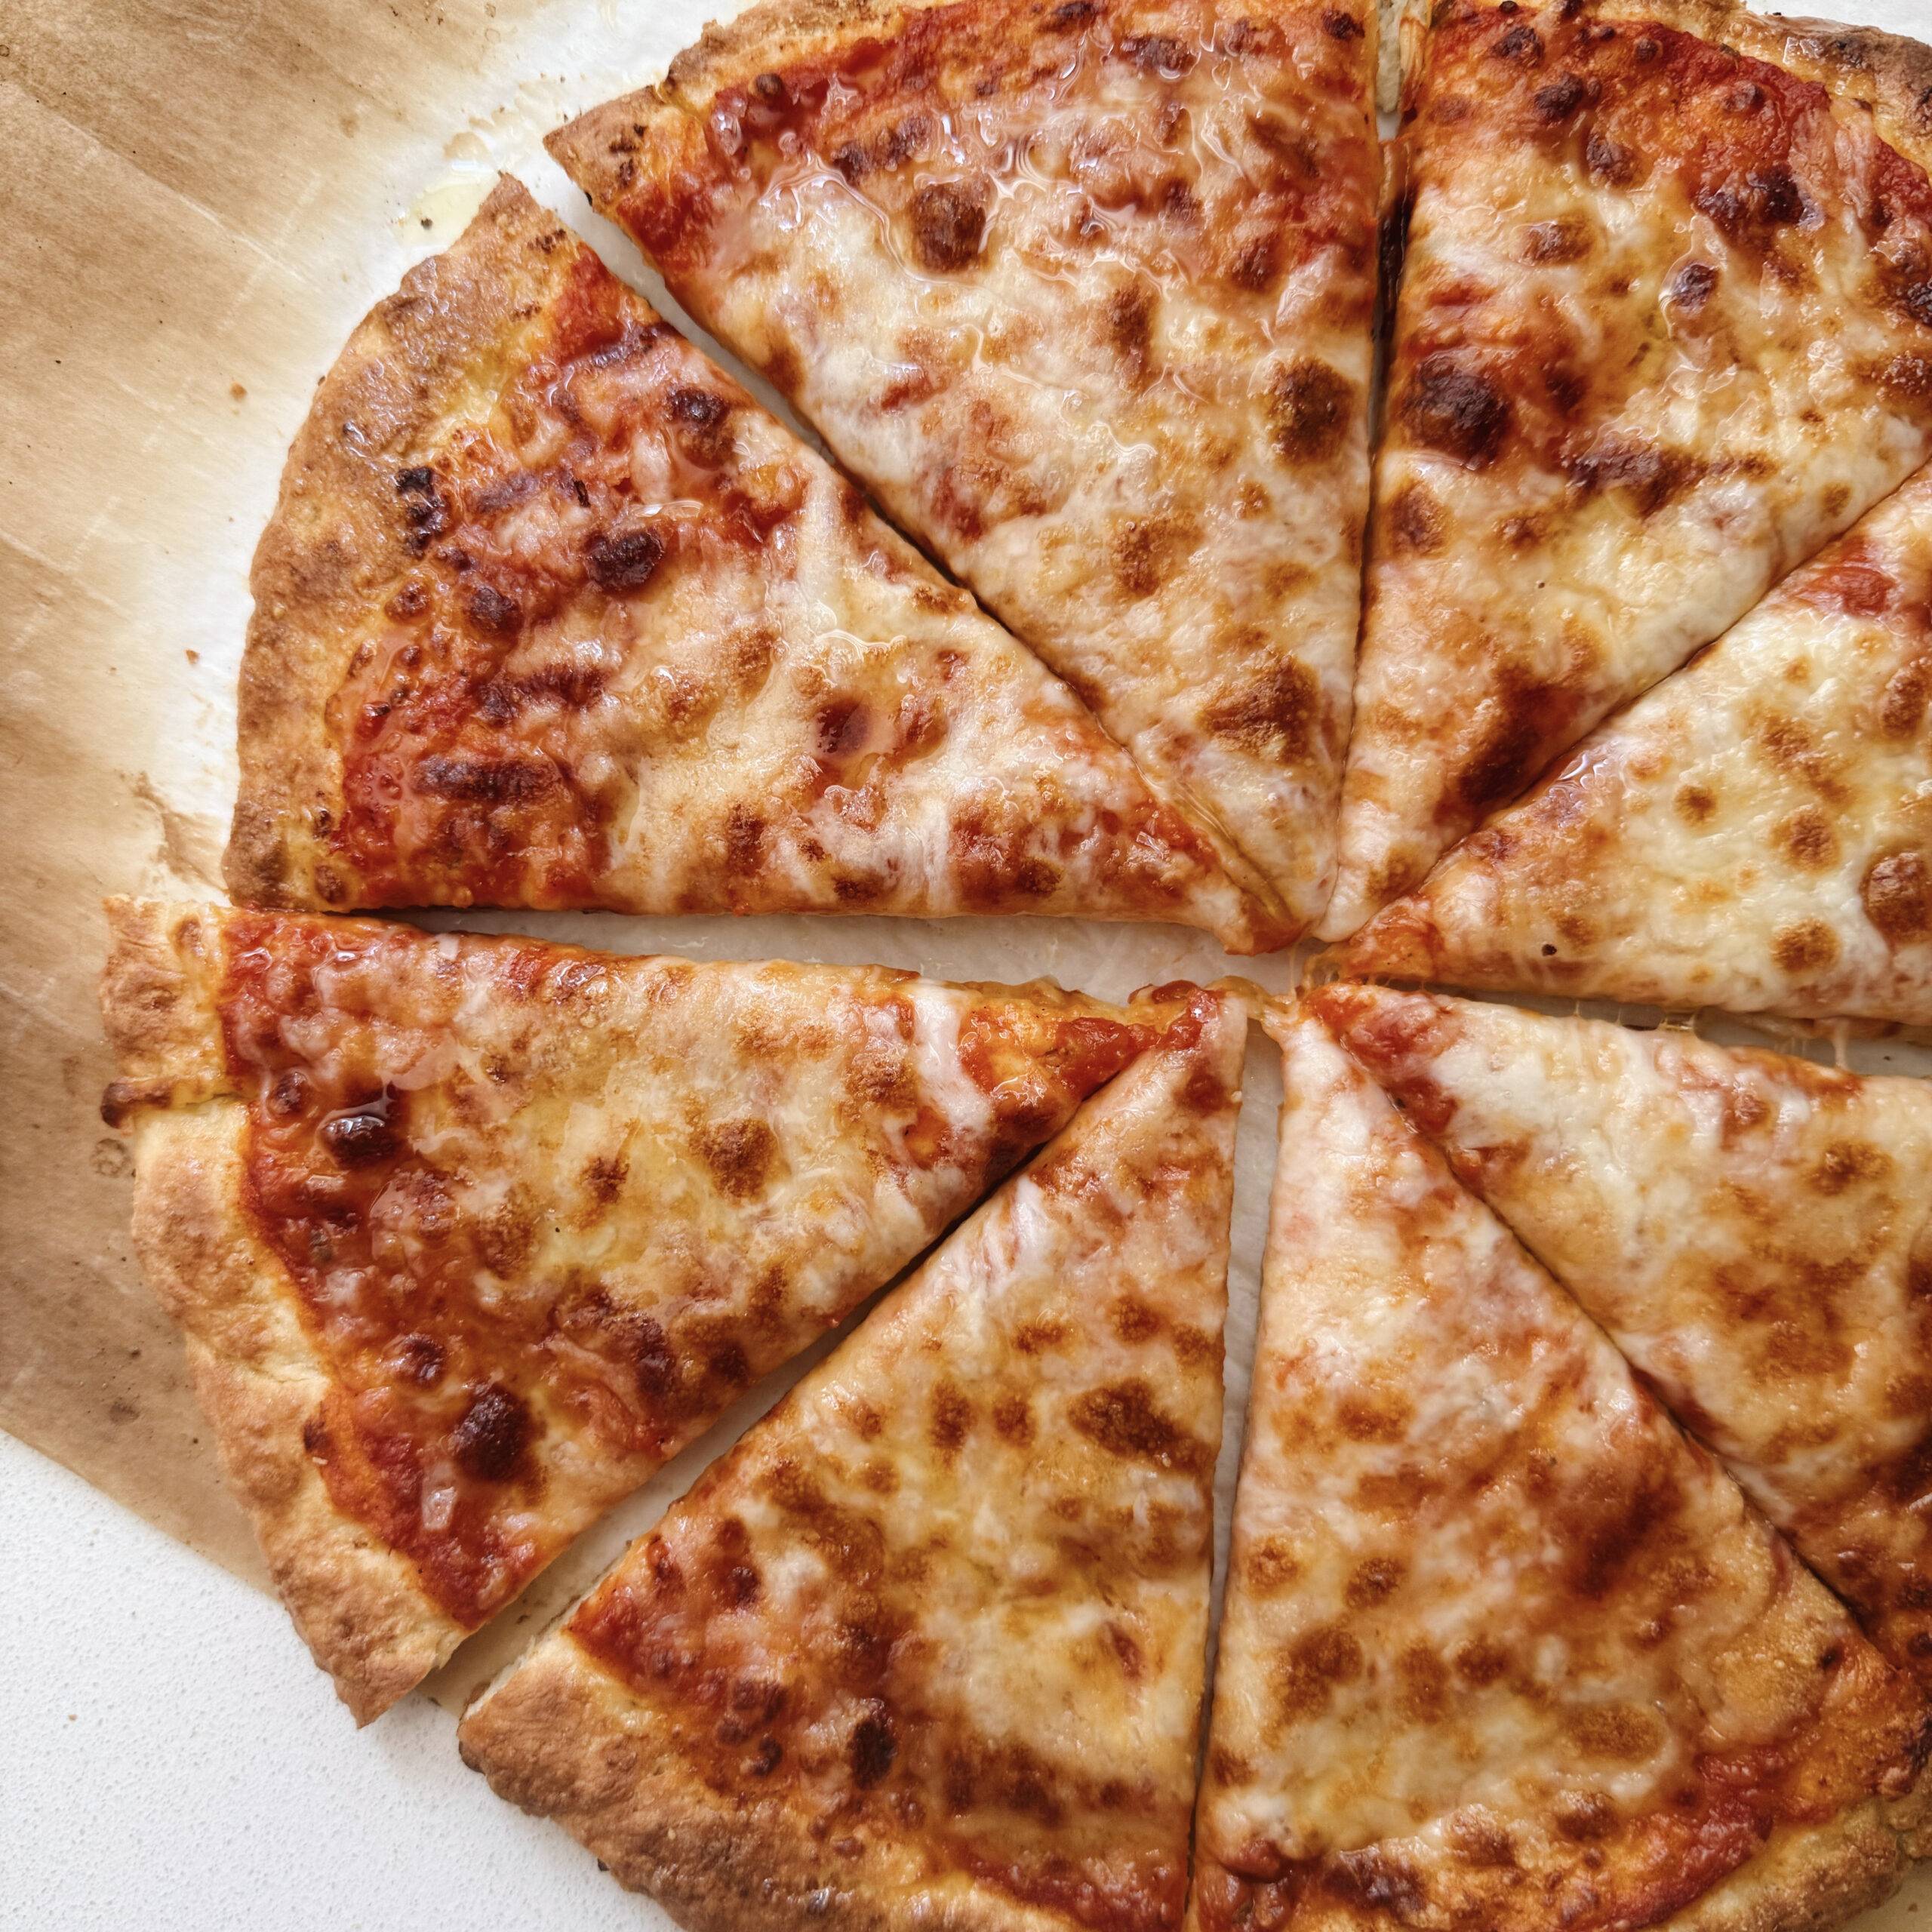
Bake until melty and crispy and devour! This is so good.
Frequently Asked Questions About This Pizza
Can you use something other than cottage cheese?
Yes, you could use Greek yogurt – I never have but the original recipe from Fit Foodie Finds recommends a number of options.
Is it necessary to blend the cottage cheese first?
Yes, I would recommend it. When I tried it without blending it, it “turned out” fine but it was more gummy and I did not enjoy the texture as much. I think really blending / borderline whipping the cottage cheese works some air into the dough to make it pleasantly chewy and lighter.
Can you use gluten-free flour?
I haven’t tried it but I would assume it will work!
Will the pizza hold up with other toppings in addition to the sauce and cheese?
Yes! Generally I find that less is more when it comes to pizza toppings, but it can for sure hold up to a few extras besides just the sauce and cheese.
How can I use up the rest of the carton of cottage cheese?
I have a few options, and all of them are desserts that would pair nicely with this pizza! 🙂
– High-Protein Tiramisu
– Emergency Peach Cobbler
– Blueberry Pie Bowls

Pizza with Cottage Cheese Crust
- Total Time: 30 minutes
- Yield: 3–4 servings 1x
Description
Pizza with a 4-ingredient cottage cheese crust. That actually tastes good. What is happening.
Ingredients
Units
Scale
The amounts written below will yield a thinner crust. You can also 1.5x these amounts to get a thicker crust! When I make it to feed our entire family (2 adults + 2 kids), I do the 1.5x amounts.
For the crust:
- 1 cup cottage cheese
- 1 cup flour + a few tablespoons for dusting
- 1 teaspoons baking powder
- 1 teaspoons coarse kosher salt
- 1–2 tablespoons olive oil
For the pizza:
- 1/4 to 1/3 cup sauce (I’ve been using Rao’s marinara)
- 1/3 to 1/2 cup shredded mozzarella cheese
- 1/4 to 1/2 cup grated Parmesan cheese
Instructions
- Preheat: Preheat the oven to 450 degrees and place a rack at the highest position, near the top.
- Prep Cottage Cheese: Blend the cottage cheese until smooth.
- Make Dough for Crust: Place blended cottage cheese in a bowl; mix with the flour, baking powder and salt until a dough starts to come together. It will start to get kind of shaggy, crumbly, and sticky – use your hands to really bring it together. I usually turn it out on the counter and give it a few squishes, coating with a bit of extra flour, to make it into a cohesive ball.
- Form The Crust: Place a sheet of parchment on a pizza pan or baking sheet. Place the dough on the parchment and press into a circle that is about 10-12 inches in diameter. It is a pretty bready crust, so you want to really press it out into a thinner, wider surface area.
- Prep The Crust: Rub the top of the crust with olive oil.
- Pre-Bake The Crust: Place in the oven; bake (no toppings) for 8 minutes.
- Add Sauce and Cheese: Remove from oven. Spread with sauce and top with the two cheeses. Bake on that same top rack for another 5 minutes to melt the cheeses.
- Broil and Finish: Finally, broil for 2-3 minutes until the cheese and crust edges are deeply golden, like the picture. I like to sprinkle the slices with red pepper flakes, drizzle with olive oil or hot honey, and dip into more sauce! It’s too good!
Notes
Technically you don’t need to blend the cottage cheese – it will work and the curds will melt, but it gives the crust a more gummy texture.
I use the Beast Mini Blender for blending the cottage cheese and it works so well. It gets the consistency nice and whipped and light, which I think yields a really amazing crust!
- Prep Time: 15 minutes
- Cook Time: 15 minutes
- Category: Dinner
- Method: Bake
- Cuisine: American
Keywords: easy pizza crust, cottage cheese recipe, cottage cheese pizza crust
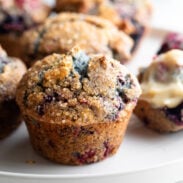
More High Protein Easy Meals

March 9, 2025

Nice to meet you!
I’m Lindsay and I ♡ FOOD. I used to be a teacher, and now making food and writing about it online is my full-time job. I love talking with people about food, and I'm so glad you're here.
Did you make a recipe? Tag @pinchofyum on Instagram so we can find you!

Wondering if anyone has tried this with gf flour?
this is my Q too! tempted to just wing it and see!
Haha, came here to see the same thing. I think I’m going to try it tonight with the King Arthur gf bread flour since it has psyllium husk in it and should make a more bendy crust. I’ll report back 🙂
I’d love to know how the GF option worked!!
Just a reminder for all those seeing this recommendation, King Arthur GF Bread flour is made with gluten free WHEAT STARCH. So if you have an allergy to wheat or a problem with wheat itself, you shouldn’t use this!!
@amaka this is the ingredient list from KA GF flour – what are you talking about ?? No wheat just rices and tapioca and some vitamin/minerals.
Ingredients
Specialty Flour Blend (rice flour, tapioca starch), Potato Starch, Whole Grain Brown Rice Flour, Vitamin and Mineral Blend [calcium carbonate, niacinamide (vitamin b3), reduced iron, thiamin hydrochloride (vitamin b1), riboflavin (vitamin b2)].
Hi Jen! A commenter on the original recipe at Fit Foodie Finds tried this with all purpose gluten free flour, and had great results.
Yes! I made this last night with Bob’s GF 1 to 1 Baking flour. It was delicious. I followed Lindsay’s recipe exactly but found my crust wasn’t crispy enough after the allotted time. I simply left it in the oven a bit longer. It was so good though! My kids ate it too – always high praise! =)
Glad to hear this, Jessica! Thanks so much for sharing!
Has anyone tried to bake the crust on a pizza stone? I’ve made the cottage cheese flatbread but it’s too runny to put on it
Try using it with parchment paper.
Recipes look so yummy and healthy
Wow! Such an easy, delicious recipe with bonus protein boost. I used an immersion blender for my cottage cheese (bit less dishes). For my oven, next time I will do the pre bake lower in the oven to help get the bottom a bit crispier. Highly recommend the chili flakes and honey.
A new go to! Thank you 🙂
After the initial bake, I removed the crust from the parchment and placed it directly on the pan, and that helped the bottom crisp up.
Thank you for sharing this part. Inhad the same problem. The bottom didn’t really crisp at all. I’m trying this next time!!
We’re so glad to hear this, Melissa! Thanks for the review!
Can you use gluten free flour?
A commenter on the original recipe at Fit Foodie Finds tried this with all purpose gluten free flour, and had great results.
Can you use any flour? Like would Almond flour also work for this? Thank you!
That was my question too! Would love to be able to use almond flour.
We haven’t tested this with almond flour, so we can’t say if it’d work. A commenter on the original recipe at Fit Foodie Finds tried this with all purpose gluten free flour, and had great results.
I tried almond flour and it didn’t rise and was soft. It was more like a wrap, which I was happy to use anyway.
I love your cottage cheese 🧀 pizza
My husband has a yeast allergy but loves pizza. This is life changing for him! Thank you!!! It’s delicious!!!!! I made it for lunch today. My only recommendation is to remove the parchment paper before broiling because it caught on fire in the oven ha ha ha 🤣 but thankfully I saw it early and all was well. I will also probably cook it initially a little longer because the middle was a little gummy. I’ll keep practicing lol. Thank you for an amazing recipe! Family favorite for sure
Thanks so much for sharing, Chrystal! So glad it was a hit with your family!
Ok… I seriously loved this! So easy and so delicious! I made it for lunch for my kids and they both enjoyed it!
My dough was still a bit sticky after kneading, so I used a bit of oil on my hands to flatten the dough and shape it & it worked perfectly!
So glad to hear it, Jamie!
Hi, Do i use lowfat, full fat or what in regards to the cottage cheese ? Thanks.
I used fat free and it worked.
Any variety will work, but we typically use 4%!
I made this tonight for our family of 4 adults (including two college students who eat really clean and can eat A LOT). I’ve been making homemade pizza with a traditional flour/yeast recipe for years. This was my first try at an alternative crust. I x the recipe by 2.5 and made 2 regular and one mini pizzas. It was just enough for us to all feel plenty full and VERY satisfied. We ALL LOVED IT!
Awesome, Jennifer! So glad it was a hit!
This is an excellent recipe! I made it tonight using King Arthur’s gluten free bread flour and I could not be more pleased. My only change for next time is I would roll it thinner and cook it on a hot pizza stone. I think it would keep it from getting gummy like GF tends to do.
To keep it low carb can I use almond flour? It looks so good!
That didn’t work well for me but give it a try.
Great question! We haven’t tested this with almond flour, so we can’t say for sure.
Does the fat content on the cottage cheese make a difference? 4% vs 2% vs 0%? I usually prefer full fat, but I’d try lower fat on this if possible.
We typically use 4% for this crust, but any variety will work!
What is best to use, small or large curd cottage cheese? Also, any specific % of fat?
Any size curd will work since you’re blending the cottage cheese. However, if you decide to skip that step, small curd would be best! Any % fat will work, but 2% or 4% will probably give the crust a richer flavor.
I made this last weekend for my husband and myself. Boy did it bring us joy! The secret is to roll it thin, thin, thin to get a good crust on the bottom.
May have to goodbye to delivery after this.
This is basically a flat bread recipe, one I’ve used often but with yogurt instead of your cottage cheese suggestion. It sounds like folks are enjoying it and I’m glad, but for me, I’ll stick to my yeast pizza crust recipe.
Would this work in a high-temperature pizza oven?
Great question, Michael! We haven’t tried, but we wouldn’t recommend it. The dough is very sticky, so you’d need a lot of extra flour and/or cornmeal to prevent sticking. Additionally, this crust is par-baked prior to adding toppings, and if done in a high temp oven, the crust may end up burning.
So, I tried this tonight, and it worked, but I ended up basically doubling the flour to get it to be less sticky and then using semolina flour to launch it into the oven. The prebaking means that when re-launching, it was easy and didn’t stick, but I had better success with the crust not burning when I didn’t put any olive oil on top and kept it in for only about 35 seconds (obviously adjust per temp). I didnt attempt this, but I have heard that if you lower the temp of the flame while your dough is in and then raise it between pizzas to get the stone nice and hot, you can help harden the bottom without burning the top. But if your goal is to be high protein, I’m not sure this achieves the desired result due to all the added flour. I didnt measure because I added more several times, but I suspect I about doubled the flour to get the desired texture. It still had more of a flatbread-like flavor, but was pretty good overall. I’ve made a LOT of pizza and I’d put this in the above average category. Not amazing, but pretty good. Our kids seem to really like it, too. Will probably stick to doing it in the regular oven from now on, though, and I will still probably add some extra flour because it was SO STICKY! But maybe that was because my 3 yo helped me measure the ingredients. 😆
Do you think I could use oat flour?
That’s a great question! We haven’t tested this recipe with oat flour, but we think it’s worth a try. If you give it a go, we’d love to hear back!
Ridiculously delicious! I think I probably should have flattened the crust more, as we like a thin crust pizza. That said, I loved it exactly the way it was. I plopped several spoonfuls of pesto on top of the cheese, just because I had a jar in the fridge. I liked the pesto addition, the hub didn’t. Next time it’ll be half and half:).
I’m curious as to whether or not anyone has tried parbaking mini sized pizza crusts and freezing them? This would be a great fast lunch idea.
I was wondering the same thing!
This was pretty good! Had some issues with the bottom of the crust not crisping so followed recs from other commenters—removed parchment after the par bake and baked on lower rack. Also didn’t get quite the same rise as the photos, but no complaints from my family. Toddler approved!
This is so tasty! I topped with pesto, basil, mozzarella, and cherry tomatoes. I was impressed with the texture of the crust— and no yeast!
This was actually incredible! Made 1.5x the recipe. Par baked the crust on parchment then directly on the rack after adding toppings (we used pepperoni, Italian sausage, sautéed red onion, cherry tomato and sliced fresh mozzarella. Finished with hot honey… so good! Will definitely be going in the rotation. Thanks guys!
Thanks for the recipe!! Trying to do low carb keto. Can you use almond or coconut flour instead?
I made this with gf flour (Namaste cup for cup) and it turned out great!.