Hey-o and happy Friday!
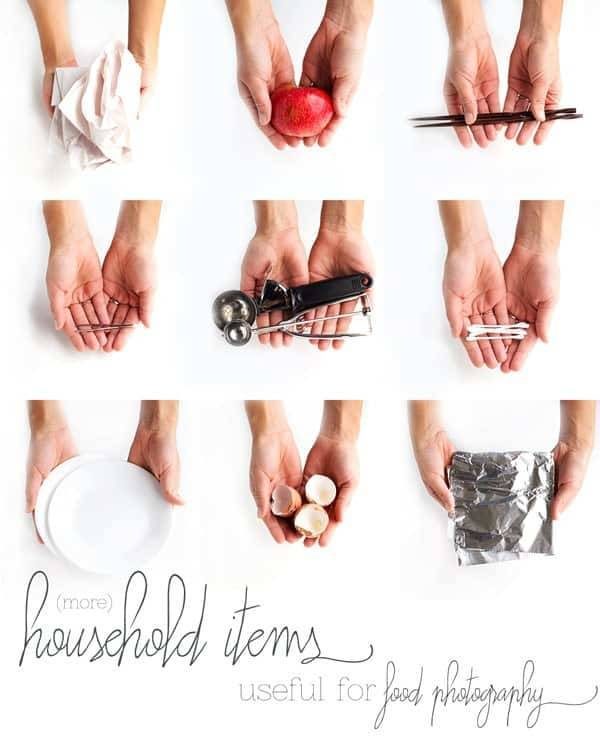
Let’s jump right into the good stuff today – we’ve done this once before, so here goes round two! My goal for today is that you could find one thing that you have in your house right now that can really improve your food photos. Easy!
1. Crumpled Paper
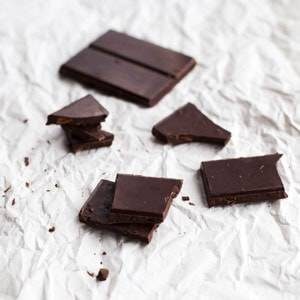
Yep, like a piece of crumpled up paper. Crumple, smooth, and voila. Beautiful texture and vibe for your background. You can adjust how this looks by choosing different colored paper – hello, adorable bakery-style light brown – or crumpling the paper more or less. If I was a person who had lots of time, I might even iron the paper to get it nice and flat so it’d be really easy to work with after I attacked it with my crumple-skills. But I’m not usually the person with lots of time, and I have a feeling you’re not either (life, I tell ya.) and it still worked like a charm for me. Win!
2. Half Of An Apple
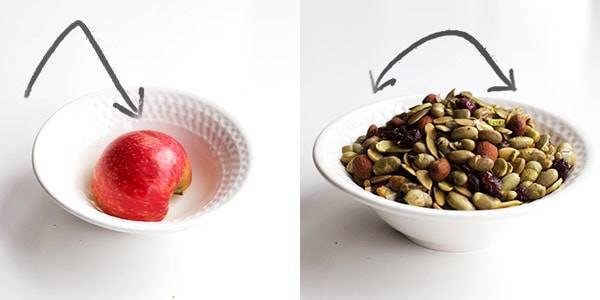
Are you willing to sacrifice half of an apple for an awesome photo? I am, which is why this is one of my favorite tricks of all time. The basic idea is to get the apple to fill the bowl in so that you can “build” your food into a nice rounded heap that will make for a more interesting picture. For example, I always struggle to take pictures of soup. It’s so flat and boring. Bla bla bla. But if it’s a soup that can stick together a bit, I will put a half of an apple upside down in a bowl and then just gently pour my soup over the top, creating a non-flat heap that gives it a have-to-eat-it-NOW kind of quality.
Doesn’t have to be just soup, either – I used a real nice fancy trail mix for this example photo. Whatever you’re photographing, be an architect! Build your food into structured shapes and mounds and heaps using something like a half of an apple or a small bowl, upside down, to create a base.
3. Chopsticks
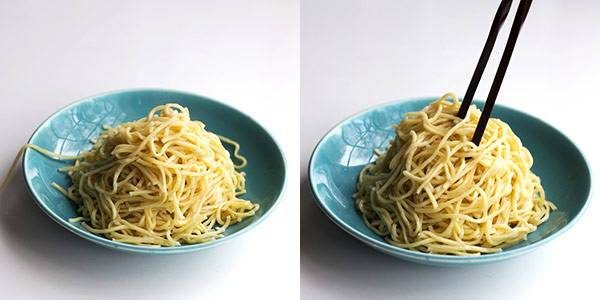
Along the lines of food architecture, chopsticks are a great tool for building a shape that works to showcase your food. For example, with these noodles, I first used the chopsticks to clean up those darn renegade noodles that were not following my plan. Thank you very much. I then stuck the chopsticks directly into the mound and pulled, tugged, wiggled until it was loosened up a bit. And I finished off by using the chopsticks to grab noodles throughout the mound and kind of gently direct them in line with my noodle-twirls. Basically chopsticks allow you more precision without having to get your fingers all messy and/or risk a chubby fingers moment where you knock the whole heap of hot noodles over. Which… happens.
4. Q-Tips
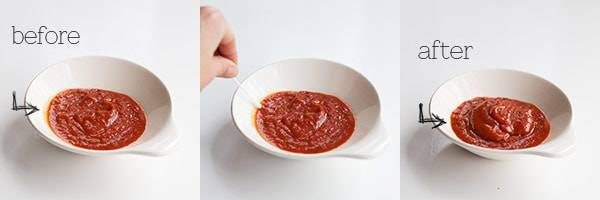
Say hello to these cuties who’ve come to save your soupy, saucy day. I have this thing about soup the sneaks up onto the side of the bowl. My thing is this: it’s gross. Even though it’s not, because it’s actually just the amazing soup itself doing what any liquid in a bowl would do if you were to wiggle it even slightly, which is stick to the side of the bowl. I just, it just, bleh. It bugs me. Especially for pictures.
So Q-Tips are my new go-to for the fix! I just dip the Q-Tip along the edge and it wipes that soup or sauce mark right off the side of the bowl. Bam. One and done.
Although I guess it depends on how much you wiggled the bowl. Maybe more like seven and done.
5. Ice Cream Scoops
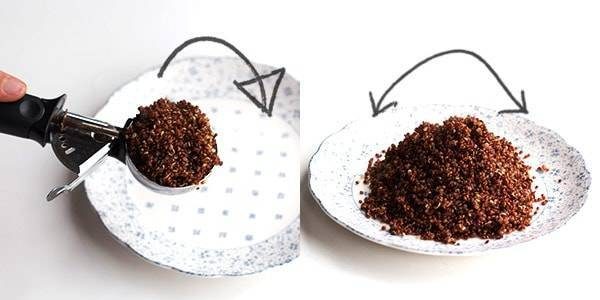
Weeee! I love these little things. I use them for creating perfectly domed muffins and cupcakes by scooping the batter into a nice little mound, like these pumpkin muffins, and I also use them for plating rice or quinoa or anything sticky that looks better in a high pile than flat on a plate. These scoops allow you so much control in your food architecture – you can literally build your food into the perfect shape, like this steaming pile of red quinoa. If I would have tried to create that shape with a wooden spoon, I would still be cleaning up quinoa all over my kitchen.
PS. It doesn’t work quite the same as normal ice cream, because for example, with quinoa on a plate, if you turn the scoop upside down the quinoa will indeed fall all over the place. No good. So just work with it depending on what food you’re styling. If it’s something like, again, quinoa on a plate, turn your scoop gently vs. dumping it over the top, and created a domed shape over the top that way. It’s slick.
6. Tweezers
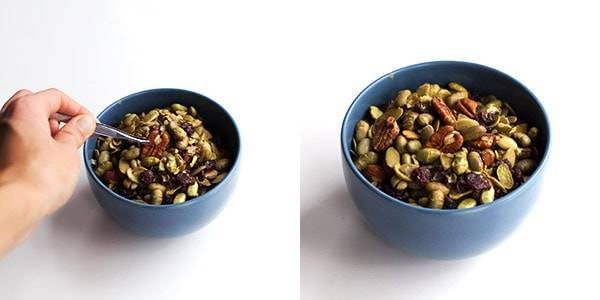
Yet another resource for us chubby fingers peeps to use to get tiny things just where we want them. This is awesome for removing a stray herb that got put where it shouldn’t have, or picking up a sprinkle that you want out of the frosting drip. It’s also great for adding food. For example, with the (repeat) real nice fancy trail mix here, if I wanted to put some pecans throughout the bowl but actually make them look like they’re a part of the mix, I can just grab ’em with the tweezers and kind of nestle them in right where I want them. Do you like when I say nestle in reference to a pecan? I do, too.
7. Small White Plates
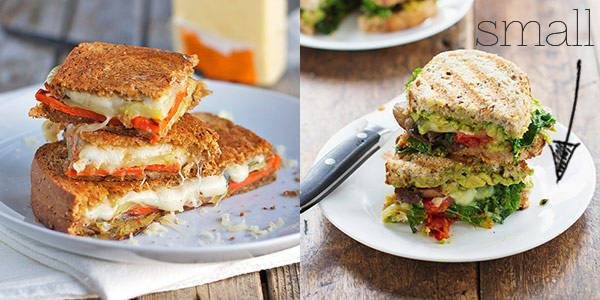
Okay, here’s the thing. I find that in general, my food photographs better on smaller plates. Part of the reason is obvious; there’s less space to fill. If you use a bigger plate, you better have a little side salad or something ready to keep things looking full and interesting because otherwise you have your one or two food items in the center of a big white empty plate universe. But with a small plate, your dish is the star, and suddenly it’s all you can see, all you can think about, maybe overtaking the plate a tiny bit, looking like a nice big serving, and guess what? People are attracted to it because it looks over-the-top yummy and filling. So that’s what I look for when I go propping aka thrifting. Small, white plates, somewhere between a small dinner plate size and a dessert plate size.
8. Eggshells
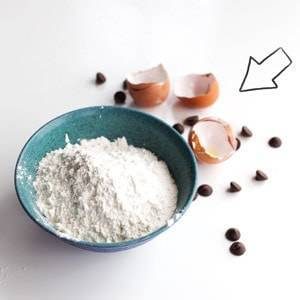
…make an awesome food prop. Especially if they’re brown and especially if they came from your own chickens because you are one of those fun, inspiring people who raises their own chickens. I wanna be you and I might try someday. But anyways.
Eggshells, after they’ve been cracked, have this awesome texture and tell the story of something so charming, like classic farmhouse baking. How cozy. Honestly. I wouldn’t necessarily use eggshells as props for something like, say, lasagna. That might be gross. But muffins, cakes, cookies like I have in the oven right now… fun, fun, and more fun.
By the way, I just keep an egg crate and then put my prettiest cracked shells in there for storing. I literally keep them by my little photography station with all my other props. That way if I happen to be using white eggs instead of the pretty browns *gasp* then I’ll have some on hand for backup.
9. Aluminum Foil
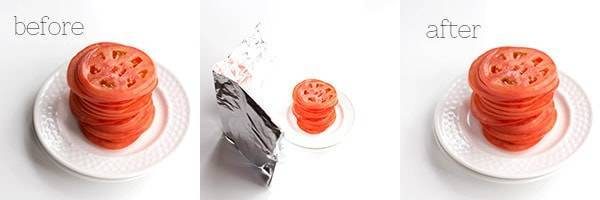
It’s a reflector. That’s really all it is. It folds, it stands, it does whatever you want it to do, plus it’s uber shiny and it bounces light back over your food. So easy, so cheap, so perfectly scrappy.
The best part? IT WORKS REALLY WELL.
10. Chalkboards Or Whiteboards
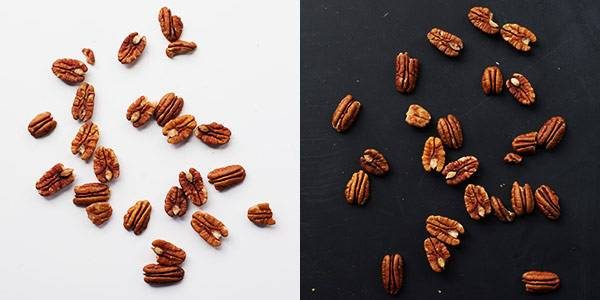
Okay final thought of the day. Two fun background recommendations I have actually happen to be fairly common household items: chalkboard and whiteboard. I will acknowledge that those of us who don’t homeschool may need to make a trip out to Home Depot. But I did just that, got myself a few big sheets of each for, what, like, $20 total? It was really affordable. And now I just layer them on top of my table for alternate backgrounds from time to time.
The bummer about the whiteboard is that it’s shiny and it scratches easily. The blackboard gets grease marks on it and they can be hard to get off. But the same is true for my old wood boards as well, so what the heck? I just swap out the old one for a new one when it has too many scratches. I can get 4 boards out of one sheet if they cut it for me, so I’ve got a whole stash in my garage. Here’s a post for pumpkin pancakes with pictures using blackboard as the background, and here’s a post of a peach green smoothie with pictures using whiteboard.
If you know of any other great replacements for all white or all black surfaces that are less shiny and/or don’t scratch and/or don’t stain, I’d love to hear them!
And if you’re looking for some on the fly, these two might be your ticket.
Tasty Food Photography
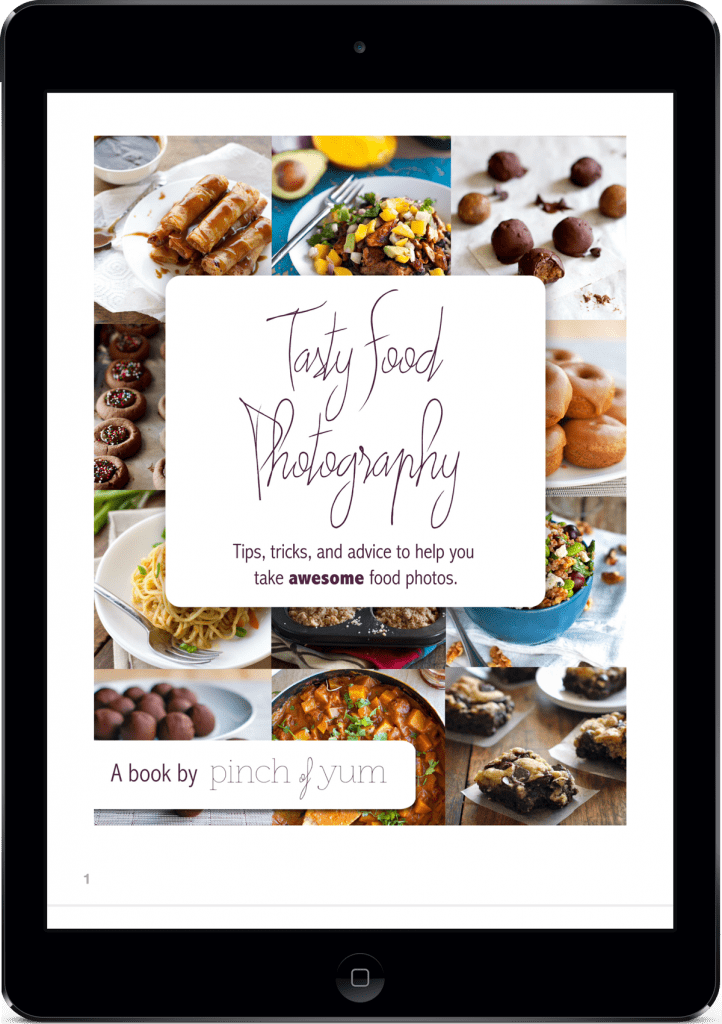
Thanks for reading, food blog and pho-tog friends! If you want to learn more about food photography you can check out my eBook, Tasty Food Photography.

Thanks for being here to talk shop with me today! More food on Monday.

Tnx for the information
Thanks so much for sharing these, so clever!
really really good reads. Good educative informative tips for upcoming photographers.
I never would have thought about the half an apple! Genius. Now I need to head to the store for some apples 🙂
Really really informative and helpfull! Big thanks for the info, Mrs
Really really informative and helpfull! Big thanks for the info, ma’am
Thank you for your great help with photography. I’m taking your food photography tips from your eBook and from here and experimenting with adapting them to knitting photography. I’m quite the novice but enjoying learning. For number 5, using the ice cream scoop, have you tried inverting the plate over your full scoop and flipping the two of them at once? Maybe that doesn’t work with the slightly “bowled” edge of the plate. Thanks again.
You are a beautiful person. Thank you for this, and your last article. I’m a photography student, and I usually have access to an awesome studio at my university (BYU), but your tips here have given me so many ideas to replicate the impossibly expensive equipment I always need.
Thanks
Excellent tips,, i love the one with apply..have often struggled filling my entire bowl,, this idea of half apple or any small bowl would definitely improve my photography..
These are great, but I really wish you’d edit the chopstick part. I think they can make a great prop for a photo, but they should NEVER be stuck vertically into your food. It’s very disrespectful and even offensive to East Asian cultures that use chopsticks since it’s so taboo. That picture alone will make me not read someone’s blog, including yours. I saw your comment earlier with regards to the chopsticks, and it being unintentional, yet you haven’t updated the post about cultural sensitivity and you literally recommend sticking the chopsticks into the food. When people talk about cultural appropriation in terms of food, this is the kind of stuff they’re referring to.
Even more ideas! Hurray! Thank you for sharing your knowledge.
I want to smack my forehead and say Why didn’t I think of that?? The solutions are so great and basic. Most of the items I have in my house and never thought to use them. Also foreseps(sp?) are great for moving things. I’ve got the locking type. My hubby originally got them for fishing but didn’t use them. They are nice a long!! great post Lindsay. Also I just thought of the apple thing and how about those cheap Styrofoam balls at the craft stores?? I believe they even come in half spheres.
Great tips! Thanks Marisa!
Thanks for these great tips.
For black background I use a black tablecloth (I got one at Christmas $15 from Aldi) and for white background I use the closed lid of the washing machine and take my photos in the laundry where there is natural light coming in. I don’t have a fancy camera w lens just a instamatic Samsung or my phone camera. I also use a bright blue tablecloth or red background sometimes its just a coloured chopping board.
THIS IS SO HELPFUL! Like, seriously, thankyousoverymuch. It’s hard starting out in the food blogging industry and these are lifesaving tips. <3
Glad to hear that Elim!
Great tips, thank you!
You don’t have to sacrifice an apple btw, you can use a small bowl instead. Or a small dog toy ball, cut into half, you can re-use it anytime 🙂
I was smiling reading about the apple trick nd behind the scene tricks….As usual brilliant idea and great tips 🙂
OMG this is so great! I’m definitely going to use your foil idea to bounce the light. ESP since I could never get rid of the damn shadows… lol
Glad to hear it, Cynthia!
Thanks for the tips! I love the tweezer idea… it had never crossed my mind and boy do I need help in the cleanup/styling department sometimes! lol… aloha 🙂
“If you know of any other great replacements for all white or all black surfaces that are less shiny and/or don’t scratch and/or don’t stain, I’d love to hear them!”
Blackboard paint. Let the scratches and oil stains fall where they may, and just apply a fresh coat when it all gets a bit too gross for making beautiful photos.
https://www.diy.com/?noCookies=false
Great idea! Thanks Josh!
I have no idea how you manage to fit in everything that you do between your job and this blog and your books…I actually get tired reading all the “ground you’ve covered”! Another idea for backgrounds is to go to your local tile shop and ask them if you can wade through their rubbish! I know that sounds weird, but tile and paver shops often have leftover stock – odds and sods which they can’t sell but don’t want to chuck and the larger ones make perfect backgrounds – lots of different colours and textures and yes you can get matte ones.
What a great idea Nagi! I love it! Thanks for the comment!
Super post! Thank you very much…all great ideas.
This is a brilliant post! Going to crupmple up some kraft paper right now to add to my backdrops 🙂 For white board our dollar stores sell white foamcore sheets, around 2′ x 3′ in the office supplies. Not shiny and really sturdy. I also use them as reflectors if shiny gives too much glare. And I painted one with chalkboard paint for black.
I really love these ideas, and i can`t wait to try them.
Thanks!!!
This is going to sound funny, but I love to shoot food photos on the top of our white front loading washing machine. The top makes a great white background. 🙂 Thanks so much for these tips! I love your blog. 🙂
Hilarious! Thanks Joy!
are you serious! I do that too, and i thought that it was just one of my weird perks!
how cool!
Awesome tips. Thank you a lot 🙂