
Featured comment
I made these to bring to the office for a Christmas treat and they turned out picture perfect. They were also perfectly yummy!
*drools*
I am totally smitten with this. Consumed. Overwhelmed. Carried Away. Which is good, because I could use a little food distraction so I don’t dwell on the fact that I’m going back to work today after three and a half years of winter break. I love my job, you guys. But I at the moment I love my comfies and my bed just a leetle beet more.
This bread makes me think of happier times that did not involve me trying to start my sub zero temperature car in a very sub zero temperature garage. In heels. Cute.
It reminds me of the happy/warm time when Bjork and I went to a baking class led by the lovely Bea Ojakangas, expert in Scandinavian baking and author of several award-winning cookbooks. Can I just say? What a doll.
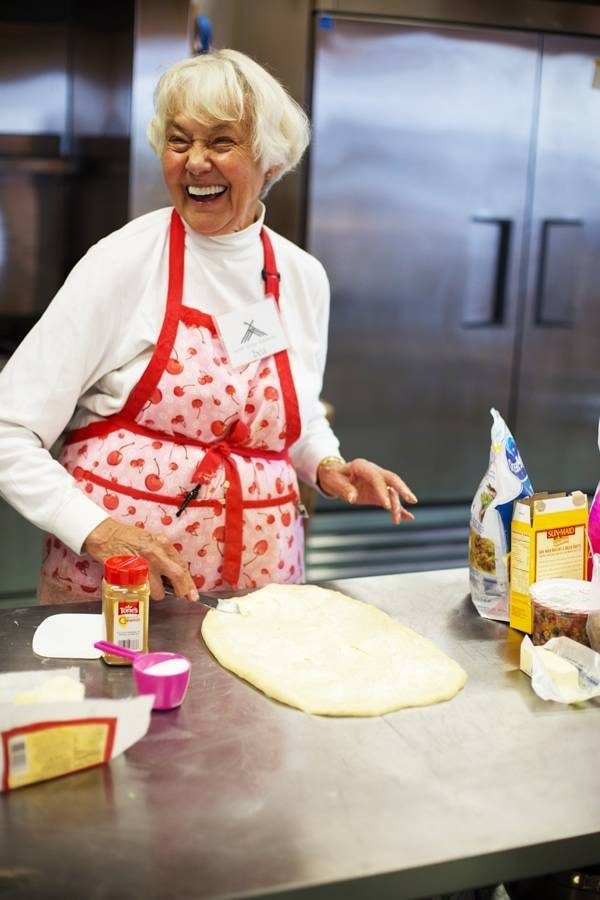
One of the things Bea taught us how to make was called Pulla. Or Pulla bread. Pulla loaves? I guess I’m not really sure how to say that, but I am sure that this bread was unique because it’s mildly sweet with crushed cardamom seeds and it’s 190% delicious. She had us make a whole big batch of Pulla dough and then divide it into three sections, to make three kinds of loaves with it. But I only remember one, and that was this cinnamon roll pull apart bread loaf. It actually had a really fancy, official Scandinavian name that I don’t remember. Carb brain freeze.
I’m just calling it Homemade Cinnamon Roll Pull Apart Bread, half because it’s easier to remember and half because it has the word “Pulla” in it. And half because it doesn’t have cardamom in it so it’s not technically Pulla, which is why I didn’t want to actually name it Pulla.
It’s complicated.
In case you forgot: I am not a bread baker. Please see this if you need confirmation.
Here’s the thing about yeasted bread – it takes fooooooooooor evvvvvvvverrrrrrr. And then when it doesn’t turn out, I obviously handle it like a normal person and I never cry and pout and pull my hair out because I’ve been waiting all morning for a large slice of warm, soft, fluffy bread soaked in honey butter. What, me? No, never.
I definitely didn’t get this right on the first try and there may or may not have been hair pullage.
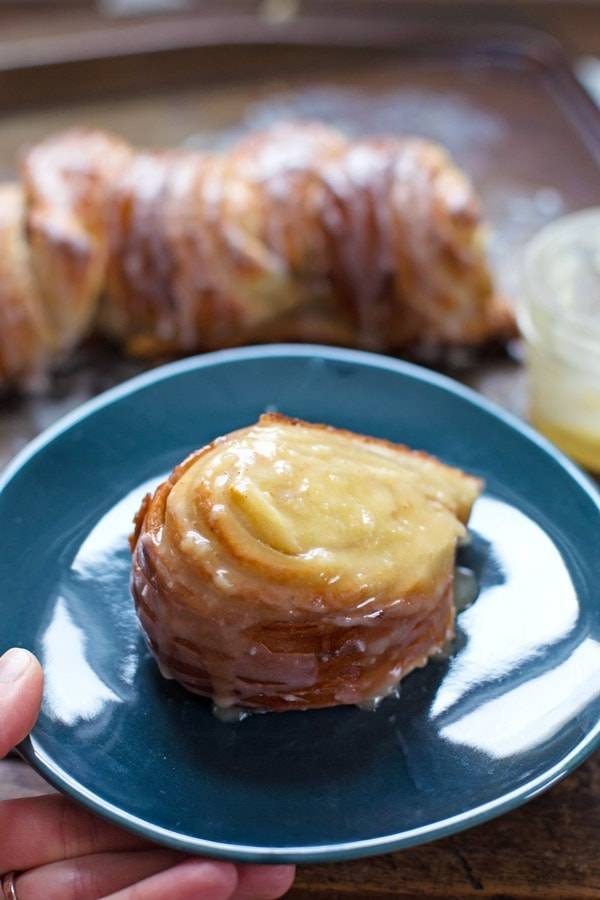
But then by some frosted cinnamon roll miracle, I got it right. Soft, cinnamony, and fresh out of the oven right.
At our class, Bea taught me that you really have to rely on your sense of feeling (like literally, your touch) and your good judgement to make bread just right. When we were baking with her, I would touch the dough and it would become a nightmare. Totally unworkable and sticking all over my hands. And then she’d take it from me and give it some gentle TLC and it would turn into silk in about 5 seconds. Some people just have the touch.
The takeaways were a) don’t overflour (apparently I am a complete flour hog) and b) be gentle with the dough and let it rest when it becomes crabby; it will respond well.
Oh, and c) a KitchenAid mixer reeeeally helps.
The bread is just meant for perfectly cozy mornings where school is canceled (but I won’t dwell in the past anymore, promise) and you’re inside with a blanket and a hot mug of coffee and a little ambition.
And a hungry tummy.
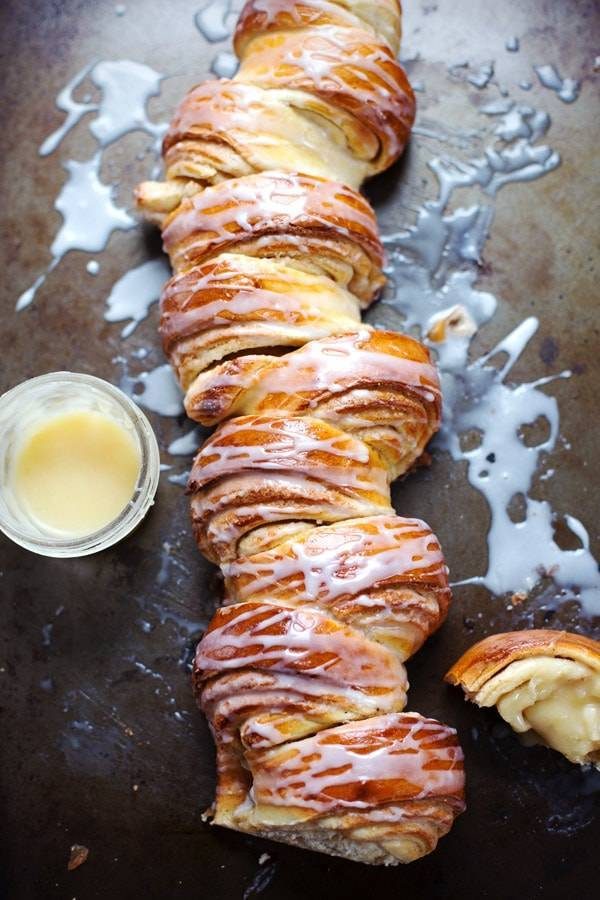
I’ll just say these last two words to you: HONEY BUTTER.

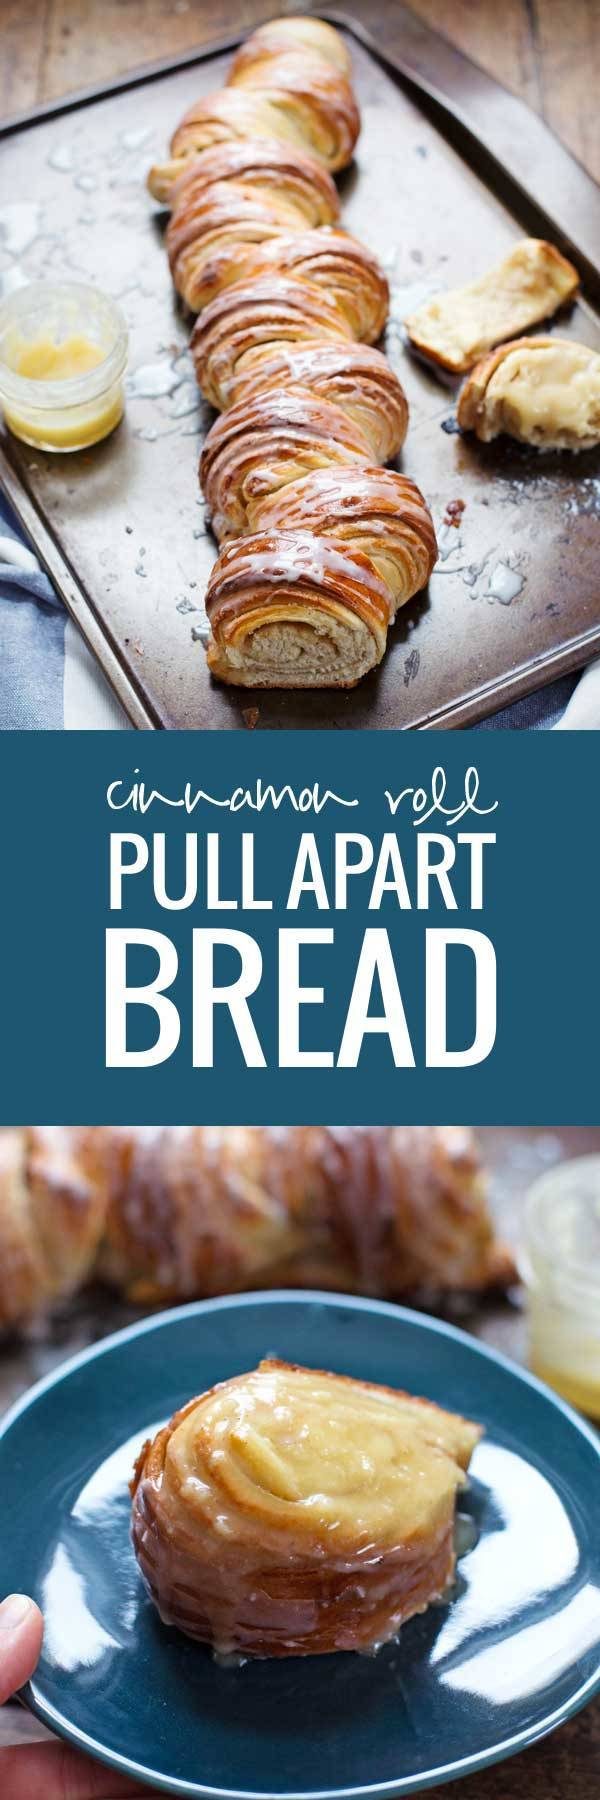
Homemade Cinnamon Roll Pull Apart Bread
- Total Time: 3 hours
- Yield: makes 2 loaves 1x
Description
This homemade Cinnamon Roll Pull Apart Bread is everything you love about cinnamon rolls in a pull apart bread form.
Ingredients
- 1 package (2 1/2 teaspoons) active dry yeast
- 1/2 cup warm water
- 2 cups mik, scalded and cooled to lukewarm
- 3/4 cup sugar
- 1 teaspoon salt
- 4 eggs, beaten
- 8–9 cups sifted white flour (lean towards 8)
- 1/2 cup melted butter
- 4 tablespoons solid butter
- 2 tablespoons cinnamon
- 1 1/2 cup sugar ** see notes
For the Glaze
- 1 egg, beaten
- 1 cup powdered sugar
- 2 tablespoons milk or cream
- 1/2 teaspoon vanilla
Instructions
- Make the Dough: Dissolve the yeast in the warm water; it should be frothy. Transfer to the bowl of a stand mixer. Add mix the milk, sugar, salt, eggs, and 2 cups of flour and mix on low speed until the dough is smooth and elastic. Add 3 cups of the flour and mix at a slightly higher speed; the dough should be quite smooth and glossy in appearance. Add the melted butter and stir in well. Mix again until the dough looks glossy. Stir in the remaining flour until a stiff dough forms.
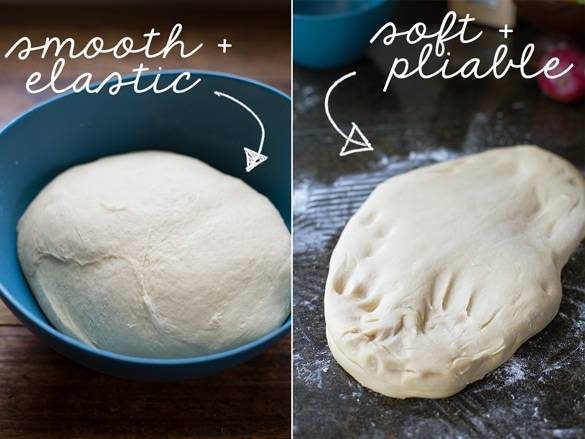
- Rest and Knead: Turn out the dough onto a surface dusted with flour. Gently toss it around a few times so it becomes lightly coated with flour. Place back in the mixing bowl, cover, and let the dough rest 15 minutes. Knead (with your mixer if possible) until smooth and satiny. KitchenAid says you should the dough hook on Speed 2 for four minutes for kneading bread, which is what I did. Place in a lightly greased mixing bowl, cover with plastic wrap or a damp towel, and let rise in a warm place for about 1 hour until doubled in bulk. It should be very soft and workable, like the picture in the post.
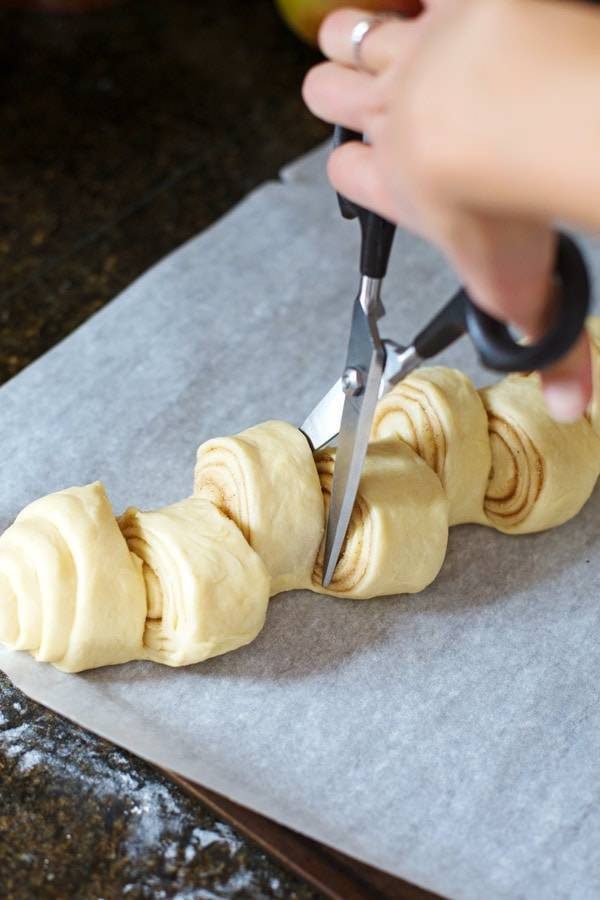
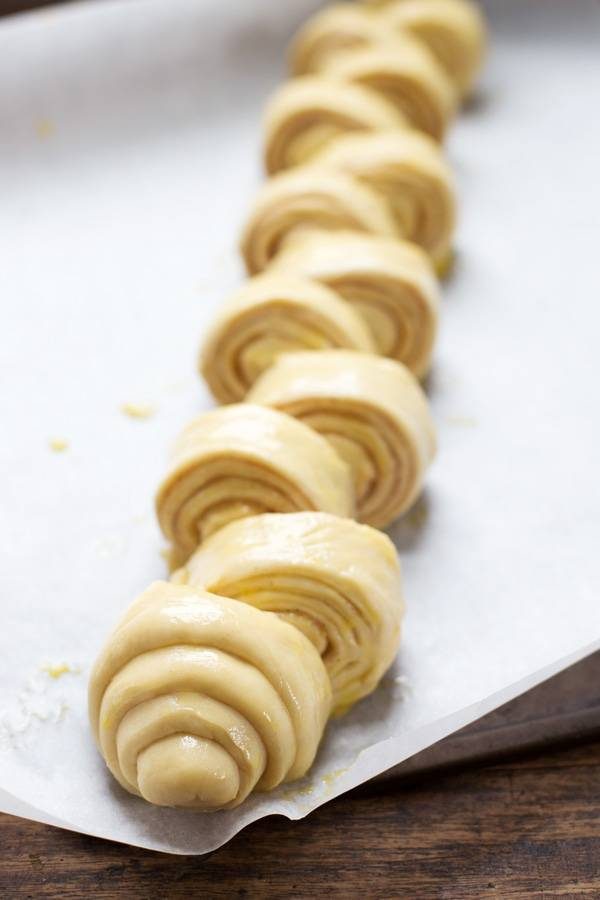
- Roll and Cut the Bread: On a floured surface, divide the dough into 2 parts to make 2 loaves. For each loaf, take one part at a time and roll it into a large rectangle. I didn’t ever measure mine but it was probably 9×13, about 1/2 inch thick. Mix the cinnamon and sugar together. Spread 2 tablespoons butter onto each dough rectangle, sprinkle with just enough cinnamon sugar to cover, and roll into a log starting on the long side (short works too – just depends on how you want the loaf to be shaped and how long your baking sheet is). Place seam side down on a baking sheet lined with parchment paper. Cut diagonal slices like pictured in the post, almost down the bottom of the log. Arrange the cut sections so that they lean to alternating sides. Let rise for about 20 minutes to puff up a little bit. Preheat the oven to 375 degrees.
- Bake: Brush the loaves with the beaten egg. Bake for 20-30 minutes on a baking stone or baking sheet lined with parchment paper. Do not overbake or the loaves will be too dry. Remove from the oven when a light golden-brown. Let cool slightly. Whisk the powdered sugar, milk, and vanilla together to make a glaze. Pour over the loaf and let set. Slice or pull apart and serve. Yummy!
Notes
Sugar Overflow: The first two times I made this, I had sugar overflow. Well, I did a little bit on the third time, too, but it was just a tiny bit and I was able to easily scrape it off. To avoid the sugar bubbling out and burning on your pan (bleh), make sure your butter is very solid, not melted, when you spread it on the dough. Also, just use enough sugar to cover the dough in a thin layer.
Amount: This recipe makes TWO loaves. I did freeze half of the kneaded and risen dough and then thawed it on the counter overnight and it worked beautifully.
- Prep Time: 2 hours 30 mins
- Cook Time: 30 mins
- Category: Dessert
- Cuisine: American
Keywords: homemade cinnamon roll bread, pull apart cinnamon roll bread, cinnamon roll bread
Hey hey. Fun math equation on how many hours went into this post, just for my fellow nerds who like to know about these kinds of things.
3 hours learning about it and making it at the class + 3 hours for my first (failed) attempt at home + 3 hours for my second (successful) attempt at home + 1 hour to photograph + 1 hour to import, edit, upload, and tag photos + 2 hours to write recipe and text =
13 Hours Spent On This Post.
And I love you goodbye.


1: Bea Ojakangas – SO FREAKIN ADORABLE! I want to be her.
2: Please have school cancelled days more often if it means we get to eat cinnamon-roll-pull-apart-bread.
3. Thank you for spending 13 HOURS on this. I <3 you
4. I have never made bread before, but my tastebuds are telling me that this needs to happen.
This looks incredible Lindsay! Pinned!
Yum!
P.S. I’ve also been told off for being a flour hog.
There is a very easy fix for that….BUTTER! My mother uses cooking spray to coat her kitchen counter before rolling dough. I used butter on both the counter and the rolling pin and nothing sticks. And it is soooo much easier to clean butter off a counter than it is flour!
OMG Michelle, this is the best tip of 2014! Wow…I make bread often enough, why didn’t I think of that?
You don’t want to do the cooking spray our butter on your work surface. There is a reason that you flour your surface. As you work the dough. You are adding in more flour but also at the same time activating the gluten and the yeast to join together and give you the life and the density that it needs. There is normaly two reasons flour is a hassle for some people. 1. they put all the recipe calls for all at one time into it. This is an Absolute No No for bread. Add half of what it calls for and then keep adding by 1/2 cup measurements. Remember your dough is still going to get the rest of the flour it needs when you Knead the Dough on your floured surface. The other thing that makes bread hard for some to do is the Kneading. It is one of the most important steps in making bread. Shortcuts in this area often ends up in not so great bread. Kneading should take NO LESS than 10 min using a stand mixer. If you are doing it by hand 10-20 min of real effort kneading. Set a timer and keep track it is important. You can take breaks and come back to it. It is in this stage that you are setting up the Gluten fibers and the rest to give you that perfect loaf. Hope this helps.
some how I think that if I will not put the flour at once the gluten will not open evenly. because as we work with the dough the gluten start to became elastic.
Oh, don’t those look delicious! I love the descriptive photos too, they are very helpful when making this type of recipe.
Stay warm everyone!
looks delicious *drools* can’t remember the last time I had cinnamon rolls.
Great photos!
Thank you Sandy!
This is so beautiful! I just recently wrote a post about quick method croissants which were inspired by Bea… I am rather envious that you got to meet her. I will be baking this as soon as I can get to my kitchen
What a labor of love Lindsay! This bread looks worth every minute though. I hope your day back at work goes well. Stay warm, and if all else fails: carbs.
Looks AM-AZ-ING!!!! Bea Ojakangas is so cute!!!!! I hope your school is cancelled for the rest of the week. I love having you make amazing things for us. 😉
She was every bit as adorable in person!
This looks yummy! I want to make these for my babies Saturday. I new to the baking world so this may be a silly question. What do you mean by “turn out the dough”?
Just gently scrape the sides of the dough ball away from the bowl, so it kind of falls or “turns” out of the bowl and onto the counter. It’s really hard to literally just scrape it up into your hands and transport it to the counter or the work surface, so you kind of “turn it” out of the bowl. Does that make sense?
Yes, but after you gently turn out the dough, you put it right back into the bowl???? Why??? Is this correct? Is there a step missing?
You’re right Niki, the way I wrote it didn’t really make sense. I think the purpose is just that it coats the dough with flour and makes it easier to handle because after mixing it all up, it’s pretty sticky. Bea took it out, gently tossed it around so it got a little floury on the outside and was manageable to hold, touch, etc, and then put it back in the bowl. I added a note to the recipe about that.
Such a beautiful bread. I really need to try this.
Oh my gosh, what a yummy looking cinnamon rolls!! I’m in love with this recipe! Already pinned and on my list to try asap!
What a fantastic and innovative way to make cinnamon rolls (i.e., my fave thing in the whole world).
I have a question though, how did you managed to not eat it all right out of the oven. I most certainly would have done it, completely disregarding the fact that I should have taken pictures…talking about priorites 😉
Haha, love this. I’m glad you put the total time down because it’s ALWAYS longer than you’d think, right?
When I started counting up the hours I couldn’t believe it. But that’s what we do! 😉
oh heaven. i need some time with pulla, alone time.
It’s amazing what a snow day can do! This looks absolutely beautiful and mouthwatering. Worth every hour, ha!
These look too good. I would not have believed you had any problems with bread unless you posted it. They look prefect!
I am in to cinnamon rolls too; just did a cinnamon roll cake for the blog a few days ago, so I am well ware of the homey sweet goodness they deliver.Thanks for sharing your adventure with bread making!
You are a trooper for putting in 13 hours for 1 post! Thank you for your diligence your rolls turned out beautifully .
Sometimes I am just too stubborn/addicted to bread to let it go.
Wow! Your 13 hours was totally worth it because this looks amazing =)
It’s so gorgeous!! I have a soft spot for cinnamon rolls – they bring back fond memories of my mom baking them on cold winter days. This pull-apart version is so fun and pretty!
Wow! 13 hours! Looks amazing, it was totally worth it, right? 😉 Especially since you get TWO loaves out of it! I love Scandinavian baking. Such great stuff.
Ahh, yeast and me are not friends. But, I did have some success recently with homemade pretzels, but I’m going to have to build up some courage to work with yeast again. But these pictures are gorgeous!
Those were 13 really, really well spent hours!! This bread is simply amazing! I’d give just about anything to pull a piece (or 5!) through the screen!
Lindsay…….this looks like absolute perfection and I would imagine it taste heavenly too! Thirteen hours…..where do you find the time?
Well, this time I found it over 17 days of winter break (no teaching, no getting up early, lots of lazy mornings)! 🙂
How disappointing. They’re most be an error in ther amount of flour. There’s entirely too much liquid for only 3 cups of flour. Then ther directions says add 2 cups, then another 3 cups? Even 5 cups wasn’t enough to make a proper dough.
I am definitely not a baker either. I tried to make biscuits the other day until I noticed that I kept using the wrong flour in two failed attempts. These are gorgeous by the way.
Thanks Meagan!
It look so divine I am going to make some for my kids today. Thank you for share . It is very fun article.