Hey-o and happy Friday!
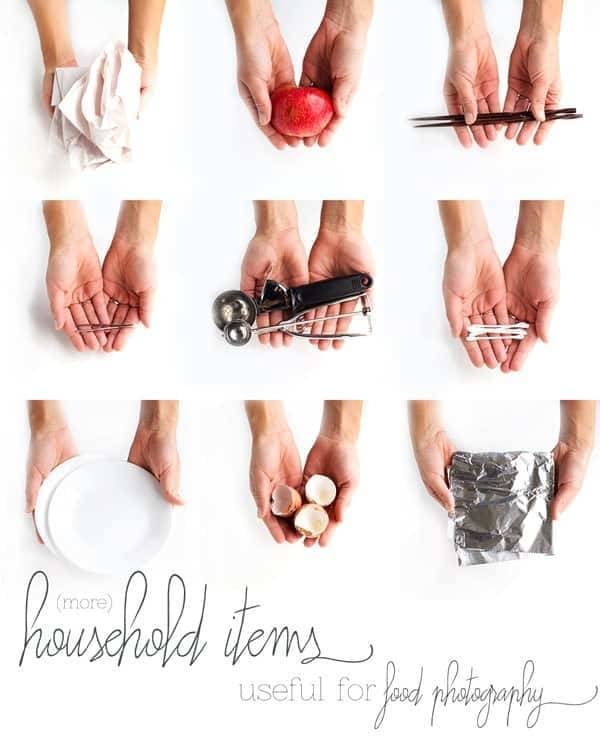
Let’s jump right into the good stuff today – we’ve done this once before, so here goes round two! My goal for today is that you could find one thing that you have in your house right now that can really improve your food photos. Easy!
1. Crumpled Paper
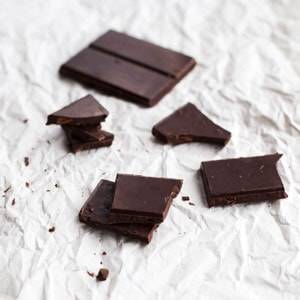
Yep, like a piece of crumpled up paper. Crumple, smooth, and voila. Beautiful texture and vibe for your background. You can adjust how this looks by choosing different colored paper – hello, adorable bakery-style light brown – or crumpling the paper more or less. If I was a person who had lots of time, I might even iron the paper to get it nice and flat so it’d be really easy to work with after I attacked it with my crumple-skills. But I’m not usually the person with lots of time, and I have a feeling you’re not either (life, I tell ya.) and it still worked like a charm for me. Win!
2. Half Of An Apple
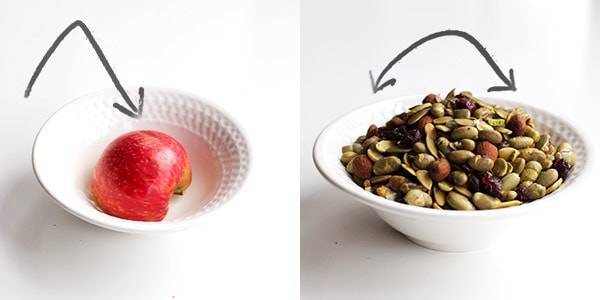
Are you willing to sacrifice half of an apple for an awesome photo? I am, which is why this is one of my favorite tricks of all time. The basic idea is to get the apple to fill the bowl in so that you can “build” your food into a nice rounded heap that will make for a more interesting picture. For example, I always struggle to take pictures of soup. It’s so flat and boring. Bla bla bla. But if it’s a soup that can stick together a bit, I will put a half of an apple upside down in a bowl and then just gently pour my soup over the top, creating a non-flat heap that gives it a have-to-eat-it-NOW kind of quality.
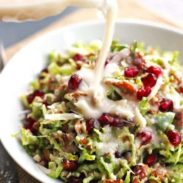
Doesn’t have to be just soup, either – I used a real nice fancy trail mix for this example photo. Whatever you’re photographing, be an architect! Build your food into structured shapes and mounds and heaps using something like a half of an apple or a small bowl, upside down, to create a base.
3. Chopsticks
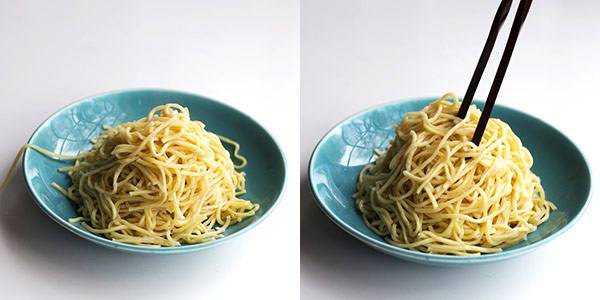
Along the lines of food architecture, chopsticks are a great tool for building a shape that works to showcase your food. For example, with these noodles, I first used the chopsticks to clean up those darn renegade noodles that were not following my plan. Thank you very much. I then stuck the chopsticks directly into the mound and pulled, tugged, wiggled until it was loosened up a bit. And I finished off by using the chopsticks to grab noodles throughout the mound and kind of gently direct them in line with my noodle-twirls. Basically chopsticks allow you more precision without having to get your fingers all messy and/or risk a chubby fingers moment where you knock the whole heap of hot noodles over. Which… happens.
4. Q-Tips
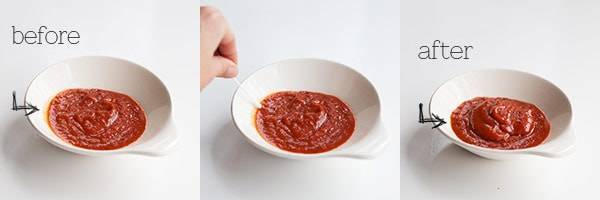
Say hello to these cuties who’ve come to save your soupy, saucy day. I have this thing about soup the sneaks up onto the side of the bowl. My thing is this: it’s gross. Even though it’s not, because it’s actually just the amazing soup itself doing what any liquid in a bowl would do if you were to wiggle it even slightly, which is stick to the side of the bowl. I just, it just, bleh. It bugs me. Especially for pictures.
So Q-Tips are my new go-to for the fix! I just dip the Q-Tip along the edge and it wipes that soup or sauce mark right off the side of the bowl. Bam. One and done.
Although I guess it depends on how much you wiggled the bowl. Maybe more like seven and done.
5. Ice Cream Scoops
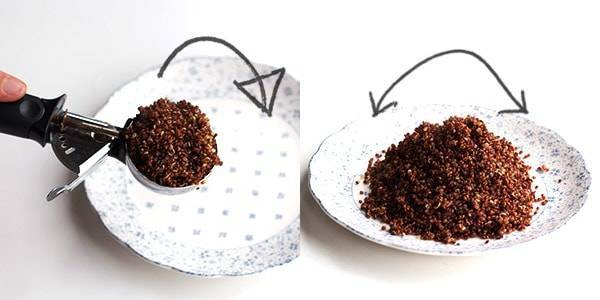
Weeee! I love these little things. I use them for creating perfectly domed muffins and cupcakes by scooping the batter into a nice little mound, like these pumpkin muffins, and I also use them for plating rice or quinoa or anything sticky that looks better in a high pile than flat on a plate. These scoops allow you so much control in your food architecture – you can literally build your food into the perfect shape, like this steaming pile of red quinoa. If I would have tried to create that shape with a wooden spoon, I would still be cleaning up quinoa all over my kitchen.
PS. It doesn’t work quite the same as normal ice cream, because for example, with quinoa on a plate, if you turn the scoop upside down the quinoa will indeed fall all over the place. No good. So just work with it depending on what food you’re styling. If it’s something like, again, quinoa on a plate, turn your scoop gently vs. dumping it over the top, and created a domed shape over the top that way. It’s slick.
6. Tweezers
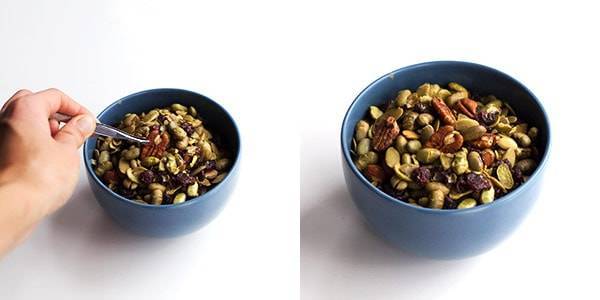
Yet another resource for us chubby fingers peeps to use to get tiny things just where we want them. This is awesome for removing a stray herb that got put where it shouldn’t have, or picking up a sprinkle that you want out of the frosting drip. It’s also great for adding food. For example, with the (repeat) real nice fancy trail mix here, if I wanted to put some pecans throughout the bowl but actually make them look like they’re a part of the mix, I can just grab ’em with the tweezers and kind of nestle them in right where I want them. Do you like when I say nestle in reference to a pecan? I do, too.
7. Small White Plates
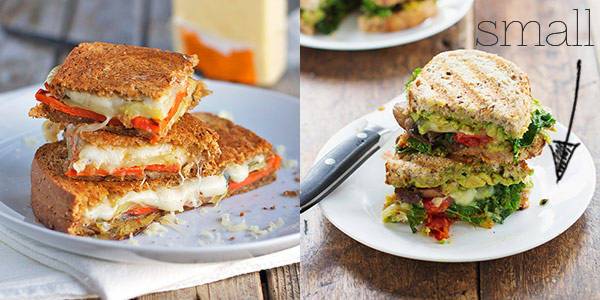
Okay, here’s the thing. I find that in general, my food photographs better on smaller plates. Part of the reason is obvious; there’s less space to fill. If you use a bigger plate, you better have a little side salad or something ready to keep things looking full and interesting because otherwise you have your one or two food items in the center of a big white empty plate universe. But with a small plate, your dish is the star, and suddenly it’s all you can see, all you can think about, maybe overtaking the plate a tiny bit, looking like a nice big serving, and guess what? People are attracted to it because it looks over-the-top yummy and filling. So that’s what I look for when I go propping aka thrifting. Small, white plates, somewhere between a small dinner plate size and a dessert plate size.
8. Eggshells
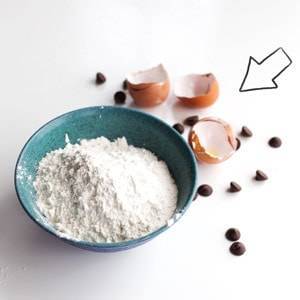
…make an awesome food prop. Especially if they’re brown and especially if they came from your own chickens because you are one of those fun, inspiring people who raises their own chickens. I wanna be you and I might try someday. But anyways.
Eggshells, after they’ve been cracked, have this awesome texture and tell the story of something so charming, like classic farmhouse baking. How cozy. Honestly. I wouldn’t necessarily use eggshells as props for something like, say, lasagna. That might be gross. But muffins, cakes, cookies like I have in the oven right now… fun, fun, and more fun.
By the way, I just keep an egg crate and then put my prettiest cracked shells in there for storing. I literally keep them by my little photography station with all my other props. That way if I happen to be using white eggs instead of the pretty browns *gasp* then I’ll have some on hand for backup.
9. Aluminum Foil
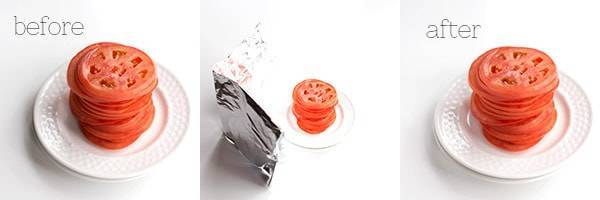
It’s a reflector. That’s really all it is. It folds, it stands, it does whatever you want it to do, plus it’s uber shiny and it bounces light back over your food. So easy, so cheap, so perfectly scrappy.
The best part? IT WORKS REALLY WELL.
10. Chalkboards Or Whiteboards
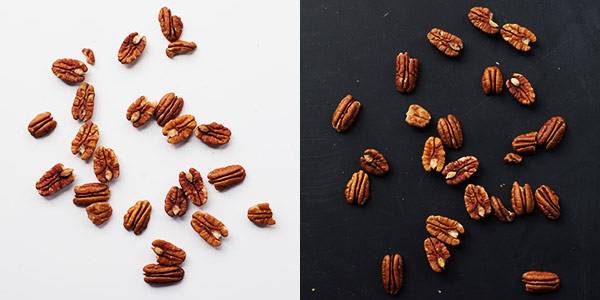
Okay final thought of the day. Two fun background recommendations I have actually happen to be fairly common household items: chalkboard and whiteboard. I will acknowledge that those of us who don’t homeschool may need to make a trip out to Home Depot. But I did just that, got myself a few big sheets of each for, what, like, $20 total? It was really affordable. And now I just layer them on top of my table for alternate backgrounds from time to time.
The bummer about the whiteboard is that it’s shiny and it scratches easily. The blackboard gets grease marks on it and they can be hard to get off. But the same is true for my old wood boards as well, so what the heck? I just swap out the old one for a new one when it has too many scratches. I can get 4 boards out of one sheet if they cut it for me, so I’ve got a whole stash in my garage. Here’s a post for pumpkin pancakes with pictures using blackboard as the background, and here’s a post of a peach green smoothie with pictures using whiteboard.
If you know of any other great replacements for all white or all black surfaces that are less shiny and/or don’t scratch and/or don’t stain, I’d love to hear them!
And if you’re looking for some on the fly, these two might be your ticket.
Tasty Food Photography
Thanks for reading, food blog and pho-tog friends! If you want to learn more about food photography you can check out my eBook, Tasty Food Photography.
Thanks for being here to talk shop with me today! More food on Monday.



Excellent!! Great post!
Thanks for yet another great post! Right now I’m really struggling with backgrounds. I have one set of blue boards I just love, and I always seem to think they’re right for every recipe and tutorial I create, so they all end up looking kind of the same! I’ve just been too busy to do anything about it, but crumpled up paper is such an inexpensive way to change the backdrop. Thanks for the idea. =)
I have a small stash of individual ceramic tiles. The big ones, 18 x 18, from home depot (they’re large enough for overhead and slightly angled shots). You can find some really pretty natural designs and textures. They clean right up and resist stains. They’re a little heavy, though, and a pain to store. I’ve also glued smaller tiles to a board to resemble a countertop.
Great idea! Ironically, I just went out to our storage shed yesterday and grabbed a couple of large tile and granite pieces from our remodel to try out as backgrounds – Thanks for sharing your good experience with tiles!
LOVE these tips. The half an apple trick just blew my mind! haha 😛
Lindsay you are amazing and offer such helpful tips! I LOVE using my folder wrapped in aluminum to reflect light, it really does work like a charm!
What a wonderful post. I love ALL the ideas and will implement them immediately :-).
Thanks for all these great ideas; many I have never thought of. Learning food photography is fun and challenging at the same time. Your photos are an inspiration.
Happy Friday everyone!
Loved the foil tip!!!
These are great tips! I love the idea of the apple, I will have to try that next time! For white and black backgrounds I use thick poster board, works great! and one more thing…I noticed you post on Foodgawker, you have much better luck than I do, every photo I have submitted they have declined when I thought they were great photos! What photo editing do you use? I’ve been using PikMonkey because it’s free.
Marti
Do the amazing and helpful tips never end with you?? Stocking a few of these items immediately – thanks, Lindsay! 🙂
thank you for your photo insights. I love the apple trick, that is so clever and money saving too.
Love it!! I am moving tweezers and q-tips to the kitchen and buying some chopsticks!
Thank you so much for these tips. I cannot believed that these items did not ever crossed my mind even once when I was struggling on making my spaghetti look “mountainous.” And the chalk board was an enlightenment. Thank you so much, Lindsay.
Lastly, thank you for making your readers aware about the typhoon situation and donating for relief in my country, Philippines.
Great tips! I love the half an apple one. I like to use things like white foam boards as reflectors or big sheets of mat boards for backgrounds!
Great tips! My kitchen table is a light brown and has been making an appearance in every one of my photos which can be frusterating. I have a darker board from a discarded shelf we tossed, but it’s very narrow so if I want to use it, I have to take tighter shots so you can’t see the edges or the table underneath. I love the whiteboard and blackboard ideas, so I’ll have to check out the nearby Staples to see what kind of sizes they offer! 🙂
Thanks for the stellar tips Lindsay! You rock my socks 🙂
WOW! Thanks for the very useful post.
Thank you for more great tips! I really need to invest in some more simple, smaller plates. I’m also very interested in textiles and simple props. I purchase them, then I have no idea how to put it all together for a photo! I feel like when I do, my photos look silly and cluttered or that I am just trying to hard.
I wasn’t sure it was possible to be blown away by a half apple in general but I just was. 🙂 So simple yet genius! I am definitely using it. I’ve also used your white rag/napkin tip from previous post and I love how easy it is to set the white balance and if artfully placed it really adds to the image. Thank you for the great info!
I LOVE IT! Where have you been all my life 🙂 I so wish you were my neighbor…but your blog is the next best thing. I”ll be ordering your book soon…. just wish it were in physical form as well as ebook…
That apple thing is brilliant! I don’t take food photos that often, so they’re never very pretty, but this is good to know.
Thanks – these tips are awesome!
Love your apple trick. Thanks for sharing Lindsay!
Great post! I loved all the tips. Can’t wait to try some of them out on my next shoot. Thanks for sharing 🙂
Thank you for such an excellent post! I cannot believe I have never thought of any of these. I cannot wait to try them out, half apple especially seems like it will solve some issues 🙂