


I’ve been preaching natural light since before I knew what “natural light” even meant.
Whether food photography, portrait photography, or whatever in the whole wide world photography, NATURAL LIGHT RULES. In my opinion, there is no comparison to the beauty you get with a good camera, a great photographer, and perfect natural light from the sun.
But let’s get on track with the reason I’m writing this post today.
The reason is that I’m trying to chill out my life a little bit, and part of that means being able to do a shoot at 9pm, after the sun is long gone. Which brings me to the topic of this post: how to make your food photography look great when using indoor, artificial lights.

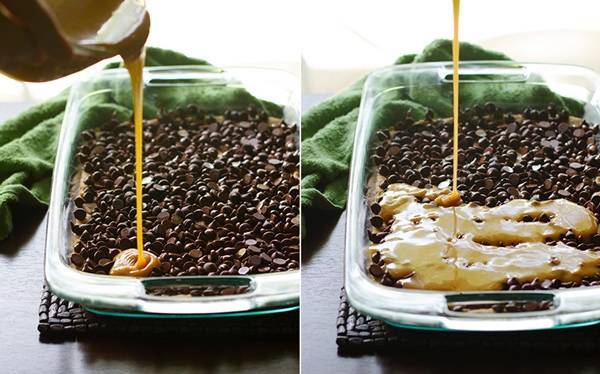
While I’d like to think that I’m really generally zen and stuff, I have been known to be kind of uptight when it comes to lighting. For example, in my previous life (like, last week) I would have been insistent on having my cinnamon rolls and glaze ready to drizzle at exactly 2:47 pm as the perfect ray of sunlight would sneak through my kitchen window. IT’S HERE! Pour, shoot, drizzle, shoot, pour, lick fingers, pour, shoot shoot shoot. Then my stream of light would disappear behind the roof of the neighbor’s house. That was a fun five seconds. But I live in the dark, frozen tundra of Minnesota. Have I mentioned that? In the winter, it starts getting dark about the time I’m ready for lunch. You guys. It just isn’t practical for me to think that I can shoot in natural light for every single recipe. And on my Saturdays, when I would have a few more hours of that nice light to work with, lately I just want to bond with the couch. You know?

Natural light rules, and I will take that to my grave. And while I’ve always recommended it only as a very last resort backup, but do you want to know my guilty secret? About half of the recipes I’ve done in the last month have been shot in artificial light. I’m not even following my own advice here, people. And the photos have turned out… like… kinda great. For example, all the pictures in this post were shot with artificial light.
Yeah, we can work with that. So today I’m getting over my preconceived notions and just sharing some quick and easy tips for making it work when you’re photographing food with indoor lighting and without the ever elusive sun. I hope it helps you relax and find more flexibility in your quest to take mouth-waterliciously yummy food photos.
A non-negotiable for indoor food photography –> a light. A “special” aka.. intensely bright, non-overhead light that is made for a job like this. We have the Neewer Lighting Kit. You could also give this one a try that’s a little more budget-friendly. Take a look.
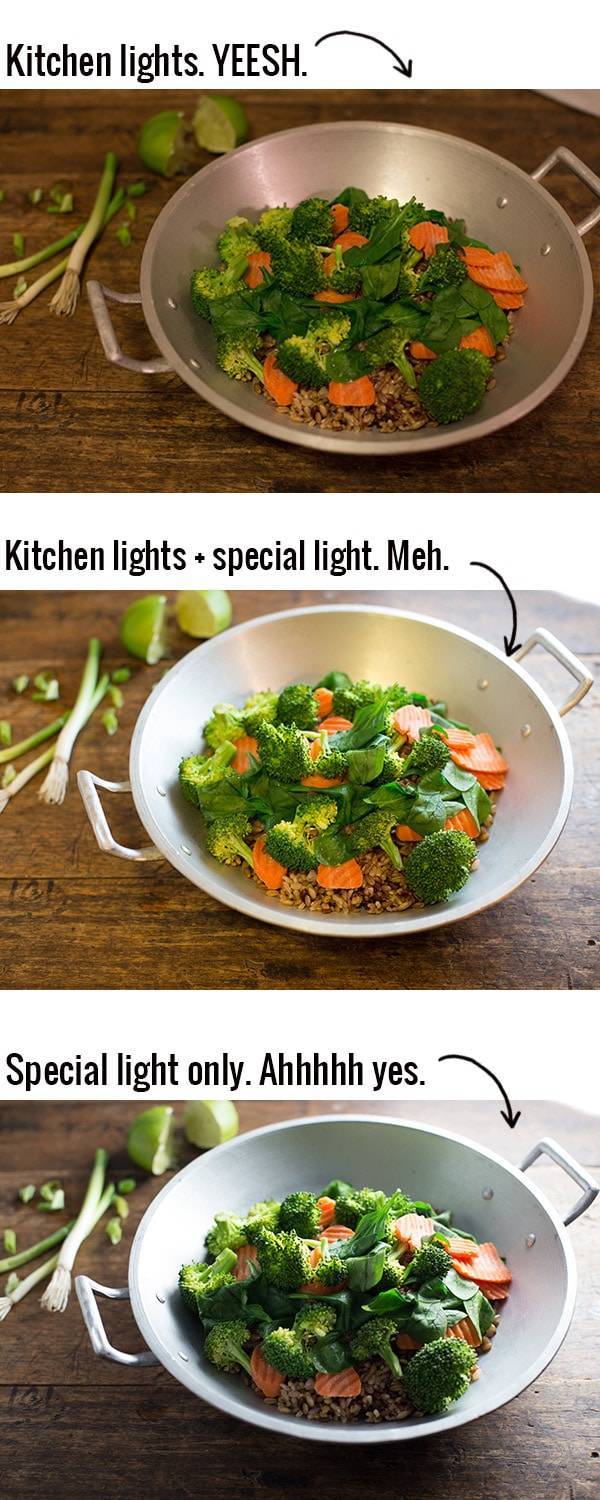
In case you forgot, let the Pinch of Yum photos of days gone by remind you that kitchen lights are horrible for food photos.

Thank you, Self, for those bright orange reminders.
Turn off all your lights to get rid of any weird colors and use ONLY your special light to illuminate the food. If you purchase a light designed to simulate natural light, it will, um, simulate natural light. Amazing, I tell ya. And even if you can just get a bright small tabletop light that you can maneuver in some way (side? back?) to make your food more appealing and to rid yourself of those overhead lights, you are pretty much already winning. You know what about this light? It really is special. The special lights aren’t cheap, but that is $95 well spent, if you ask me. If you’re more of a DIYer and less of a spender, check this little tutorial out.
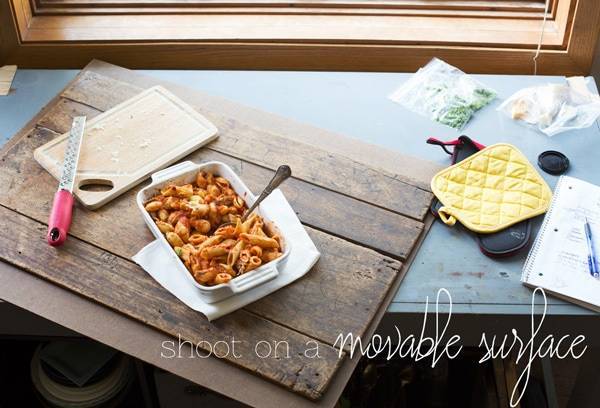
These, on the other hand, are just a few buckeroos. Go buy a couple of little cardboard or foam things like this at Michael’s. That’s what I did. Or if you order a specialized light, it typically comes with a handy dandy white reflector like this.
Be sure to set your reflector up in such a way that it bounces the light back over the food. BOOSH. Gorg.
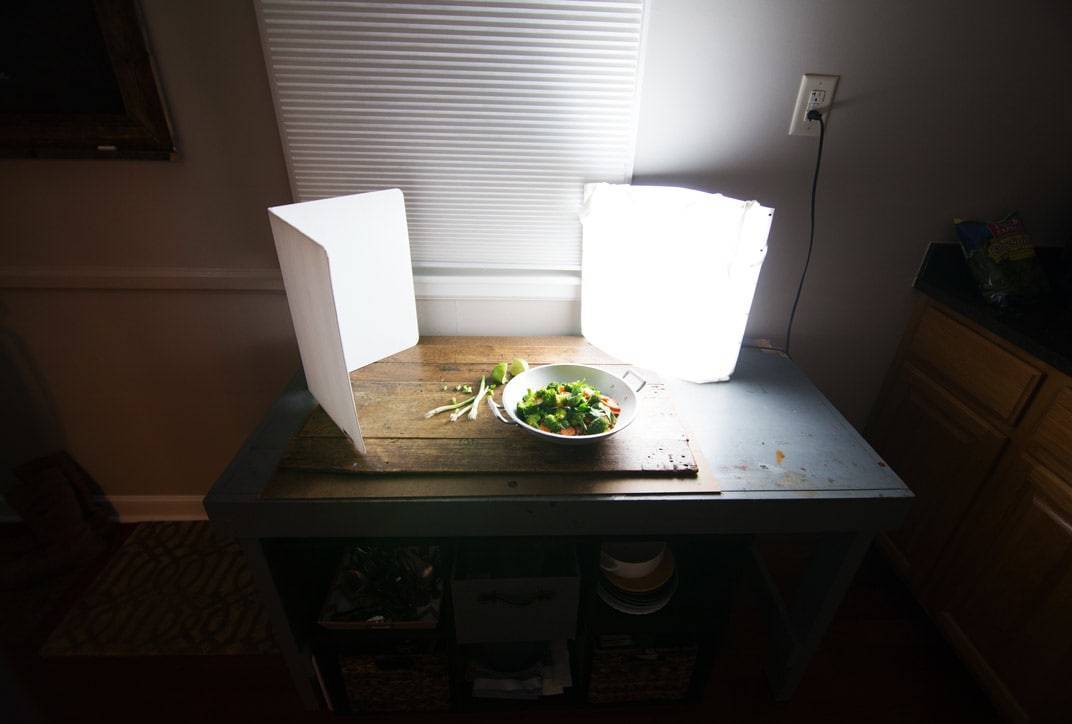
Notice how the kitchen lights are turned off. I really mean it. Every last little one. It’s like a food photography rave.
…Er, is that what a rave is like?
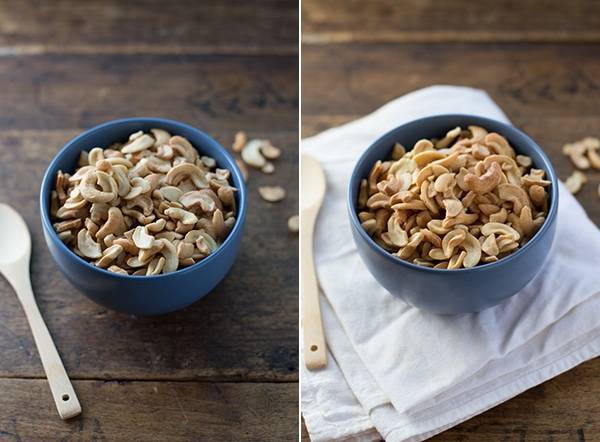
These are the best angles for lighting food photography that I’ve found, whether using natural light or The Special Light. Here’s the side lighting example:

And the backlighting example:
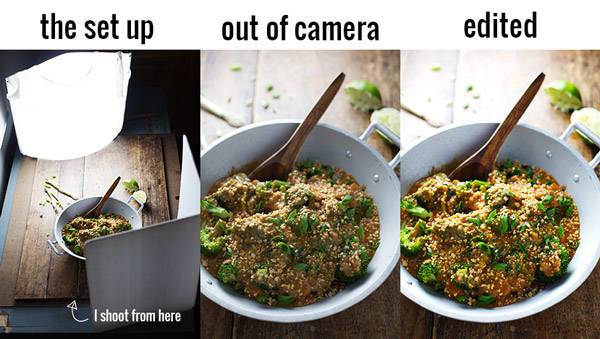
Back lighting is a lot trickier than any other lighting style I’ve tried, but I have a total love affair with it because of the bright, glowy, magazine-like quality it gives your photos. It’s worth a shot, peeps.
These are the settings I typically use when shooting with my special light:
ISO – 400
Shutter Speed – 60
Aperture – 3.2
In general, know and work with your trifecta settings (aperture, shutter speed, and ISO) so you can take full control of how the photos look. And in general, ISO = up. I know that not everyone agrees with this, but my line of thinking is —> who cares about a little bit of barely detectable graininess in the photos when you have excellent light throughout the entire photograph to make up for it? So I say boost your ISO. If you’re like, HALP ME I DON’T KNOW THOSE WORDS, check out my ebook Tasty Food Photography for some practical/picture-heavy/easy reading.
It just helps you have a reference point when you’re adjusting your white balance later on. I find that the white balance is already pretty good – in fact, maybe even easier to control when using artificial light – but still, it’s a good idea to have something in there just so you have that reference point during your editing. (Okay okay I’m a cheater and this photo was taken in natural light. But the principle applies more than ever when using artificial light. Seeeriouslydoit.)
Wow! You made it to the end and you’re still reading. GO YOU!
If you want to know more about using artificial light for food photography, check out our Artificial Lighting for Food Photography post on Food Blogger Pro!

Some other posts you might like are:
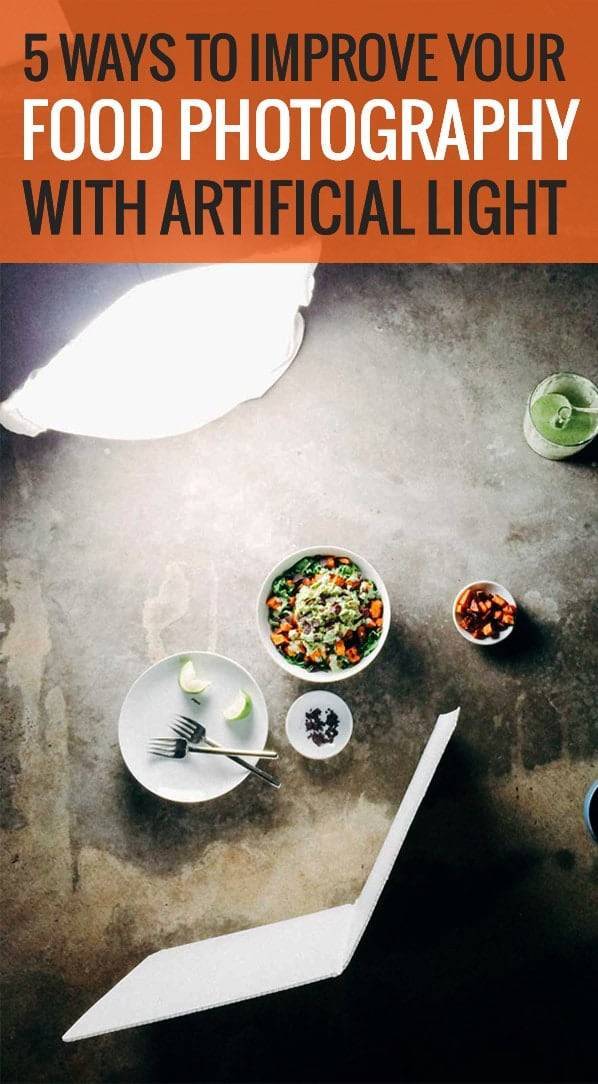
Five Ways to Improve your Food Photography with Artificial Light
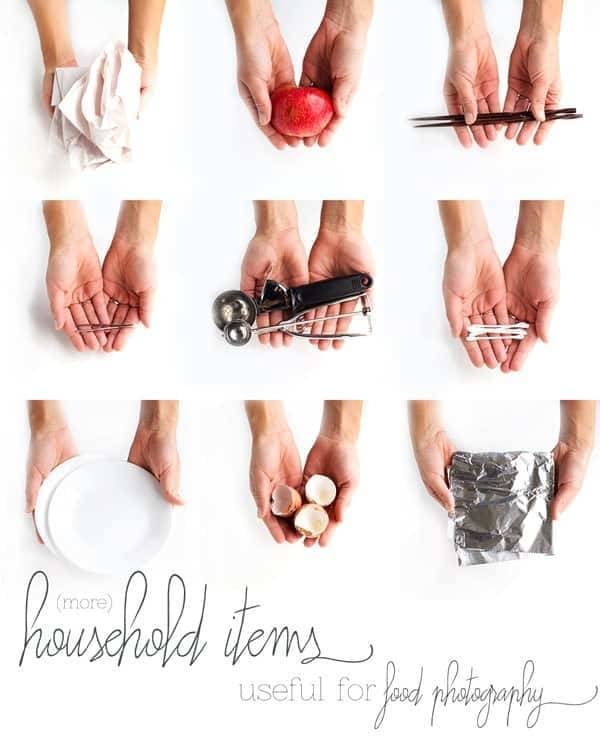
Ten Household Items That Can Improve Your Food Photography

Ten More Household Items That Can Improve Your Food Photography
Time Saving Tips for Food Photography
Lastly, if you want to continue this chat and learn more about food photography in a more comprehensive (but very approachable) way, check out my eBook, Tasty Food Photography! TFP has 60+ pages of easy to read tips and tricks on everything from lighting, to props, to working food photography into your schedule. You’ll also get access to a series of video tutorials on using specific editing tools for food photography in both Lightroom and Photoshop.


Mmk, that’s all for today. Go get a cookie and a glass of milk – you win the dedicated reader award! TGIF, friends.


These are such great tips! I am lucky to live in Florida, where the light is generally cooperative but I can imagine that it gets stressful, and not so fun, when you get good light for about .57 seconds in a day.
I had no idea your past pics were in artificial light girl! Still so gorgeous.
I’m a huge fan of your food photography tips! Nowadays I shoot only in natural light (long gone are the days of the orangish photos with the kitchen lights, lol) but it means I cannot shoot many of the things I cook because some of them never see daylight… And I have been seriously thinking about enrolling a studio photo course in order to improve my shooting skills with artificial light. So, today’s tips are precious!!!! Thank you 🙂
Glad to hear it Ondina! This light has been such a helpful tool for me and enabled me to photograph things that I otherwise wouldn’t have been able to.
You’re amazing. I love when you talk about your photography! I have recently discovered that only one specific set of light parameters work for me, but I know I still need to try new things. I tried back lighting yesterday, and it wasn’t too bad!
Nice Christina! Just out of curiosity, what are your specific lighting parameters? I’d love to hear!
This is so helpful!! Can’t wait to delve into this over the weekend.
Great tips! We live half in the woods, in Michigan, so we get maybe 2 seconds of light a day (your 5 seconds seems so luxurious!) and I also like to spend quality time with my couch 😉
I have a lowel ego and never really found that sweet spot with it. WOW Im going to dust that sucker off and practice and just perch it on my workspace as if it were lovely real backlight! The setup shot you gave, the pic right under And the backlighting example:
that is worth it’s weight in gold! That’s exactly what I do….with natural light.I’m going to plop my lowel up there and see what happens!
And I also shoot manual and see nothing wrong with cranking up to about a 640ISO for blog pics. Who cares. No one is going to really pay that much attn. I can’t shoot at a shutter of 60. I need 80 b/c otherwise I see shake so am even more flexible with going up in ISO and I also cant shoot at a f/3.2 or it’s bokeh city but not in a soft pretty way.
Such a great, helpful post! Thank you & pinned!
Hi Lindsay,
I just wanted to say thank you for this post! I have read your other post/article about this light, but I appreciate the more in-depth detail you provided us here. I am challenged by living in a tiny (550 sq ft….) east cost apartment with a kitchen the size of a small closet. Add to that, I typically work from 7am-530pm, so shooting in natural light isn’t really an option unless on the weekends. But from the looks of your pictures and the light itself, I think that is the perfect size light for my tiny space! With my website just a few weeks away from being finished, I can’t wait to pick up this light and elevate the looks of my photos!
Thank you again!! I really appreciate everything you guys are doing!!
Have a great weekend!
A.J.
Awesome post, Lindsay! I started using artificial lighting once in a while (although more now) last year. It took me a while, and a ton of trial and error to get used to it and to figure out the settings that work best. I will always prefer natural light, but having artificial lighting has reduced my freak outs a lot 🙂
This is awesome! I’m just beginning my journey into food photography, and I knew I needed to get rid of the overhead floodlights on reflective black countertops, I just didn’t know that a special light existed to do that!
I thought I had it bad with the early sunset living in MN, but after two years on the east coast I swear it sets an hour earlier here 🙁 No natural light for me.
Lindsay- your photography tips rule and I just finished reading your photog e-book which I bought on black Friday. Thanks so much for being so open and honest about what you do, you’re the best!
Thanks Lindsay for these amazing tips. I just bought a Folding Island Kitchen Car from qvc.com
https://www.qvc.com/Folding-Island-Kitchen-Cart-w-Decorative-Spindle-Legs.product.K37075.html?upsh=1&sc=K37075-CSWB&TZ=EST
So I can take have more freedom with the light at home.
Thanks again.
Rachida
This is SO helpful. Two kids and another on the way, I neeeeeeed this. Thank you! Pinned.
Light ordered 🙂 It was on my wish list for 2014 anyway, and the company you guys posted charges a lot less for shipping to Canada than Amazon does. Thanks! I love seeing you guys rock it.
Thank you, thank you for sharing your tips and tricks from years of experience. I’m going to buy that light immediately. Already on my to-do list for the weekend!
XOXO,
Lauren H.
http://www.elliehickey.com
Lindsay, this information is invaluable. Thank you so much. Also, would you consider adding an easier way to find your photography tips posts? I have a hard time digging through all of your wonderful food posts to find your hints and helpful tidbits on photography. OR you could create your own photography site. GASP! What a grand idea!
Ohmygosh! Thank you so much for this post! Like you, I work full time and by the time I get home it is dark and photographing is impossible. Which means weekends packed with cooking and photographing. Too stressful! Buying this light now, thank you so much for the recommendation!
Quick question, do you adjust your white balance settings on your camera at all when using this light? To tungsten? Or is it the same as if shooting in natural light?
You are the best! Thanks for always sharing what you’re learning and inspiring to continue improving on my photography skills Lindsay!
I neeeded this!! I live in Wisconsin and was all ready to shoot a recipe when all of a sudden, the sun was GONE. It was just there, ugh. Thank you times a million, you are awesome!
Ugh, the worst. I totally know. Glad this was helpful!
this came at such a great time for me Lindsay. Thank you so much. I have been trying to shoot pictures for my book but its been really difficult. I will have to look into those things.
More brilliant tips! I’m definitely in the ‘omg it’s 2pm, all photography must STOP’ stage, but I think I might just buy one of those lights – it would definitely be easier if I was able to cook my dinner AT DINNER TIME rather than 8 hours early haha
This post came at just the right time for me, Lindsay! I have been struggling with the elusive Minnesota sun for weeks!! I much prefer taking my photos in the late afternoon or evening, which works great in the summer, but in winter, not so much. I’ve got to get one of these lights ASAP, I can’t wait to try it out and use your tips. Thank you!!
Like a few others here I am also battling the short time on daylight in the north (Michigan) and have read a few tips on how to create light. Thank you for sharing your tips. You make it look so easy!
Do you know if you can by one of the handy dandy type reflectors from amazon? I’m in Ireland btw!I have big daylight lamps but need a reflector ASAP!
Hi Shel,
The two white boards that Lindsay showed can be easily made with two sheets of white foam core board, taped together at the seam on the back side. You can find foam core at stores like Walmart or Target, dollar stores or art supply stores. It should be in the same area as poster board, tri-fold presentation boards (which are also great for photo backdrops, since they are up to 4 feet tall and fold flat–I have white and black ones) and office supplies.
Lisa 🙂
I would just make one! You can also use tinfoil or white posterboard to reflect light back in the photograph.
These are some amazing tips! I’ve been wanting to improve my photography and this definitely helped. Great post, bookmarking for future reference. Be sure to stop by my link party today, #OmNomNomFriday, and share your fantastic creations 🙂
Happy Blogging!
This is why I love this blog — thank you for sharing your wealth of knowledge with the rest of us! I live in a dark apartment that gets natural sunlight for approximately 18 minutes per day, so it’s good to see how you’re doing this without the help of the sun!
These are great! I live in a basement apartment, so I don’t get any natural light … ever. I have a homemade light box, but this seems like another great option.