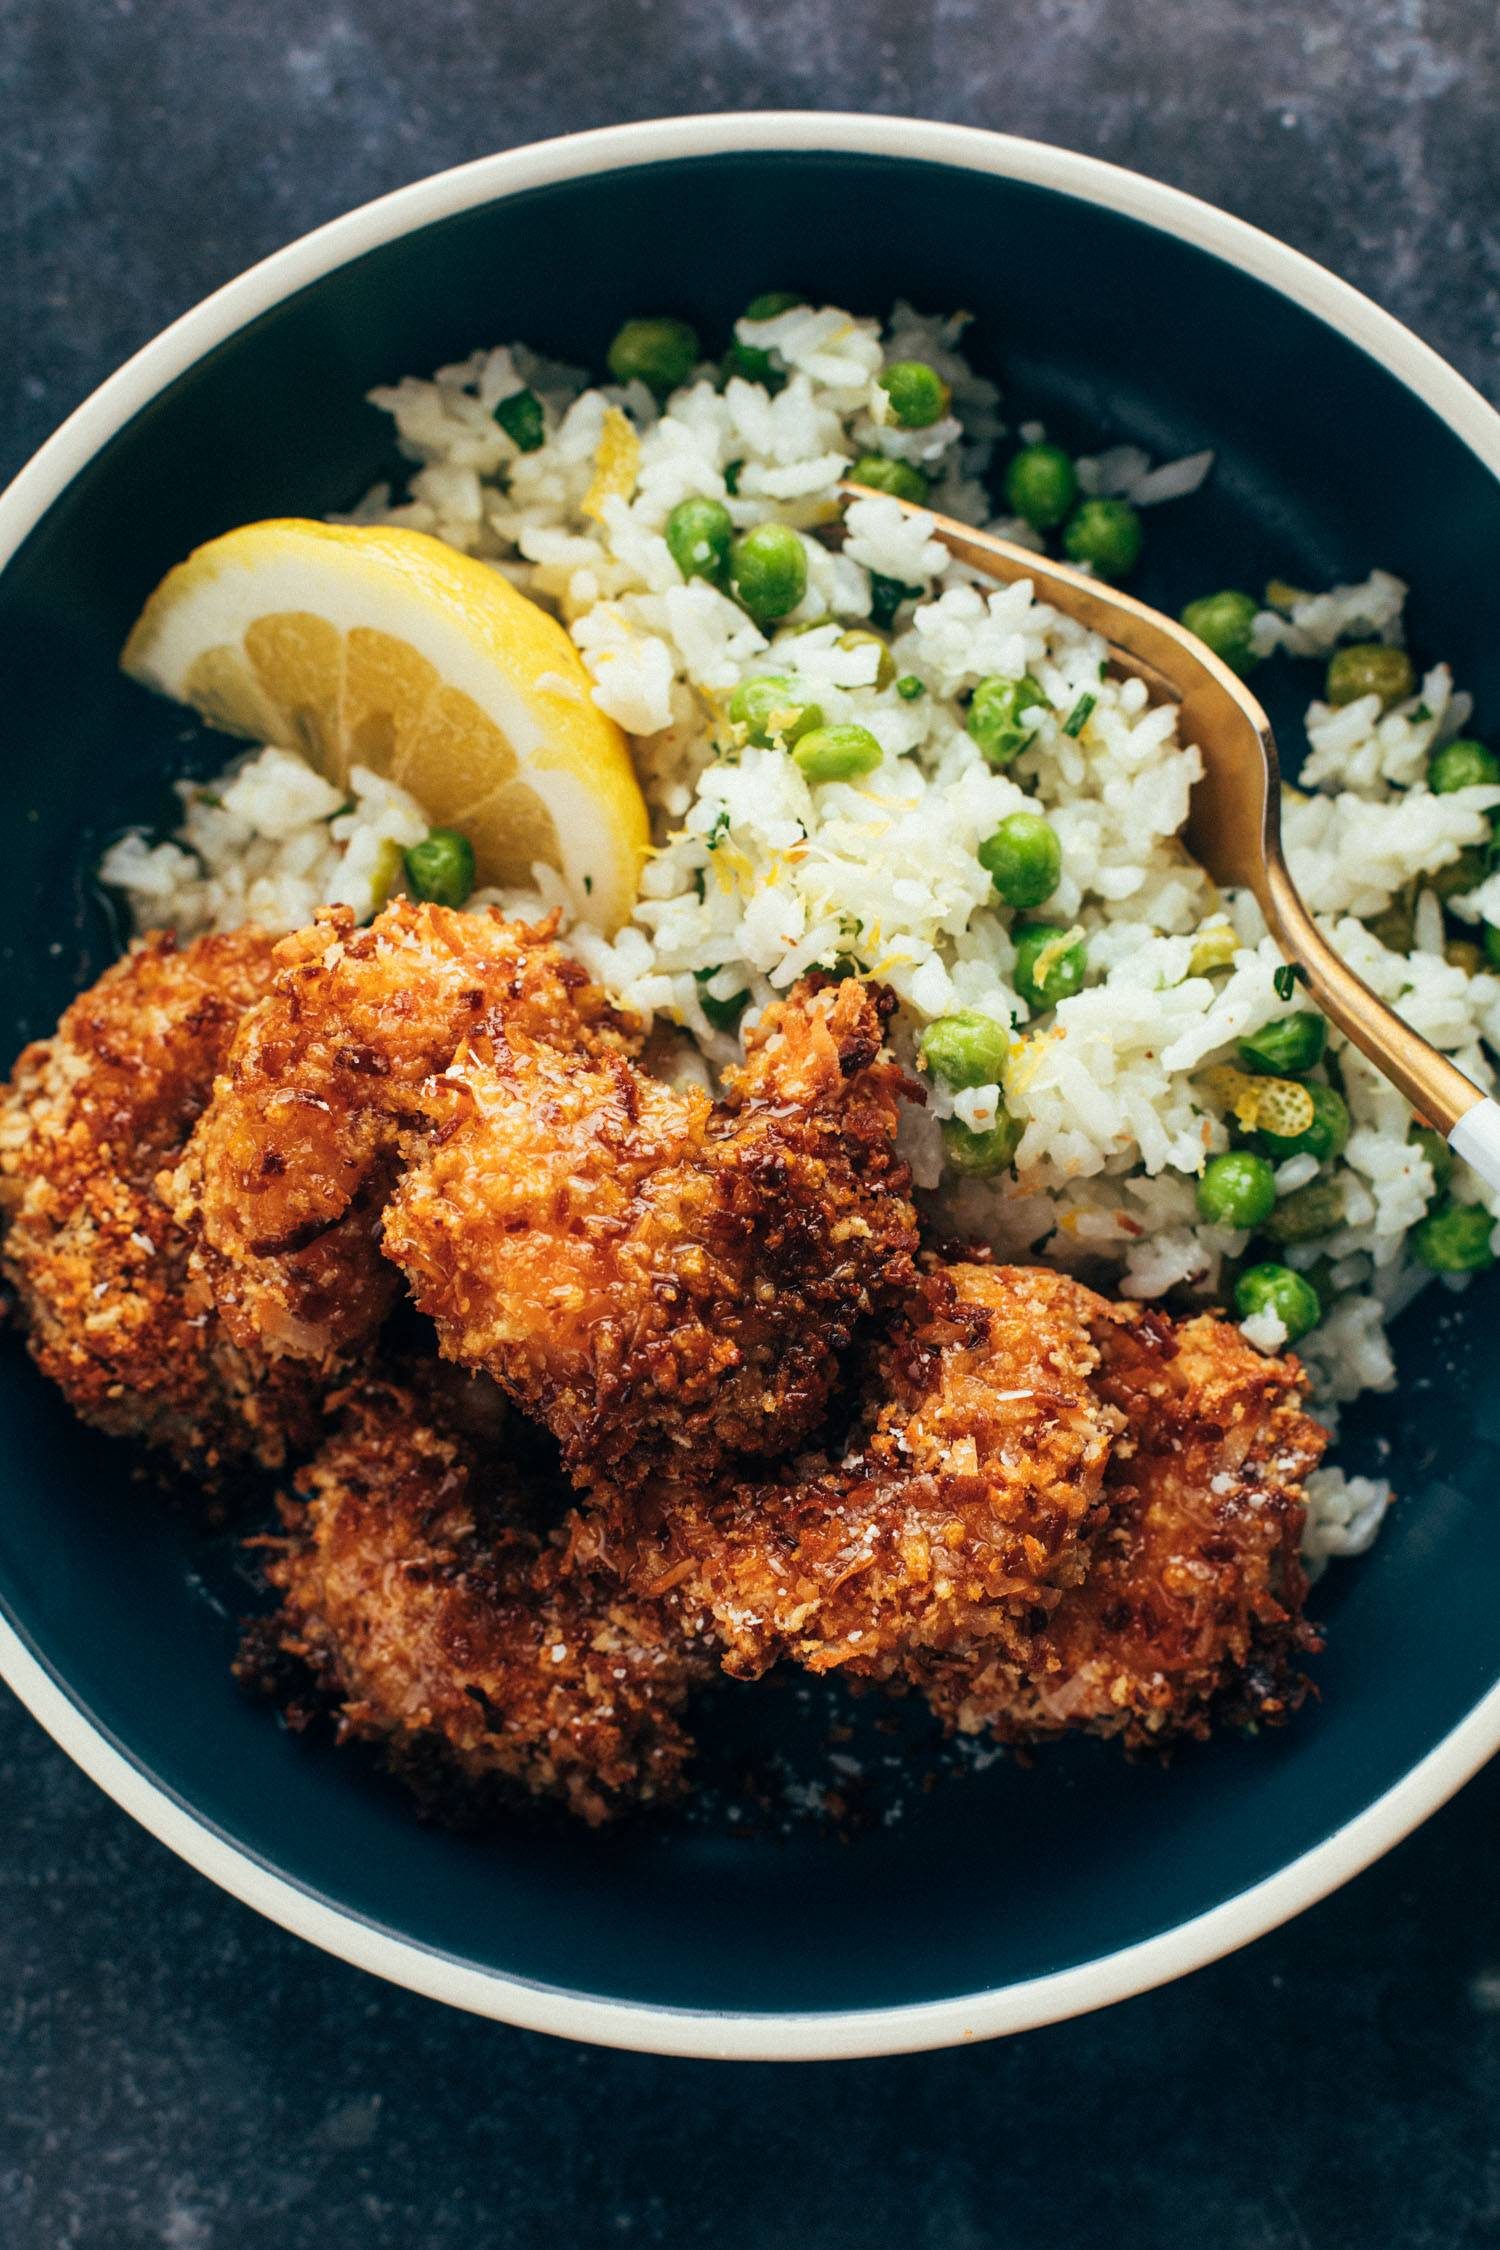
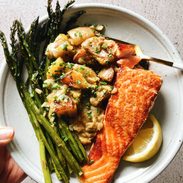
Perfectly springy baked coconut shrimp piled high on a mountain of steamy pea-speckled and lemony rice and drizzles upon drizzles of a beautiful honey butter sauce. This is exactly the spring vacay you need!
Baked Coconut Shrimp with Springy Rice and Honey Butter Sauce

Featured comment
This was SO good! Could not get over how crispy the shrimp came out. The sweetened coconut flakes are definitely the way to go. For the rice I used about a tablespoon of chopped parsley for the herbs and half of a lemon’s zest and juice. Can’t wait to make again!
![]() Julia
Julia
This post is sponsored by ALDI
This beautiful and perfectly springy shrimp and rice combo has us feeling that sunshine on our faces. The slightly sweet crunch of the coconut shrimp (with a nice & simple bake method, so a lot of the crisp with none of the fry-smells), the bright, sweet, green peas popping up here there and everywhere in the light, lemony, herby rice. And then there’s the honey butter sauce for sweet dips and drizzles that taste like vacation (inspired by this springy quinoa salad from long ago!).
For those of you who also experience a change of seasons, maybe you are also so ready for spring that you get all teary-eyed just thinking about it. Here in Minnesota, we’re in infamous “fake spring” where the weather is like, “Oh man, would you like a 50 degree day today? Okay, here you go. You deserve it!” And then turns right around and is like, “LOL, JUST KIDDING GET READY FOR SUBZERO TEMPS AND A SNOW EMERGENCY TOMORROW.” Right to our faces, like we’re not even friends.
Our hearts collectively break and we ache for the warm and the bright and the green.
And this springy coconut shrimp piled high on a mountain of steamy pea-speckled, lemony rice with drizzles on drizzles of honey butter sauce? Yeah, that’s what we’re here for and it won’t turn on us. It keeps being A+ over and over again.

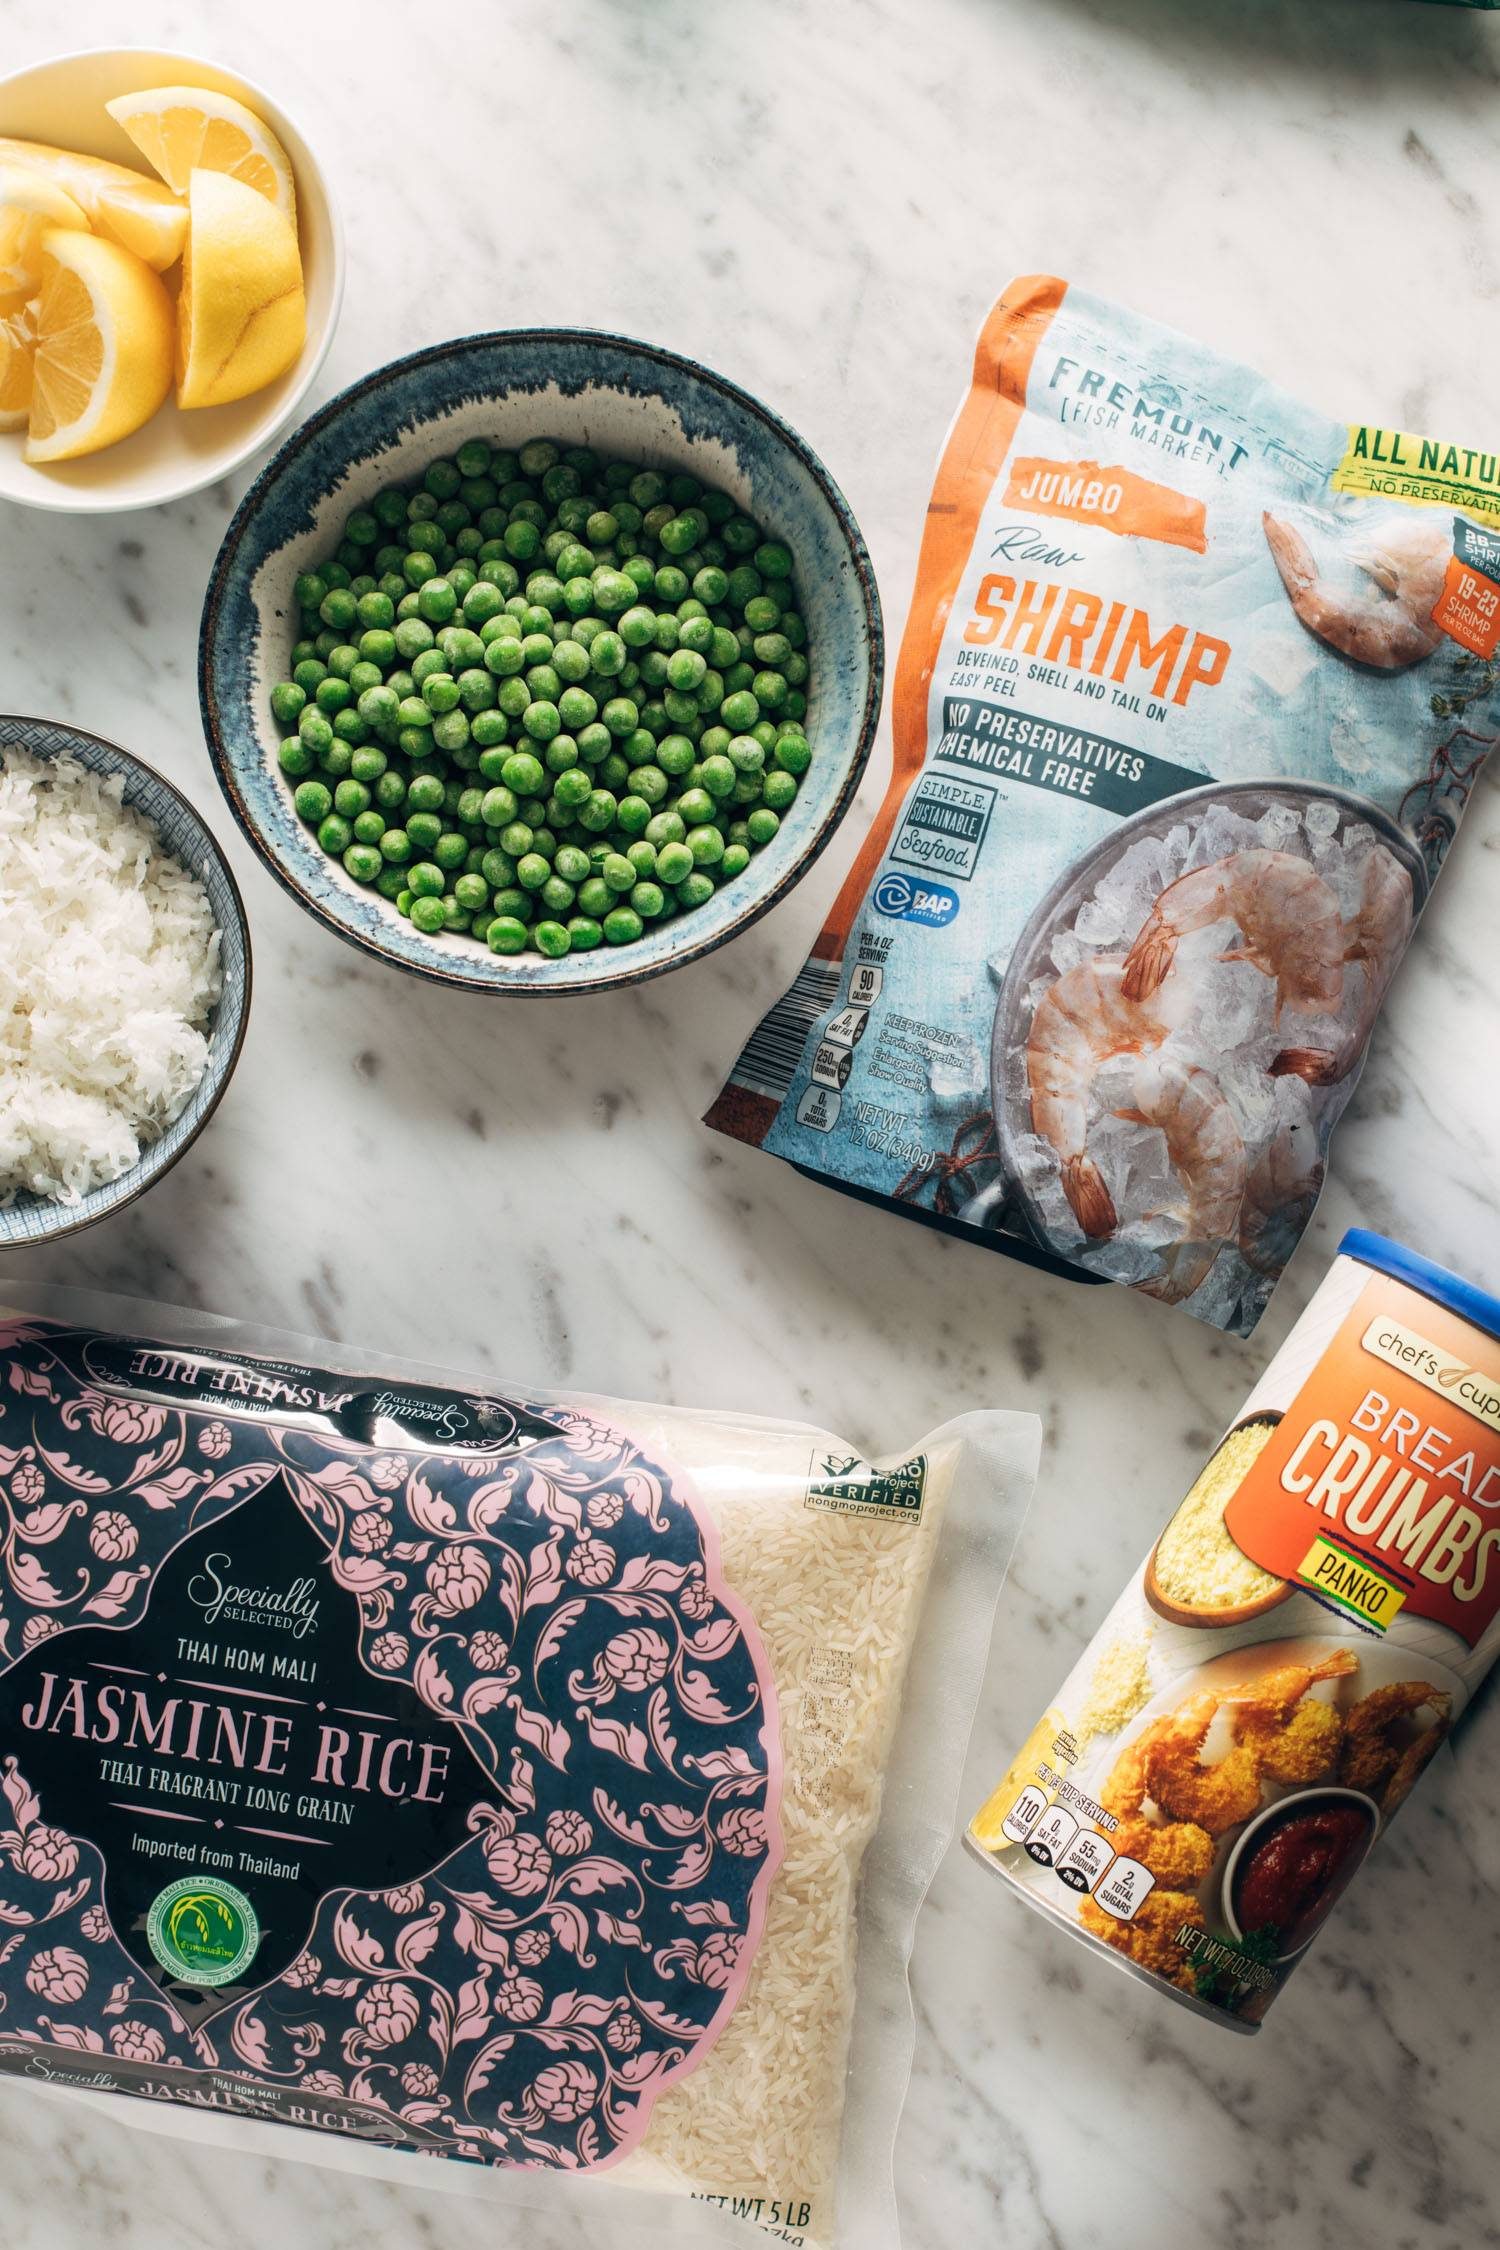
Ingredients For This Delicious Springy Coconut Shrimp
When we want a little spring in our step and also in our grocery bags, we always round up our favorites from our favorite, ALDI! A definite go-to for affordable and high quality seafood options (the Fremont Fish Market Jumbo EZ Peel Raw Shrimp is a top-notch choice for this), beautiful fresh and frozen veggies, and lots of other seasonal delights. But we also – like always – are hitting up the pantry items too, like the panko, coconut flakes, and rice. ALDI always has so many options to brighten up our days.
Here are the major hitters that you’ll need for this spring fling:
For the golden crunchy shrimp:
- Fremont Fish Market Jumbo EZ Peel Raw Shrimp
- Chef’s Cupboard Panko Breadcrumbs
- Baker’s Corner Coconut Flakes (sweetened or unsweetened, but sweetened sure ups the yum factor! )
For the springy rice:
- Specially Selected Jasmine Rice
- peas (we used frozen Simply Nature Organic Sweet Peas, but you could use fresh or any other green veg favorite)
- lemon juice and zest
- herbs or greens
- garlic
For the delicious honey butter drizzles and dips:
- butter
- honey
- Dijon mustard
How To Make Baked Coconut Shrimp
In addition to the fresh and ready ingredients comin’ atcha ALDI-style, it’s also relatively simple to bring it all together. Like we said, we love this baking method for the shrimp in order to minimize clean up but maximize perfect shrimp cooks and crunch factors.
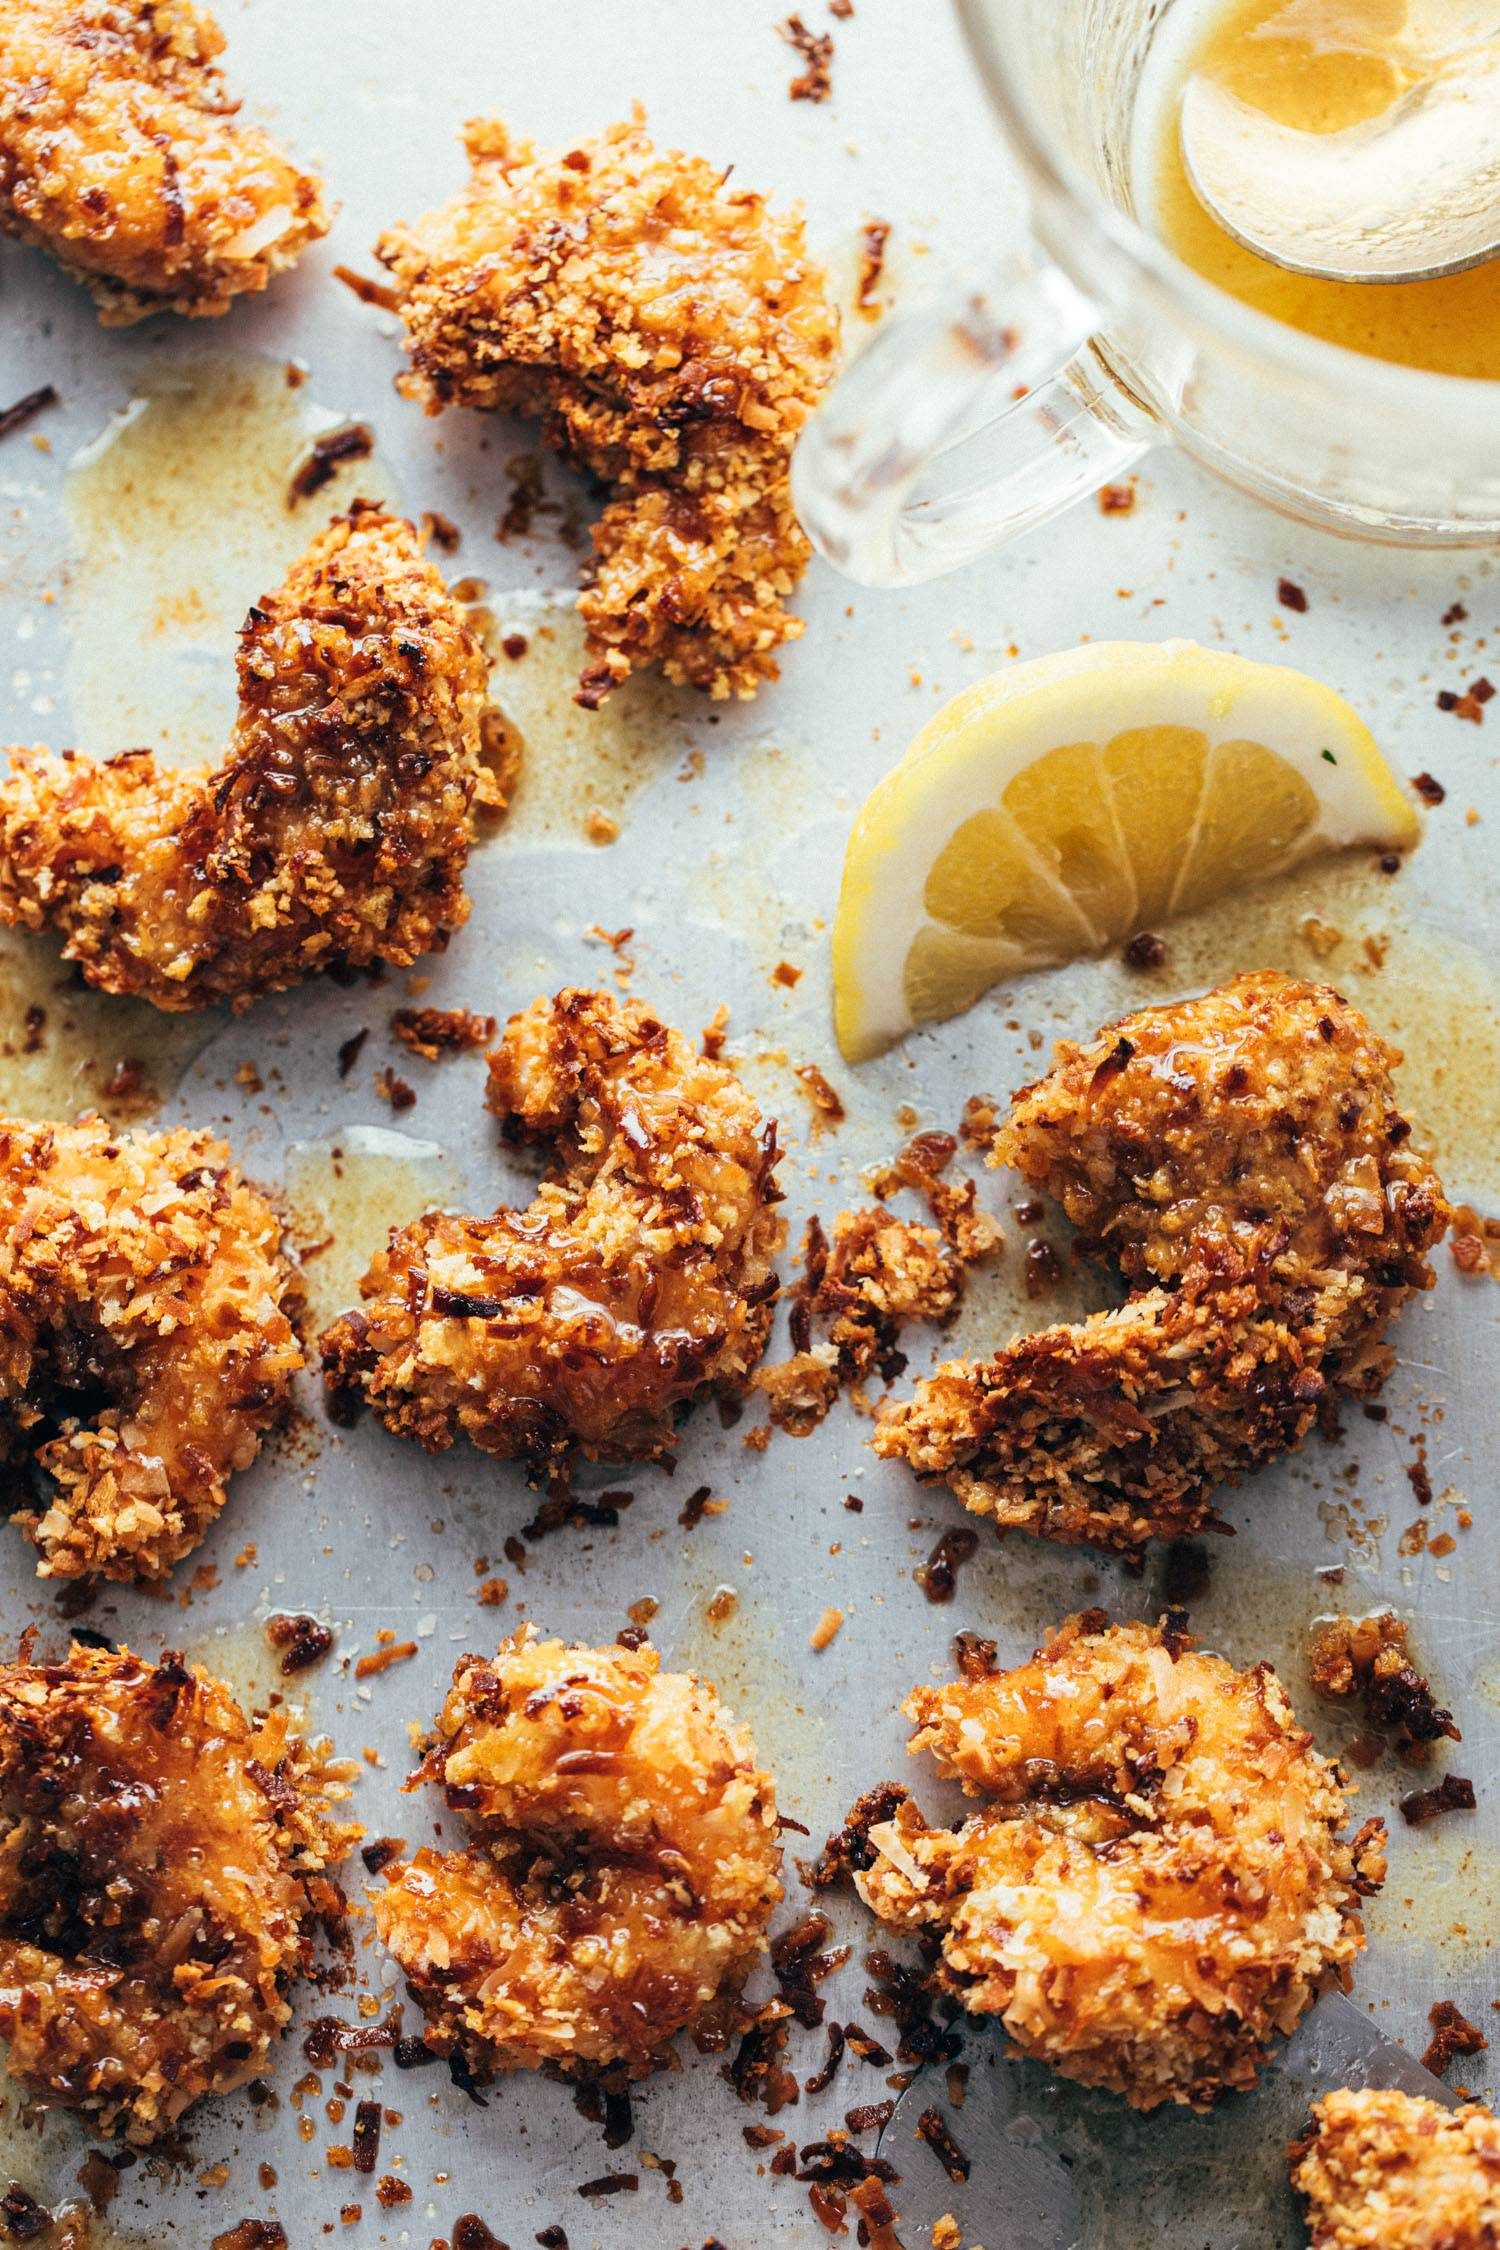
- Panko & Coconut. You’ll give the panko & coconut flakes a little pre-toast in the oven first to guarantee that golden brown goodness. Yum!
- Shrimp. Coat the shrimp in flour, then egg, then panko/coconut mixture and spread out on pan. Give them a little drizzle of oil before heading into the oven to bake.
- Rice. Whatever rice cook method you prefer (we used our pressure cooker!) and then toss in the butter, lemon zest and juice, and stir in the frozen peas.
- Sauce. Whisk all your sauce ingredients together and try not to drink it right then and there.
Serve those crisp beachy shrimp on a pile of bright sunny rice, drizzled with that sweet, zippy honey butter sauce and, yep yep yep, it already feels warmer here.
Our Love Keeps Going and Going and Going For This One
The tender juiciness of the shrimp under the solid crunch of the coconut coating, plus a pile of steamy green-flecked garlicky lemon rice and a drizzle of honey butter sauce… all of it is just freshness and brightness and color hard at work. It’s one of those meals you can look forward to all day. And again the next day. And maybe we’ll just make it every night this week.
So, basically, we’ve laid out a big ol’ welcome mat for spring in the form of this coconut shrimp and rice and we really, really, really hope it pays us a visit ASAP.
Baked Coconut Shrimp: Frequently Asked Questions
Does coconut shrimp taste like coconut?
Sure does! The beautiful sweet and nutty coconut flakes shine through on the shrimp and leave you with a slightly sweet tropical flavor.
Should I make the shrimp with the tails on or off?
For this recipe, we typically remove the tails; however, you could keep the shrimp tails on if you want them to be more of a finger snack. We like to eat them on the plate with a fork, which is why we pulled the tails off.
Can I fry the shrimp instead of baking them?
You can! Add oil to a medium skillet and fry a few shrimp at a time over medium-high heat. Be sure not to overcrowd your pan. Cook the shrimp for about 2 minutes per side until they come out a beautiful golden brown color.
Baked Coconut Shrimp with Springy Rice and Honey Butter Sauce
- Total Time: 45 minutes
- Yield: 3–4 servings 1x
Description
Perfectly springy baked coconut shrimp piled high on a mountain of steamy pea-speckled and lemony rice and drizzles upon drizzles of a beautiful honey butter sauce. This is exactly the spring vacay you need!
Ingredients
Units
Scale
Coconut Shrimp
- 3/4 cup Chef’s Cupboard Panko Breadcrumbs
- 3/4 cup Baker’s Corner Coconut Flakes (sweetened or unsweetened, but I prefer sweetened)
- 2 eggs, beaten
- 1/2 cup flour
- 1/2 teaspoon paprika
- 1/2 teaspoon salt
- 1 pound Fremont Fish Market Jumbo EZ Peel Raw Shrimp, thawed, tails removed (see notes)
Springy Rice
- 1 cup Specially Selected Jasmine Rice, uncooked
- 10-ounce bag of Simply Nature Sweet Peas
- lemon juice and zest
- herbs or greens
- 1 clove grated garlic
- 2 tablespoons butter
Honey Butter Sauce
- 4 tablespoons melted butter
- 2–3 tablespoons honey
- 1–2 teaspoons Dijon mustard
Instructions
- Prep: Cook the rice according to package directions. (I do this in a pressure cooker)
- Toast the Coconut: Preheat the oven to 325 degrees. Place panko and coconut on a baking sheet; toast for 10-15 minutes, stirring occasionally, until nice and golden brown. After your panko and coconut are toasted and out of the oven, bump up the oven temperature to 425 degrees.
- Coat the Coconut Shrimp: Make three bowls: one for the flour, paprika, and salt; one for the egg, and one for the toasted coconut. Coat individual shrimp in flour / spice mix, then egg, then press into the panko until the mixture sticks to the shrimp. (I usually do all the shrimp in the flour / spice mix first, and then do the egg / panko dip so it’s a bit cleaner). Place coated shrimp back on the baking sheet. Spritz or drizzle with oil.
- Bake the Coconut Shrimp: Bake shrimp at 425 for 10 minutes.
- Finish the Rice: Add peas, lemon juice and zest, herbs, garlic, and butter into the hot rice and gently fluff with a fork to combine. The peas just need to get heated through.
- Make the Sauce: Whisk the melted butter with the honey and Dijon mustard. (And add whatever else you like – red pepper flakes, chili paste, lemon, etc.)
- Serve: Serve shrimp with a pile of rice and generously drizzle with the sauce. HELLO! So yummy.
Notes
I prefer to make these with the tails removed because I like to pile them on a plate and eat them with the rice, and honestly, pulling the tails off with every bite is kind of annoying. But if you want it to look a little fancier or if you want this to be more of a finger-food situation, then you can also leave the tails on.
This amount as written feeds my family of 4 (mom, dad, toddler, baby) perfectly, with little to no leftovers. If you are serving a larger group, or people with bigger appetites than little kiddos, I would double the amounts!
- Prep Time: 25 minutes
- Cook Time: 20 minutes
- Category: Dinner
- Method: Bake
- Cuisine: American
Keywords: coconut shrimp, baked shrimp, spring shrimp
Thank you to ALDI for sponsoring this recipe!
More Springy Shrimp Favorites
- Sheet Pan Shrimp and Cauli Rice (an incredibly easy sheet pan dinner)
- Chipotle Orange Shrimp with Cilantro Rice (with a sweet-meets-smoky cream sauce)
- Spicy Shrimp Tacos with Garlic Cilantro Lime Slaw (these are our FAVORITE shrimp tacos!)
One More Thing!
This recipe is part of our collection of sweet honey recipes. Check it out!
April 4, 2022

Nice to meet you!
I’m Lindsay and I ♡ FOOD. I used to be a teacher, and now making food and writing about it online is my full-time job. I love talking with people about food, and I'm so glad you're here.
Did you make a recipe? Tag @pinchofyum on Instagram so we can find you!


DELICIOUSSS
Would it be O.K. to cook the shrimp in an air fryer? If so, at what temperature & for how long? Thanks for any info Lindsay!
Hi Molly! We haven’t tested the shrimp in the air fryer, but it should work out just fine! I’d maybe start with 8-ish minutes at 370 degrees.
I made mine in the air fryer at this temp and were cooked thru closer to 6 min.
Thanks for the tip, Jessica!
Says herbs for the rice? What kind of herbs work best?
Parsley, thyme, or even cilantro would be great!
This looks great and I’d like to serve this for a dinner party. Could I prep the shrimp through the coating step, store it in the fridge, then bake when needed?
Hi Jen! That should work as long as you’re going to bake the same day. I’m thinking the coating might get a teeny bit soggy if it’s stored for a really long time.
Hi there! Can’t wait to make this. Looks so delicious. I’m a little confused on the shrimp part. Do you combine the flour with the salt and paprika? And then the breadcrumbs with the coconut?
Thanks!
Correct, Emily! Thanks for pointing this out. We will update the recipe.
I am going to make these tonight with the unsweetened version of coconut! Excited to see how it turns out. Thank you for the inspiration!
I made this for supper tonight – it was a hit! I didn’t have any shrimp in my freezer, so I used what I had on hand – flounder & baked for 12-15 mins. It turned out great! Thanks for an easy week-night meal!
Awesome, Christina! So glad it worked out with the flounder!
Hi! I’m allergic to shellfish. Do you have any substitution recommendations?
Same question. Shellfish is no longer an option. Would chicken pieces or something else work? Change to cook time?
You could try chicken tenders, but keep in mind the bake time will be longer!
What herbs did you use in the rice?
I love a good Aldi post and I love coconut shrimp but have never tried making it at home! Now I know what I’ll be buying at Aldi for dinner next week 🙂
Enjoy, Lexy!
We loved the shrimp, I loved the rice/peas—husband not so much. Just a couple recipe remarks—if I had toasted the coconut/panko mixture for “10 to 15 minutes” in a 425 degree oven I would have had to call the fire department!!😳😳 Five minutes was plenty at that temp! The recipe fails to tell us what to do with the paprika and salt—I added it to the flour. How much zest and lemon juice? And lastly, dumping 10oz of frozen peas into my rice chilled the rice so much that I had to re-warm it.
Hi Janna! Thanks so much for the feedback! Super helpful! We’ve updated the recipe with instructions to add the paprika and salt in with the flour. For the lemon juice and zest, we’d recommend starting with a couple squeezes of lemon juice and 1/2 teaspoon or so of zest, and adding more if needed!
I had the same problem with toasting the panko/coconut mix. Burned my first batch because it didn’t take nearly the 10-15 minutes the recipe stated.
Thanks for the feedback, Brenda!
Same! About 3 mins was all I needed to get the coconut/Panko toasty. Other than that, this was a hit! So delicious! We subbed raw thinly sliced sugar snap peas for regular peas and it was great!
Thanks for the feedback, Amy!
Recipe says to do panko and coconut at 325º, and then increase oven temp to 425º. That is why many people had problems.
Coconut shrimp! My fave! Thanks for another amazing recipe Lindsay!
Absolutely! We hope your love it, Joanna!
Made the baked coconut shrimp tonight and it was FABULOUS. Brilliant to toast the panko and coconut before; just that much more crunchy when it bakes with the shrimp. The rice with peas was tasty and of course, the sauce; so simple butter, dijon and honey. YUM for sure!! Thanks.
So glad you enjoyed it, Natalie!
Hey Pov, I just wanted to make you aware that another blogger copied one of your recipes without any acknowledgement of your work, right down to the pear in the sauce. When she was called out, she deleted the comments.
I just wanted to make you aware because she apparently recently copied a carrot cake recipe and when the blogger called her out, she deleted the entire recipe. Unfortunately she doesn’t seem to understand giving the “inspired by” disclaimer at the bottom of her recipes.
https://www.halfbakedharvest.com/korean-inspired-tacos/
I have frozen cooked prawns; I’m wondering whether I can use them in this recipe still frozen then put them in the oven for 10 mins or is it better to defrost them and bake them for less time?
Hi Patricia! It’s hard to say if frozen shrimp would work in this recipe since we haven’t tested it. I’d probably defrost the shrimp, pat them dry, coat them in the breading, and bake for less time. The shrimp may be a bit overcooked though.
Curious if you tried with frozen cooked shrimp?
Hi Courtney! We we haven’t tested this recipe with frozen cooked shrimp. I’d probably defrost the shrimp, pat them dry, coat them in the breading, and bake for less time. The shrimp may be a bit overcooked though.
This is a really good meal. I couldn’t find gluten free panko so just used GF breadcrumbs. I used plum sauce for dipping. I really wished I’d left the tails on the shrimp though. Would have made them so much easier to dip and eat!
Great tip, Margot! Thanks for the comment!
I made this last night and loved it! My husband can’t eat shrimp – what would you recommend I sub for him? Would loved to make for me and pre-schooler and give him something else with the coconut breading. Chicken tenders or fish? Thanks!
Chicken or fish would be great options!
What do I do with the paprika and salt with the shrimp?
Hi David! Mix it in with the flour!
This was DELISH. I toasted the coconut and panko for about five minutes and it was the perfect amount of time. My husband and I both agree that we’ll be adding this into our regular meal rotation—even our toddler loves it!! POY does it again!
So glad it was a hit, Maggie! Thanks for the review!
This was SO good! Could not get over how crispy the shrimp came out. The sweetened coconut flakes are definitely the way to go. For the rice I used about a tablespoon of chopped parsley for the herbs and half of a lemon’s zest and juice. Can’t wait to make again!
Glad to hear it, Julia!
Hi there – very excited to try this but I found this step a little confusing and wanted to clarify: “Make three bowls: one for the flour, paprika, and salt; one for the egg, and one for the toasted coconut. Coat individual shrimp in flour / spice mix, then egg, then press into the panko until the mixture sticks to the shrimp.” Is the last bowl just coconut? Just panko? Both mixed together? Thank you!
Hi Taylor! The 3rd bowl is for the coconut and panko. Thanks for the question! Enjoy!
I made this for dinner last night. The only difference is that I air fried the shrimp for 10 minutes at 360. It was fabulous! My husband proclaimed this recipe a keeper after two bites. We will be making this again and again. Thank you for another great recipe.
So glad it was a hit!
This was absolutely amazing! My family of three just ate the entire batch, and if there was more, we’d keep going! This will definitely be made again!
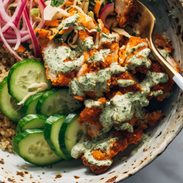
This was delicious! We served this as a “bowl” meal and added fresh mango, cilantro, and black beans to the mix. SO good – it reminded us of meals from our Costa Rica trip!
Great idea to make this recipe into a bowl!
Should have read the reviews. 425 for 15?! This must be a typo. Whole house is filled with smoke. Have to start over. Please rewrite.
So sorry about that, Meredith! We will take another look at these instructions and adjust. Thanks for the feedback!
I made this for dinner last night and it was delicious!! Toasting the panko and the coconut before was key. The sauce was great too and could be changed up easily for different flavors. I will make this again for sure. I will also try it with chicken tenders. Thanks POY.
Glad you enjoyed it, Kristen!
This was so delicious! I didn’t follow it exactly when it came to browning the coconut/panko so didn’t experience the same issues the other comment seemed to have. The sauce I agree is deadly.
So glad you enjoyed the recipe, Bea!